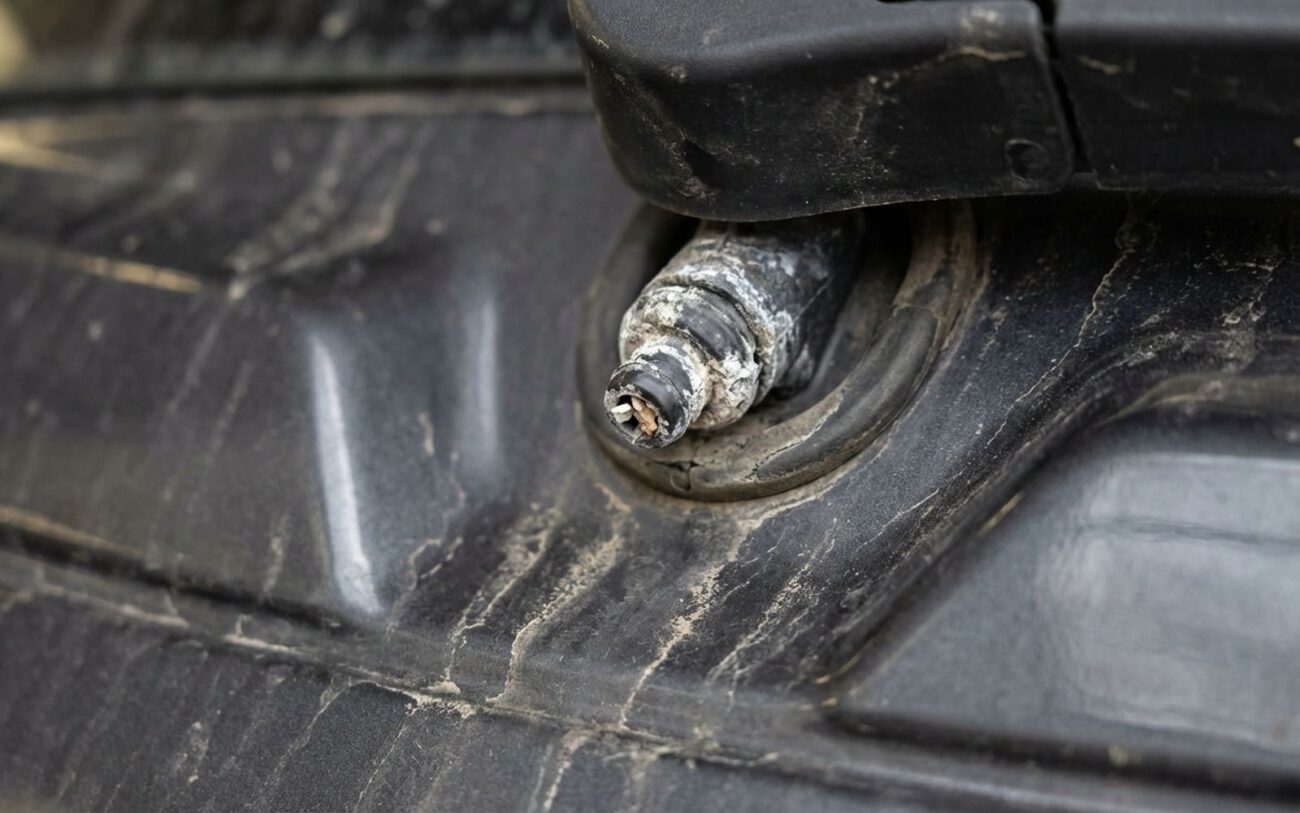
Rear washer not spraying? You’re not alone. I’ve worked on everything from beat-up Corollas to high-end BMW wagons, and this is one of the most common issues I see—especially on SUVs and hatchbacks. The pump runs, you hear the whine up front, but the back window stays dry. Nine times out of ten, it’s the nozzle. But before you yank parts off, let me walk you through how I diagnose and fix this in my shop. Because yes, sometimes it is just a clogged jet. But other times, you’re chasing the wrong end of the system.
Stop Pressing That Button
If you’re getting zero spray and the pump’s running, stop hitting the stalk. Seriously. You’re forcing fluid into a closed system. That pressure has nowhere to go, and it’s hammering the pump. I’ve seen motors burn out in under five minutes doing this. I once had a customer come in with a dead rear pump—turned out he’d been mashing the switch for a week thinking it’d “clear itself.” It didn’t. Now he’s out $180 for a new pump and labor. Don’t be that guy.
Is It the Nozzle—or Something Else?
Here’s the reality: the nozzle is the usual suspect, but it’s not always guilty. I’ve replaced plenty only to find the real issue was a hose popped off at the liftgate hinge. That’s a 90-second fix. So don’t assume. Test.
The tool that saves me hours? A Mityvac. Or any hand vacuum/pressure tester. It’s $40 and pays for itself in one accurate diagnosis. You’re not guessing—you’re proving.
First, remove the interior liftgate trim. Most are clipped in—use a trim tool, not a screwdriver. These panels crack easy. Once you’re in, find the hose going to the nozzle. Disconnect it from the back of the nozzle.
Now, apply suction to the hose end with your Mityvac. If you can’t pull air through, the nozzle is blocked. If air flows freely, the blockage is upstream—or worse, the hose isn’t even connected.
Same deal if the spray is weak. Pull the hose, pressurize the nozzle with clean washer fluid using the Mityvac, and watch the stream. If it’s dribbling or spraying sideways, the orifice is clogged or the nozzle’s cracked. If it sprays clean and even, the problem isn’t the nozzle. Could be a weak pump, kinked hose, or air in the line.
And if you see fluid leaking around the nozzle? Clean it, add UV dye to the reservoir, run the system, and check with a black light. Leak at the base? That’s a failed O-ring or cracked housing. Replace it.
Why Nozzles Die (And It’s Not Just Dirt)
You’d think it’s just road grime. But after 25 years, I can tell you the real killers:
Evaporation and mineral buildup. Washer fluid sits in that long hose to the rear. In hot climates or if the car sits for weeks, the fluid evaporates. What’s left? Minerals from tap water, or sediment from cheap fluid. They bake into the nozzle. I see this all the time on weekend drivers and fleet vehicles that sit.
Internal screen clogs. Most nozzles have a tiny filter at the inlet. It’s supposed to catch debris. But if your reservoir is dirty or you’ve got old rubber hoses shedding particles, that screen gets blocked. Once it’s sealed shut, no amount of pump pressure helps.
Plastic fatigue. These nozzles sit in direct sun, freeze in winter, bake in summer. The plastic gets brittle. I’ve pulled ones that look fine from the front—but inside, there’s a hairline crack letting fluid leak back instead of spraying forward.
Check valve failure. Some nozzles (especially on BMWs and Mercedes) have a ball-and-spring check valve to stop siphoning. Use the wrong fluid—high alcohol, off-brand “de-icer” junk—and that valve swells or corrodes. Stuck shut? No spray. And you’ll think the pump’s dead.
How to Fix It—For Real
Option 1: Clear a partial clog (if spray is weak)
Don’t grab a paperclip. You’ll wreck the orifice. Use a proper nozzle cleaning tool—Stant 91760 is what I keep in my kit. Soft tip, won’t scratch. Gently insert it, then blow backward with low-pressure air (under 20 psi) or carb cleaner through a straw. Always blow back toward the hose—never deeper into the system.
Option 2: Replace the nozzle (if clogged, cracked, or leaking)
This is where most people go wrong. They try to force it out from the front. Bad idea. Most nozzles are press-fit or held by a single Torx screw from behind. Remove the interior trim, disconnect the hose, then either unscrew it or gently push it out from the back. If it’s press-fit, twist slightly as you pull to break the seal.
Inspect the O-ring. If it’s flattened, cracked, or missing, replace it. I keep a universal O-ring kit in my toolbox—saves trips to the dealer.
Install the new nozzle by hand. If it’s threaded, torque to 0.5–2 Nm. That’s finger tight plus a quarter turn. Over-tighten and you’ll crack the housing. Seen it happen.
Option 3: System flush (only if you suspect line contamination)
If you’ve got sediment in the line, try a dedicated washer system cleaner—Prestone Super Cleaner works. Pour it in, run the system 3–4 times. But be careful: aggressive solvents can eat pump seals or wiper blade rubber. Don’t mix brands. And never use it as a routine thing—only when you’ve ruled out mechanical failure.
Did It Work? Test It Right.
Don’t just hit the stalk and walk away. Go outside. Watch the spray pattern. It should cover the wiper’s path evenly, not dribble down one side. If it’s weak or off-angle, the nozzle might be misaligned or still partially blocked.
And check for leaks. Run it three times. Look at the base of the nozzle. Any seepage? Pull it and check the O-ring seating.
Prevent It From Coming Back
-
Use 50/50 mix of name-brand fluid and distilled water. Tap water leaves scale. Distilled doesn’t.
-
Flush the system once a year. Drain the reservoir, rinse it out, refill with fresh fluid. Do it in fall if you’re in a cold climate.
-
Run the rear washer every few weeks—even if you don’t need it. Stagnant fluid is the enemy.
-
Check the spray pattern. If it’s starting to fade, fix it now. A $15 nozzle beats a $200 pump.
Cost and When to DIY
Here’s the breakdown:
| Repair | DIY Cost | Shop Cost | Success Rate | Risks |
|---|---|---|---|---|
| Nozzle Cleaning | $5–$10 (tool) | $50–$100 | ~70% | Orifice damage, pushing debris in |
| Nozzle Replacement | $15–$60 (OEM) | $100–$200 | ~98% | Broken clips, O-ring leaks, kinked hose |
| Full Diagnosis & Flush | N/A | $150–$300 | N/A | N/A |
Bottom line: nozzle replacement is DIY-friendly. The tools are basic, the part’s cheap, and the access is usually straightforward. But if you’re not comfortable pulling trim or working with electrical connectors, take it in. A shop will do it in 20 minutes.
One More Thing
While you’re back there, check the liftgate wiring harness at the hinge. I’ve seen more than a few where the wires fatigued and broke from repeated opening and closing. If the rear wiper isn’t working either, that’s your next stop.
