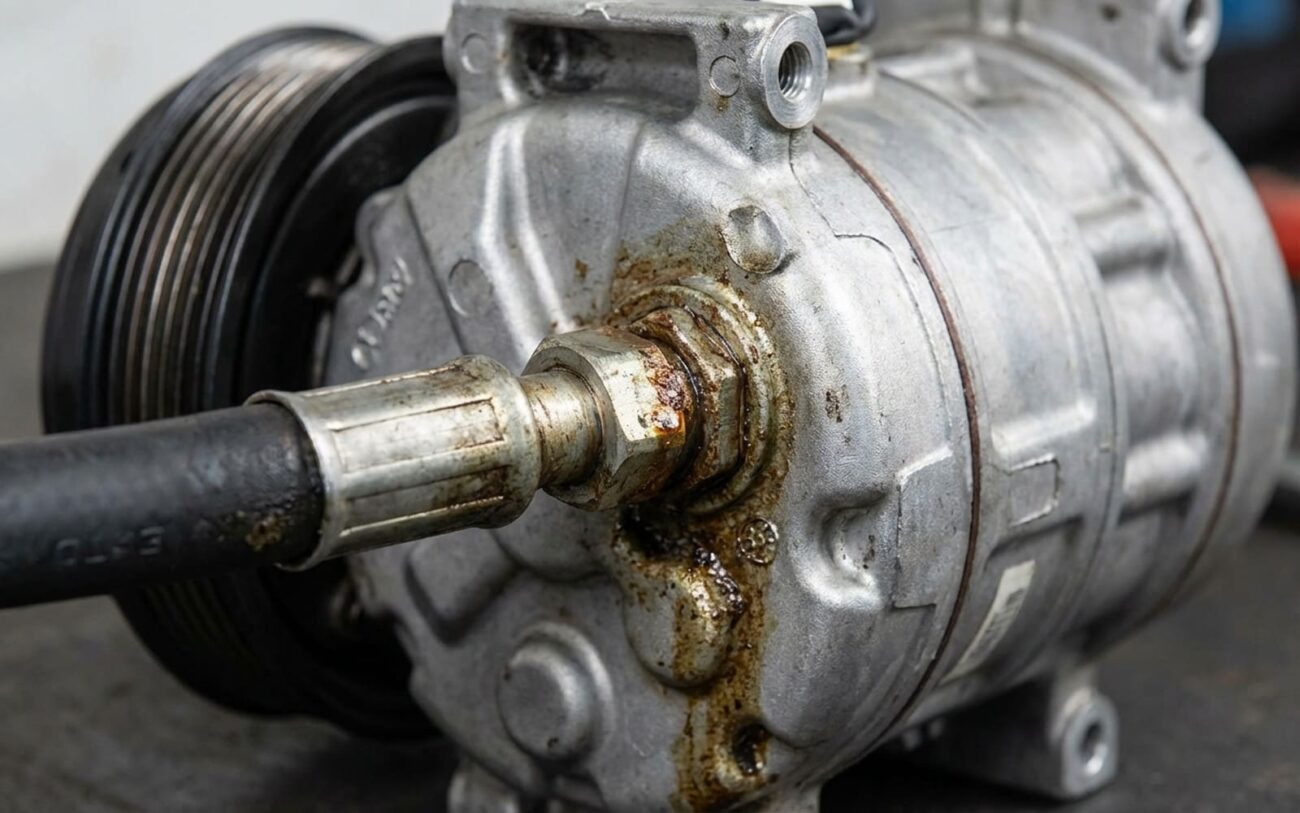
Alright, let’s cut to the chase about R134a and R1234yf. I’ve been doing this long enough to remember when R12 was the standard, then R134a came along, and now we’re on R1234yf. Every time there’s a switch, customers get frustrated, especially the ones who like to top off their own A/C. They think we mechanics are just trying to make things complicated or sell them new equipment. But trust me, this isn’t some shop conspiracy. This change? It’s all about environmental regulations, pure and simple.
Why We Switched to R1234yf
R134a, for all its years of good service, has a Global Warming Potential (GWP) of 1,430. To put that in perspective, one kilogram of R134a leaking out is like dumping 1,430 kilograms of CO2 into the atmosphere. The folks making the rules in Europe and here in the U.S. decided that wasn’t going to fly anymore. They put out mandates – the EU’s MAC Directive and the EPA’s SNAP program – saying new vehicles had to use refrigerants with a GWP under 150.
That’s where R1234yf comes in. Its GWP is less than 1, which makes it a lot friendlier to the planet. So, environmentally, it’s a win. But for us on the shop floor, and for vehicle owners, it’s a whole new ballgame. This stuff behaves differently, needs specific oils, and comes with some serious safety protocols. It’s not just a simple swap; it changes how we diagnose, repair, and even think about A/C systems.
When the Refrigerant Itself is the Problem
Now, most A/C problems I see are pretty straightforward mechanical failures: a leaky hose, a compressor that’s finally given up, or a clogged expansion valve. But every now and then, the refrigerant itself is the problem, and those are the ones that can really throw you for a loop. Why? Because the symptoms often look exactly like a mechanical fault.
I’ve had cars come in with weak cooling, and when I hook up the gauges, the pressures look fine. No obvious leaks either, and the compressor sounds like it’s working. That’s when my internal alarm bells start ringing. If everything looks okay but it’s not cooling, I’m thinking refrigerant purity or degradation.
Other big red flags I look for:
- A burnt electrical smell coming from the vents. That’s usually the refrigerant and oil breaking down under extreme heat.
- Dark, sludgy oil when you check the service ports. Again, a sign of thermal breakdown, often from poor airflow across the condenser or some other restriction in the system.
- “Sensor implausibility” codes on newer vehicles with smart climate control modules. This means the computer sees a pressure reading that just doesn’t make sense for the refrigerant temperature. That kind of mismatch almost always points to contamination or the wrong refrigerant altogether.
You ignore these signs at your peril. I’ve seen it too many times: what starts as a seemingly minor refrigerant issue turns into a catastrophic compressor failure. When that compressor grenades, it sends metal shrapnel throughout the entire system. Then you’re not just replacing the compressor; you’re looking at flushing or replacing the evaporator, condenser, expansion valve, and all the hoses. A simple fix becomes a full-blown, wallet-draining system rebuild.
How I Pinpoint the Problem: Chemical vs. Mechanical
So, how do you actually tell the difference between a mechanical problem and a refrigerant issue? It’s not a guessing game, and making assumptions here is a fast track to wasting money and time. I’ve learned to rely on a few key diagnostic steps to really pinpoint the root cause. The symptoms can overlap like crazy, so you have to be methodical. Here’s how I break it down in the shop:
| Symptom | Likely Refrigerant/Chemistry Issue | Common Mechanical Mimic | Definitive Test to Confirm |
|---|---|---|---|
| Poor cooling, but no leak found | This usually means the refrigerant itself is compromised – either it’s broken down from heat, or someone put the wrong stuff in (like R134a into an R1234yf system). | Could mimic a compressor that’s just worn out or has internal valve problems. |
First thing I do is recover the refrigerant and run it through a dedicated identifier. If it’s less than 96% pure, or if it shows a mix of refrigerants, you’ve found your problem. |
| Burnt smell, dark oil | This is a classic sign of the refrigerant and oil cooking from overheating – often from something simple like a blocked condenser or a fan not pulling enough air. | Sometimes an internal electrical short in the compressor can cause this, but it’s less common for the smell to come through the vents. |
I’ll pull an oil sample and test it for acidity. Low pH means thermal breakdown. While I’m there, I’ll check the compressor clutch coil resistance to rule out an electrical short, just to be sure. |
| High-pressure faults or weird sensor readings | This is almost always air (non-condensables) or mixed refrigerants in the system. | Could be a physical blockage in the condenser or the liquid line, but the sensor codes often point to something else. |
I’ll compare the high-side pressure to a pressure-temperature (PT) chart for the specific refrigerant at that ambient temperature. A big difference means contamination. I also always do a thorough vacuum test; if it can’t hold a deep vacuum, you’ve got air or moisture getting in. |
R1234yf’s Unique Challenges
Beyond the diagnostic headaches, R1234yf brings its own set of technical challenges that we didn’t really deal with on R134a systems.
The big one everyone talks about is flammability. Yeah, R1234yf is classified as A2L, which means ‘mildly flammable.’ In a perfect lab setting, it needs temperatures over 779°F (415°C) to ignite. So, under normal driving, you’re fine. But in a severe collision or an engine fire, especially if there’s an oil mist around or super hot surfaces, the risk of ignition goes up. What really concerns me, though, is what happens if it burns: it can break down into hydrogen fluoride (HF) gas. That stuff is highly toxic, and it’s why every OEM has specific handling procedures for repairs and even mandates evacuation protocols after an airbag deployment. You don’t mess around with HF.
Then there’s material compatibility. This is huge. R1234yf systems must use Polyol Ester (POE) oil. R134a systems use PAG oil. You absolutely, positively cannot mix them. I’ve seen shops make this mistake, and the result is always sludge. That sludge will chew up compressor bearings and clog expansion valves faster than you can say ‘warranty claim.’
And POE oil itself is a bit of a sponge. It’s highly hygroscopic, meaning it sucks moisture right out of the air. If a system isn’t pulled into a deep, deep vacuum before charging, that moisture mixes with the refrigerant and oil, creating acids. And acid inside your A/C system? That’s a recipe for internal corrosion and a dead compressor. This is why a proper deep vacuum — I’m talking below 500 microns, and held for at least 30 minutes — isn’t ‘optional’ anymore. It’s the only way to protect the system long-term. I see this step skipped way too often, especially in those quick-lube places, and it is, without a doubt, a leading cause of premature failure in R1234yf systems I get in my bay.
My Process for R1234yf A/C Repairs
When it comes to fixing these R1234yf systems, let me be clear: there’s no such thing as a ‘quick fix’ for refrigerant-related failures. Anyone telling you different is cutting corners, and you’ll pay for it later.
My process always starts with a proper refrigerant recovery. This means using an EPA-certified machine that meets the SAE J2844 standard specifically for R1234yf. This isn’t just about being compliant; it’s about preventing cross-contamination and handling this stuff safely.
If the contamination is mild – maybe just a bit of air got in, or someone put in a small amount of the wrong refrigerant – the fix is relatively simple: recover everything, pull a deep vacuum, and then recharge with pure R1234yf and the exact OEM-specified amount of POE oil.
Now, if I find sludge, acid, or metal debris – which usually happens after a compressor has failed internally – that’s when the job gets serious:
- Full recovery is still step one.
- Then, depending on the manufacturer’s guidelines, we might be able to flush components like the evaporator and lines with an approved solvent. But honestly, a lot of modern condensers and evaporators aren’t designed to be flushed effectively; they just need to be replaced.
- The receiver-drier (or accumulator) and the expansion valve? Those are always replaced. Think of them as sponges that soak up all the contaminants. You can’t clean them out.
- In the worst-case scenarios, especially after a catastrophic compressor failure where metal has gone everywhere, the only truly reliable repair is to replace the condenser, evaporator, and all the hoses. Manufacturers like GM and Ford have even published detailed service bulletins with ‘clean or replace’ matrices based on how bad the contamination is. These aren’t suggestions; they’re the standard if you want the repair to last and maintain any kind of warranty.
A critical safety note: If a vehicle has been in a collision, especially with front-end damage or airbag deployment, you need extra caution. Never, ever open an R1234yf system without first following the OEM’s emergency procedures. The risk of toxic gas release (that HF I mentioned earlier) or ignition during servicing is very real. Always depressurize safely and use proper Personal Protective Equipment (PPE).
And for the love of all that is holy, stop using leak sealants! I don’t care what the bottle says about being ‘safe for all systems.’ These products are snake oil. They clog expansion valves, they coat evaporator walls, and they absolutely ruin compressors. A ‘top-off’ with sealant might give you a few weeks of cold air, but it guarantees a much, much more expensive repair down the road. The only correct repair is to find and fix the leak, recover the refrigerant, do a proper evacuation, and then recharge.
Confirming the Fix: How I Know It’s Done Right
Just putting new refrigerant in isn’t the finish line; it’s just the start of proving the repair actually worked. I’ve got a specific checklist I go through to validate everything:
- Refrigerant Purity Check: First, if I’ve recovered any refrigerant, I run it through my identifier. It absolutely must show over 98% pure R1234yf. If it’s less than that, I know there’s still contamination, and we’re not done.
- Performance Test: I set up the car under specific conditions: ambient temperature around 80°F, humidity below 60%. I run the engine at 1,500 RPM with the A/C on maximum recirculate. My benchmark? That center vent temperature needs to drop to 40°F (4.4°C) or lower within five minutes. If it can’t hit that, the cooling capacity isn’t where it should be.
- Leak Testing (The Right Way): I pressurize the system and meticulously inspect every connection, every seam, every component with an electronic leak detector. And this is key: it must be a detector rated specifically for HFO refrigerants like R1234yf. Your old R134a detector often won’t pick up R1234yf leaks, and you’ll miss something critical. I also monitor the system for stability – no weird pressure fluctuations or erratic sensor readings over a good 10-minute idle cycle.
Only when all those boxes are checked do I consider the job truly complete and ready to go back to the customer.
The Hard Truth About R1234yf Repair Costs
Alright, let’s talk about the elephant in the room: cost. I’m going to be blunt here – R1234yf A/C servicing is not a DIY job. Period. The specialized equipment alone, like the recovery machine, a proper micron gauge, and especially that refrigerant identifier, costs thousands of dollars. That’s why shop labor rates reflect not just our time, but also the significant investment in tools and ongoing training required to do this work correctly and safely.
Here’s a realistic look at what you might expect to pay, based on what I see in my shop:
| Scenario | DIY Cost | Shop Cost | Success Rate | Secondary Risk if Incomplete |
|---|---|---|---|---|
| Incorrect refrigerant (e.g., R134a in R1234yf system) | Not feasible for DIY. You need dedicated equipment. | $300 – $600 | About 95% (if we do a full recovery, evacuation, and proper recharge). |
You’ll get poor cooling, sludge in the oil, and eventually a dead compressor because the lubrication isn’t compatible. |
| Severe contamination (compressor replaced) | Absolutely not feasible for DIY. This is a major repair. | $1,500 – $3,000+ | 70–90% (This really depends on how thoroughly we can flush or if we have to replace multiple components to get it truly clean). |
You’ll be replacing that brand-new compressor again in a few months because of residual debris or acid in the system. |
| Standard R1234yf recharge (no major fault, just low) | Still not feasible for DIY due to the specialized equipment needed. | $200 – $400 | Around 98% (assuming there are no underlying issues we missed). |
N/A (if done correctly, there’s no secondary risk here). |
Now, here’s the tough reality check: if you’ve got an older car that’s not worth much – say, under $3,000 – and it needs a full A/C system rebuild due to severe contamination, it might not make financial sense to fix it. It’s a hard pill to swallow, but sometimes you have to cut your losses. However, on newer vehicles, a functional A/C system is pretty much expected, and trying to cheap out on a proper repair almost always leads to bigger, more expensive problems down the road. I’ve seen countless customers go for a ‘cheap’ recharge, only to be back six months later facing a $2,500 system replacement because the initial problem was never truly addressed.
My Best Advice: Prevention & What to Watch For
So, how do you avoid these headaches and keep your R1234yf A/C system running smoothly? It really boils down to using the right materials and following the correct procedures, every single time.
- Use the Right Oil: This is non-negotiable. Always, always use the OEM-specified POE oil for your R1234yf system. Check the label; it’ll have designations like ND-11 or PS-23. Never, under any circumstances, let anyone put PAG oil (used for R134a) into an R1234yf system. The service port fittings are actually designed to be different sizes to prevent accidental cross-connection, but I’ve seen people force things. A good shop will have dedicated hoses and recovery machines for each refrigerant type to completely avoid contamination.
- The Deep Vacuum is Law: I cannot stress this enough: the vacuum step is absolutely critical. Moisture in the system is the enemy. It mixes with the refrigerant and oil to form acids, which will slowly but surely kill your compressor and corrode everything internally. A true deep vacuum, pulled below 500 microns and held for at least 30 minutes, is the only way to remove both air and moisture. I see this step skipped constantly, especially in those high-volume, get-it-done-quick shops, and it’s the number one cause of early R1234yf system failures I encounter.
- Annual Performance Check: For vehicle owners, your best defense is a simple annual A/C performance check. On a warm day, grab a digital thermometer and stick it in your center vent. If it’s not blowing in the low 40s (°F) within a few minutes, bring it in. Catching a small leak or a minor restriction early can save you from a massive repair bill down the road.
- Don’t Forget Engine Cooling: Remember, your A/C condenser sits right in front of your radiator. If you’re replacing a radiator or dealing with a cooling system issue, make sure that job is done right. An overheating engine can indirectly cook your A/C condenser. Same goes for radiator fan failures; reduced airflow means higher underhood temperatures, putting immense stress on your entire A/C system.
