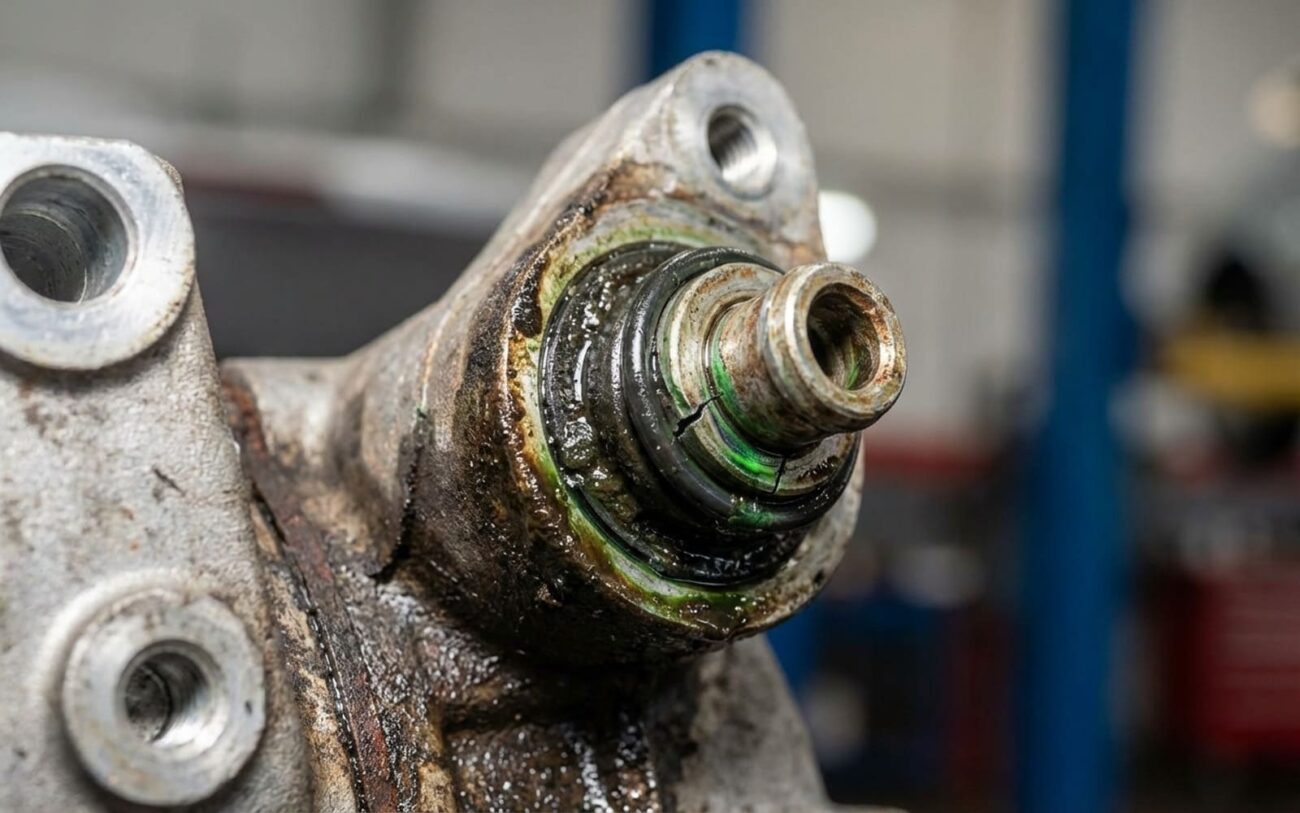
Alright, let’s talk A/C. If your air conditioning was humming along fine, then suddenly it’s blowing warm air right after a service – especially a “recharge” – you’ve got a serious problem on your hands. In my 25+ years under the hood, I’ve seen this scenario play out countless times, and often, it points to one thing: refrigerant contamination.
Your vehicle’s A/C system is a finely tuned machine, designed to work with one specific refrigerant. For most modern cars, that’s either R-134a or the newer, environmentally friendlier R-1234yf. These aren’t like different brands of motor oil you can just swap out; they are chemically distinct. Mixing them, or using one of those so-called “universal” refrigerants, is a recipe for disaster. It throws the entire system out of whack, and frankly, it can be a death sentence for your A/C.
The Immediate Fallout: What You’ll Notice
When you’ve got incompatible refrigerants in the system, the cooling performance drops off a cliff. You’ll feel weak airflow, and the cabin temperature just won’t get where it needs to be. But the real trouble is brewing under the hood. I’ve seen pressure readings go completely haywire, compressors short-cycling like crazy, and the whole system just acting… wrong. It’s not just a little less cold; it’s a fundamental breakdown of how the system is supposed to operate.
Now, poor cooling can come from a lot of places – a leak, low charge, a dying compressor clutch. But contaminated refrigerant creates its own unique set of symptoms, and if you ignore them, things get expensive, fast.
Why It’s So Bad: The Real Damage Underneath
This isn’t just about using the “wrong” gas; it’s about a fundamental chemical incompatibility that wrecks components. Refrigerants and their lubricating oils are precisely matched. For example, R-134a systems use PAG oil, while R-1234yf demands a specific POE or PVE oil. When you mix refrigerants, especially with those shady “universal” blends, the oils can separate, break down, or just become completely ineffective. Without proper lubrication, your compressor runs dry, overheats, and can seize up in a matter of minutes. I’ve seen it happen. It’s not pretty.
Once a compressor seizes, it’s like a grenade going off inside your A/C system. Metal particles from the failing compressor get pumped throughout the entire loop – into the condenser, evaporator, and lines. Now, every single component is contaminated. At that point, you’re not looking at a simple recharge; you’re looking at a full system replacement, or at the very least, a comprehensive, expensive flush. And that’s if you’re lucky enough to catch it before it completely welds itself shut.
Another major headache is something called fractionation. Many alternative refrigerants are what we call zeotropic blends – mixtures of different chemicals that evaporate at different rates. If you get a leak in a system with one of these blends, the lighter components escape first. What’s left behind is a refrigerant with completely different thermodynamic properties than what the system was designed for. Even if you try to top it off, it’ll never cool right, and your pressure readings will be all over the place. It’s a losing battle.
And let’s not forget the official warnings. SAE International Standard J2845 explicitly warns against mixing R-134a and R-1234yf. It can change the refrigerant’s flammability rating, and it absolutely voids manufacturer warranties. OEMs take this seriously; many service bulletins state that if non-approved refrigerants are found, it requires a complete system flush to even think about warranty coverage. I’ve worked on vehicles where a tech used the wrong oil, and within weeks, the compressor was toast, taking the whole system with it.
Finally, some of these “alternative” refrigerants or their additives can degrade the rubber seals (like HNBR) commonly used in R-134a systems. They can also saturate the desiccant in your receiver-drier or accumulator, making it useless. Once that desiccant fails, moisture gets into the system, leading to acid formation and internal corrosion. You might chase a clogged expansion valve or a faulty pressure sensor, but if you don’t rule out contamination first, you’ll just be throwing parts at a problem that won’t go away.
How We Really Diagnose Contamination (No Guesswork Allowed)
Look, you can’t guess with A/C. Many issues, from a simple low charge to a failing blend door, can mimic refrigerant contamination. Relying solely on pressure gauges or how cold the air feels from the vent is a rookie mistake; those can be incredibly misleading. I’ve seen systems with normal pressures that just wouldn’t cool because the refrigerant blend was off.
The only reliable way to confirm contamination is with a dedicated refrigerant identifier. Period. This isn’t an optional tool; it’s essential. Any reputable shop should have one and use it on every vehicle before they even think about connecting their A/C machine.
Here’s what I typically see, and why the identifier is so critical:
- Poor cooling with high head pressure: This often screams “incompatible blend.” The mixed chemicals don’t behave right, causing pressures and temperatures to go sideways. You might think it’s just an overcharge or a clogged condenser, but it’s usually deeper than that.
- Compressor short cycling or making unusual noises: This is a big red flag for poor lubrication. If the oils aren’t mixing or are breaking down, the compressor is starving. It’ll try to kick on, struggle, and shut off. People often jump to a low charge or a bad clutch, but I always suspect oil separation with mixed refrigerants.
- Normal pressures but weak cooling: This is classic fractionation. A prior leak might have let the lighter components of a zeotropic blend escape, leaving you with a refrigerant that just doesn’t have the cooling capacity. You could replace blend door actuators all day, but it won’t fix the core problem.
In all these cases, the only way to truly know what you’re dealing with is to test the refrigerant directly.
A quality refrigerant identifier samples the gas right from the service port. It tells you, unequivocally, whether you have pure R-134a, pure R-1234yf, or a contaminated mix. A “PASS” means you’re good. A “FAIL” or “CONTAMINATED” result means the system has been compromised, and you need to take action. If a shop isn’t using this tool before servicing your A/C, I’d find another shop.
Repair Options: My Approach to Fixing Contaminated A/C
This Ain’t No DIY Job. Seriously.
Let me be crystal clear: fixing refrigerant contamination is not a weekend project. You’re dealing with specialized tools, EPA-certified recovery equipment, high-vacuum pumps, and often, specific flush tools. There are no safe shortcuts here. Trying to do this yourself is dangerous, illegal, and will likely cause more damage.
Once we’ve confirmed contamination with the identifier, the repair path depends on the severity. Here’s how I break it down:
Path A: Minor Cross-Contamination (Caught Early) Professional Only
- First, we recover all the refrigerant using a certified recovery machine. No venting it to the atmosphere, ever.
- Then, we replace the receiver-drier or accumulator. Its desiccant is compromised the moment it sees the wrong stuff, so it’s a mandatory replacement.
- Next, we evacuate the system for at least 45 minutes – sometimes longer, depending on the system size – to pull out every bit of moisture and non-condensable gases.
- Finally, we recharge with the correct OEM-specified refrigerant and the proper type and amount of oil (PAG or POE/PVE, as required by the manufacturer).
This method works well if the contamination was truly minimal and caught right away, before any real damage started.
Path B: Confirmed Major Mixing or “Universal” Refrigerant Use Professional Only
- Recover all that contaminated refrigerant.
- Then, we start disassembling. The compressor, condenser, evaporator, and all the lines come out. You can’t properly flush with everything in place.
- Each component gets flushed individually using an approved solvent, like RX-11, followed by a thorough dry nitrogen purge. This pushes out every last bit of old oil, contaminants, and solvent.
- We replace the receiver-drier/accumulator, the expansion valve or orifice tube (these are impossible to clean thoroughly), and every single O-ring and seal with OEM-specified parts. Don’t cheap out here.
- Before reassembly, I’ll lightly flush the components with the correct new oil and another dry nitrogen purge. This pre-lubricates and ensures no moisture is left.
- Reassemble everything, making sure to use a torque wrench on all fittings. Overtightening or undertightening leads to leaks.
- Evacuate for a good 60+ minutes, sometimes longer, to ensure a deep vacuum.
- Finally, charge with pure, correct refrigerant and the precise amount of new oil.
This is the only way to ensure all contaminants are gone. Skipping any of these steps is just asking for a repeat failure, and I’ve seen shops try to cut corners, only to have the customer back in a month.
Path C: Legacy R-12 Retrofit with Adapters
How We Verify the Repair (And How You Can Too)
Once the work is done, you can’t just take “it should work” for an answer. A proper repair needs to be validated. Here’s what I do, and what you should expect from any good shop:
-
First, we let the system run for at least 15 minutes to stabilize. This gives everything a chance to settle in.
-
Then, we measure the center vent discharge temperature. It needs to be within 5°F of the manufacturer’s specification for the current ambient temperature. I use a digital thermocouple for accuracy – no hand-waving here.
-
Next, we check both high and low-side pressures with a manifold gauge set. They have to fall within the OEM’s specified range for the current conditions. Again, specs matter.
-
Most importantly, especially after a full flush (Path B), I run a second refrigerant identification test. I sample from the newly charged system. It absolutely must read “PASS” for the correct, pure refrigerant. This is your final confirmation that no residual contamination remains. If it doesn’t pass, we’ve got more work to do.
A good shop will document all these results and provide them to you. If they won’t – or can’t – run these tests, that’s a huge red flag in my book.
The Hard Truth: Cost, Risk, and Making the Call
Let’s be realistic here. These repairs aren’t cheap. The decision to proceed often comes down to your vehicle’s value and overall condition. Here’s a general idea of what you’re looking at:
- Path A – Corrective Service: This usually runs between $300 and $600. It’s not a DIY job – you need recovery machines and vacuum pumps. Success rate is high if the contamination was minor and caught immediately. The risk if it fails? Ongoing performance issues and accelerated compressor wear.
- Path B – Complete Flush & Component Replacement: This is the big one, typically $1,200 to $2,500, sometimes even more depending on the vehicle and which components need replacing. Again, absolutely not DIY; it requires full system disassembly and specialized flush tools. When done correctly, I’d say the success rate is about 95%. But if it fails – usually due to an incomplete flush or a missed contaminated component – you’re looking at a seized compressor, which means a new compressor and a second flush. That’s another $800 to $1,500 on top of the original bill.
My rule of thumb? If the repair cost starts to creep past 40% of your car’s current market value – especially on an older, high-mileage vehicle – it might not make financial sense. For example, dropping $2,500 to fix the A/C on a car worth $4,000 is a tough pill to swallow. In those cases, sometimes the most practical alternative is to permanently disable the A/C (just unplug the compressor clutch or pull the fuse) and rely on window ventilation. It’s not ideal, but it saves you from throwing good money after bad.
Always check your vehicle’s warranty status before authorizing any major A/C repairs. Sometimes, if the contamination was due to a manufacturing defect or a previous dealer service, it might be covered.
How to Prevent This Headache in the Future
Prevention really starts with you, the car owner. You need to be smart about who you let work on your A/C. Here’s what I tell my customers to look for:
-
They must use a refrigerant identifier on every vehicle before they open the system. It’s non-negotiable. Ask to see the report if you’re unsure.
-
They should be able to show you their recovery machine’s certification and a refrigerant purity log. This proves they’re handling refrigerants responsibly and not cross-contaminating their own equipment.
-
They only use OEM-specified refrigerant by name (R-134a or R-1234yf). If they mention “universal” blends or “top-off kits,” walk away. Fast.
-
A good shop will refuse to “top off” your A/C without testing it first. Topping off a leaking or contaminated system is just wasting your money and setting you up for bigger problems.
If a technician tries to tell you “it’s all the same” or pushes a suspiciously cheaper alternative, trust your gut and find someone else. The risk of major system damage just isn’t worth the few bucks you might save upfront.
Stay proactive. If your A/C performance tanks right after a service, go back and demand a refrigerant identification report. Also, a quick visual check of your service ports can tell you a lot – odd adapters, mismatched fittings, or fresh tool marks where they shouldn’t be might suggest a questionable past repair. It’s your car, your money, and your comfort.
