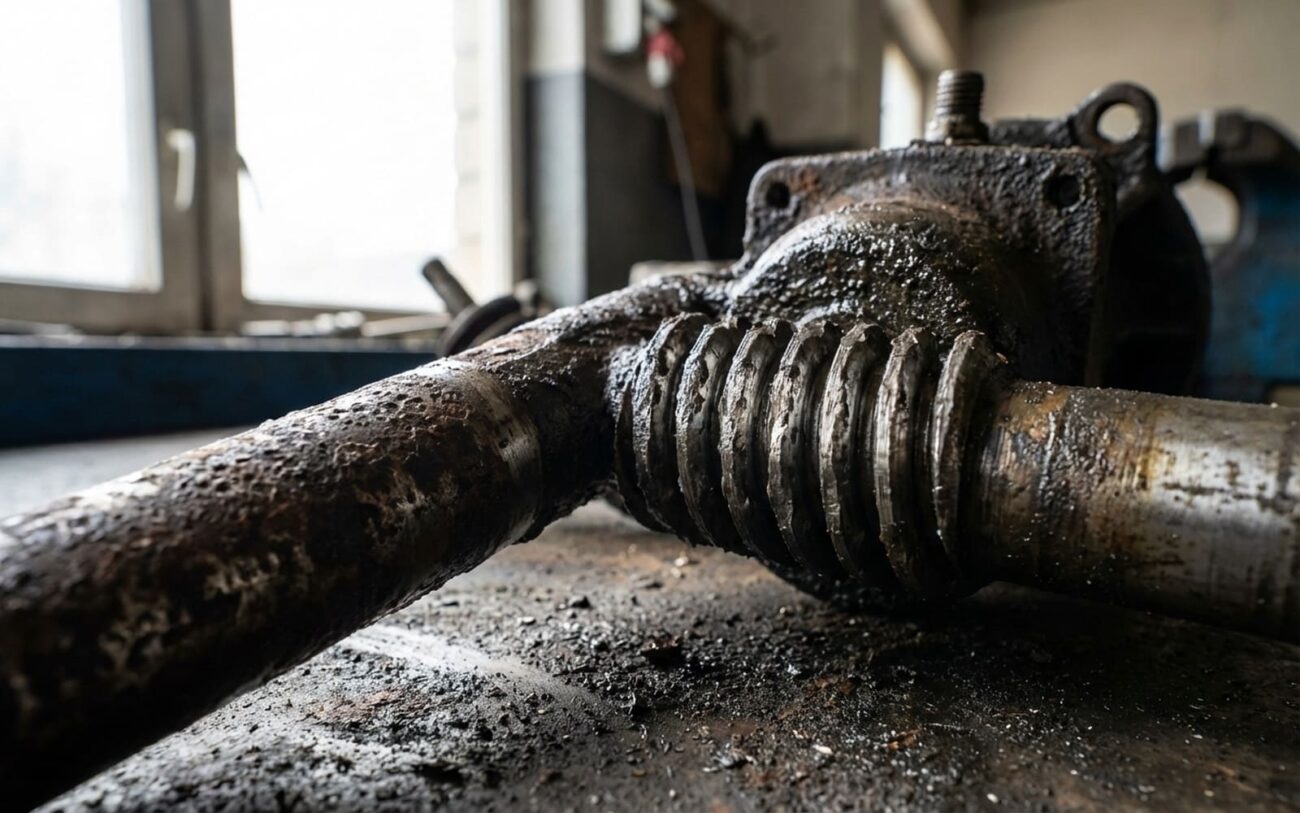
You know that feeling, cruising down a perfectly straight road, and your steering wheel just feels… loose? Not like it’s pulling one way or the other, but there’s this noticeable gap right in the middle, dead on-center. You might turn the wheel five degrees, maybe even more, before the front wheels even think about reacting. Yeah, that’s what we in the shop call “dead on-center” steering, and after 25 years, I can tell you it’s almost always a classic sign of wear in a recirculating-ball steering system.
What That “Dead On-Center” Feel Really Means
On the older iron, like those classic Mercedes G-Wagens (the 463 chassis, especially pre-1998 models) or even some of the rugged UAZ off-roaders I’ve worked on, this dead zone usually screams “internal wear” from the steering gearbox. What’s happening inside? It’s typically excess clearance, or “lash,” between the worm shaft and the ball nut assembly. Think of it like a set of gears that are supposed to mesh tightly, but now they’ve got a little too much wiggle room.
Now, I’m not going to lie, external parts like worn tie rod ends or a tired drag link can sometimes mimic this feeling. But if you’ve got that distinct neutral zone only when you’re pointed straight ahead, and then the steering feels pretty normal once you get a few degrees off-center, that’s almost always classic gearbox wear. It’s just mechanical slop where things should be nice and tight.
Why It’s More Than Just Annoying: The Safety Angle
And let me tell you, this isn’t just about a sloppy feel; it’s a serious safety issue. That slack means every bump in the road, every little correction you make, it’s sending shock loads right through your entire steering linkage. That accelerates wear on everything downstream: tie rods, pitman arm, idler arm – you name it. I’ve seen more than a few cases in my career where folks ignored this kind of play, and it led to a failed drag link right in the middle of a drive. Losing steering control at speed? That’s not some theoretical problem; it’s a very real, very preventable disaster.
My Go-To Diagnostic Method: Pinpointing the Problem
Alright, so you’ve got that dead-on-center feel. Before we even think about touching the steering box itself, my first rule is always: rule out the simpler, cheaper stuff. We need to know if this play is inside the box or somewhere in the external linkage. My go-to test, the one I’ve used for decades, is a simple two-person job.
Here’s how I do it:
- Set It Up: Get the vehicle on level ground. If it’s a manual steering box, engine off. If it’s power-assisted, you’ll want the engine running so the pump is doing its thing and you’ve got hydraulic assist.
- The Wheel Rocker: Have one person sit in the driver’s seat and gently rock the steering wheel back and forth, only within that dead zone. Don’t turn it far enough for the wheels to actually move. Just that little bit of slack.
- The Under-Car Inspector: The second person (that’s usually me, with a good flashlight) gets underneath. I’m looking at every single joint in the steering system. I start right at the steering shaft U-joints, then move to the pitman arm nut, the drag link ends, and then the inner and outer tie rod ends.
What I’m looking for is any visible movement, any clunk, any play in those external components before the road wheels start to react. If I see any of that – say, a tie rod end moving before the wheel does – then the problem is external, and we fix that first. It’s usually a much easier, cheaper fix.
But here’s the kicker: If all those external joints are tight, no visible play anywhere, but the pitman arm is moving without the corresponding input shaft rotation from the steering wheel, then you’ve confirmed it. The wear is inside the gearbox. That’s a definitive test in my book.
When It Won’t Self-Center
Now, sometimes you get a different symptom: the steering doesn’t want to self-center after you make a turn. It just kind of stays turned, or returns very slowly. That’s a different animal. While it can be external stuff like binding ball joints, seized kingpins, or even an alignment issue with too much negative caster, it often points to worn or incorrectly adjusted sector shaft mesh preload inside the gearbox. To really check this, I’ll disconnect the drag link from the pitman arm. Then, I can manually rotate the pitman arm by hand. A healthy steering box will have a slight “detent” or a noticeable increase in resistance right at the center. If it’s smooth all the way through, or binds up, that tells me the preload is off or the sector shaft teeth are worn.
Deep Dive: What’s Really Failing Inside the Box?
So, you’ve done your diagnostics, and you’ve confirmed it: the problem is definitely inside the recirculating-ball steering gearbox. What’s usually going on in there? Well, it almost always comes down to plain old mechanical wear over time.
Inside that box, you’ve got a worm shaft and a ball nut assembly, and they rely on a whole bunch of tiny recirculating ball bearings to make that precise contact. After years of hard work – especially if the fluid hasn’t been changed, or if the vehicle’s been under heavy loads – those microscopic ball bearings and their races start to wear down. That wear creates more axial clearance, or “lash,” and that’s exactly where your dead zone comes from. Think of it like a marble run where the marbles have flattened—the smooth flow becomes a clunky mess.
Another big culprit I see is a loss of bearing preload on the worm shaft itself. There are thrust bearings in there designed to handle the axial loads. When those bearings wear out, or if they develop “brinelling” – basically little surface dents from impact – the worm shaft starts to get end play. That end play translates directly into that on-center slack you’re feeling, even if the main gear teeth are still looking okay.
And a quick pro tip, especially for you G-Class owners out there: those early Mercedes G-Class models (the 463 chassis, pre-1998) are notorious for this on-center wear. Mercedes even had service bulletins about it. The factory solution back then was usually a precise adjustment or, if the wear was too far gone, a full replacement.
My Approach to Fixing It Right: Options & Warnings
Alright, so you’ve confirmed the gearbox is the problem. Now, let’s talk about fixing it. And let me be absolutely clear right upfront: internal steering gearbox work is high-stakes. This isn’t like changing your oil. Get the preload wrong, and you could end up with a steering box that binds or, even worse, locks up during a turn. If you’re not comfortable with precision tools like dial indicators and working with inch-pound torque specs, this is definitely a job for a specialist. Seriously, your life, and the lives of others, depend on this.
1. Adjustment (If Wear Is Minimal)
This is the least invasive option, and sometimes, if you catch it early enough, it can bring that steering feel right back. It involves adjusting the sector shaft. You’ll need to center the steering box precisely, then loosen the locknut on the adjuster screw. From there, you turn the adjuster screw clockwise in very small increments. The goal here is to get the rotational torque at the center of the input shaft to about 15–20 inch-pounds. This isn’t a “tighten until it feels good” situation. Over-tighten it, and you’ll cause binding, making the steering heavy and prone to locking up. Under-tighten it, and you’ve still got that dead zone. This is an advanced DIY job, for sure.
2. Overhaul (For Advanced Wear)
If a simple adjustment doesn’t cut it, or if the wear is more significant, the gearbox needs to come apart. This means replacing the ball nut assembly, the worm shaft bearings, and all the seals. I’ve done plenty of these, and they require specialized tools: a press, bearing drivers, micrometers for precise measurements. This is absolutely a professional-only job. One misaligned bearing, one incorrect measurement, and you’ve doomed the repair before you even put it back on the truck.
3. Full Replacement (When It’s Beyond Repair)
Sometimes, the damage is just too far gone. If the worm shaft is deeply grooved, or if the gearbox housing itself is cracked or damaged, replacement is the only safe and reliable option. When you go this route, I always recommend a high-quality OEM-remanufactured unit. I’ve seen too many problems with cheap aftermarket boxes – poor metallurgy, shoddy assembly, and they often fail much faster than they should. Don’t cheap out on steering components; it’s just not worth the risk.
I’ve seen it happen. Someone tries to hide the lash by over-adjusting the sector shaft. Don’t do it. Seriously, this isn’t a fix; it’s a dangerous shortcut. Over-tightening will kill your steering’s self-centering ability, making it a nightmare to drive, and it significantly increases the risk of sudden steering lockup, especially during low-speed turns. It’s not just annoying; it’s incredibly dangerous.
After the Work: Making Sure It’s Right
Once the work is done, whether it’s an adjustment or a full replacement, verification is non-negotiable. You absolutely have to make sure it’s right.
- Static Check: Before it even leaves the bay, I’ll put an inch-pound torque wrench on the input shaft and rotate it through its full travel. What I’m looking for is a smooth, consistent torque reading. It should rise slightly, peak right at the center (that’s your detent), and then drop off symmetrically. No spikes, no sudden drops, and definitely no binding anywhere in the travel.
- Road Test: Take it for a drive. The vehicle should track straight, with minimal drift, and that immediate, crisp response at center should be back.
- Self-Centering: After you make a turn, the steering wheel needs to return to center smoothly and completely on its own. If it hangs up, or you have to help it, something’s still not right.
- Thermal Check: This is a trick I learned years ago. After a good road test, pull over and use an IR thermometer on the steering box. If it’s more than 30°F above ambient temperature, that’s a big red flag. It usually means you’ve got too much preload or something’s binding internally, generating excessive heat.
Making the Call: Cost, Risk & Economic Decisions
Now, let’s talk brass tacks: what’s this going to cost you, and what are the risks? Making the right economic decision here is key, especially with older vehicles. Here’s a quick breakdown based on what I typically see in the shop:
| Repair Type | DIY Cost (Approx.) | Shop Cost (Approx.) | My Take on Success Rate | Key Risk |
|---|---|---|---|---|
| Adjustment | $50 (for tools) | $150–$300 | High (if wear is truly minimal) | Binding/failure if over-tightened – a common mistake. |
| Overhaul | $200–$500 (for parts/special tools) | $800–$1,500 | Medium–High (requires real expertise) | Incorrect assembly leads to rapid re-failure, or worse. |
| Replacement | $800–$2,000 (for a quality unit) | $1,500–$3,000 | Very High (with a good OEM-spec box) | Low, if you use a quality OEM-spec remanufactured part. Avoid the cheap stuff. |
Keeping Your Steering Tight: Prevention & Monitoring
Look, prevention is always cheaper than a cure, especially with steering boxes. If your unit is serviceable – meaning it has a fill plug and drain plug – change that gear oil every 60,000 kilometers, or about 37,000 miles. And this is crucial: use the correct fluid. Most recirculating-ball boxes need a GL-4 80W-90 gear oil, not standard power steering fluid. Using the wrong stuff is a recipe for accelerated wear. Also, pay attention. If you start hearing groans or clunks, or feel even a hint of looseness, get it checked out. Catching these issues early can often mean a simple, inexpensive adjustment instead of a full-blown, costly replacement down the road.
So, here’s the bottom line from my perspective: that dead on-center steering feel? It’s not just an annoyance; it’s a clear warning, and one you absolutely shouldn’t ignore. Whether it ends up being a straightforward adjustment or a full-blown gearbox replacement, restoring that solid, mechanical connection between you and the road is the difference between a precise, confident drive and a dangerous guessing game at highway speeds. Stay safe out there.
