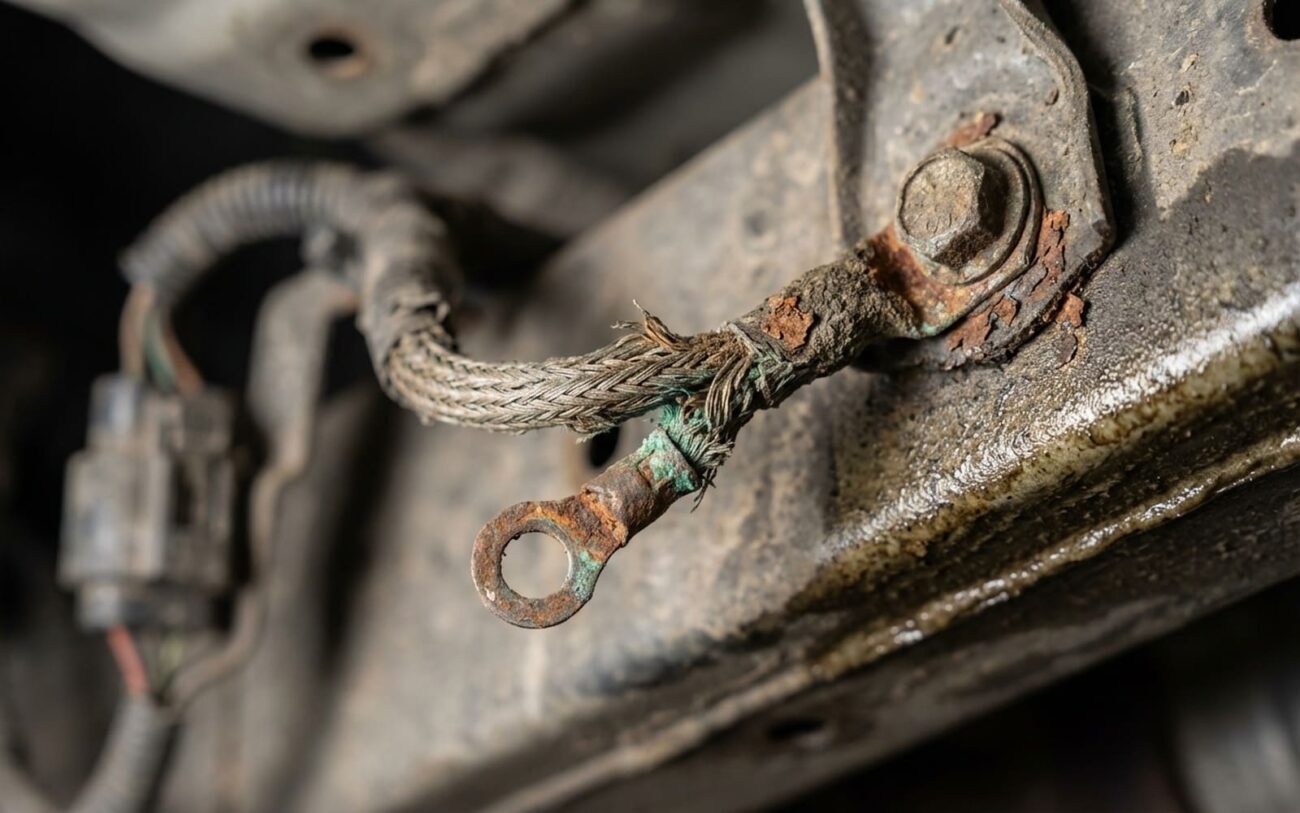
That shaky backup camera image? It’s not the lens, it’s not water inside, and it’s not a bad sensor. I’ve seen this on hundreds of vehicles—from beat-up Corollas to lifted Rams—and 9 times out of 10, it’s either a failing ground or electrical noise sneaking into the video signal. You don’t need to replace the camera. You need to diagnose like a tech, not guess like a parts changer.
Symptoms Tell the Real Story
If the image jitters in time with the engine—smooth at idle, shaking like a phone on vibrate when you rev—it’s a ground issue. Period. Voltage drop across a corroded or loose ground point creates ripple that the video circuit interprets as motion. I’ve measured over 1.2 volts of drop on a tailgate hinge ground before—it should be near zero.
But if the screen flickers, rolls, or shows static snow—and gets worse when you turn on the headlights, defroster, or A/C blower—then you’re dealing with electromagnetic interference (EMI). That noise usually comes from the alternator, ignition system, or power steering motor, and it’s being picked up by poorly shielded coax.
And yes, I’ve had customers swear the camera was “possessed” because the shake only happened when the rear defroster kicked in. Turns out, the coax was routed right next to the defroster bus bar. Classic.
How to Test—No Guessing
Start with a voltage drop test on the ground. Don’t just check continuity—real techs measure voltage drop under load. Disconnect the battery negative first. Then set your multimeter to DC volts. Put the red probe on the camera’s ground terminal, black on the battery negative. Start the engine, rev to 2,000 RPM. If you see more than 0.1V that pulses with RPM, that ground is garbage.
I’ve seen techs skip this and go straight to replacing cameras. Bad move. On a 2018 Honda CR-V last month, the camera looked fine, wiring looked intact—but the ground at the liftgate hinge had 0.8V drop. Cleaned the terminals, added a star washer, and the shake vanished. Customer saved $400.
For EMI, you want to rule out the cable. If you don’t have an oscilloscope (most DIYers don’t), do this: run a temporary, high-quality shielded coax from the camera to the display—keep it away from engine bay wiring. If the image stabilizes, the factory harness is the problem. I use Belden 1855F or equivalent—don’t bother with cheap stuff.
And check the head unit ground if all video inputs shake. I had a Toyota Tundra where the entire infotainment display jittered. Turned out the aftermarket radio installer never grounded the video converter shield. One 10-gauge wire to a clean chassis point fixed it.
Where Things Actually Fail
The camera itself rarely fails internally. What fails is the path to ground. On Fords, the ground is often on the liftgate striker plate—exposed to road salt, moisture, and constant movement. Corrosion builds up, resistance increases, and boom: shaky image.
On Toyotas and Hondas, the ground runs through the liftgate harness, flexing every time you open it. After 50,000 cycles, the wires fatigue. I’ve pulled harnesses apart and found broken strands inside insulation—looked fine from the outside.
And don’t forget shared grounds. That same bolt might carry the backup camera, reverse lights, and parking sensors. If one circuit pulls dirty current, it can mess up the others. I’ve seen reverse lights dimming in sync with the camera shake—same root cause.
For EMI, the coax routing is usually the culprit. On 2015–2017 F-150s, the factory runs the camera wire right next to the alternator output. Bad idea. The B+ wire carries hundreds of amps—perfect antenna setup. Ford issued a TSB with revised routing and added ferrite clamps. If you’re working on one, check TSB 17-2444.
How to Fix It—For Real
Fix the Ground—Properly DIY-FEASIBLE
Replace the Coax—Right PROFESSIONAL-ONLY
Replace the Camera—Only If Needed
Test Like You Mean It
Don’t just look at the screen and walk away. Put the car in reverse, rev the engine to 2,500 RPM, and watch. Then turn on everything: high beams, defroster, heated seats, blower on max. If the image flickers, you missed something.
For ground repairs, recheck the voltage drop. It should be under 0.05V and stable. For EMI fixes, if you have a scope, check the camera power line—less than 50mV AC ripple under full load is acceptable.
And take it for a drive. Hit some bumps. If the shake comes back under vibration, you’ve got a loose connection or damaged wire in a harness.
Cost vs. Value—Be Smart
Cleaning a ground? Under $20 and an hour of your time. Replacing the coax? $100 in parts, 3–4 hours labor. New OEM camera? $400–$800 with programming.
Rule of thumb: if the repair costs more than 40% of the car’s value, skip OEM and go aftermarket. A quality aftermarket system with proper shielding and a dedicated ground can outperform the factory setup—especially on older vehicles.
I’ve installed them on 2008–2012 Camrys with chronic camera noise. Used a 1080p camera, RG6 coax, and grounded the shield to a drilled chassis point. Rock-solid image. Customer’s been happy for three years.
Stop It Before It Starts
After any rear bumper work, double-check the camera ground. I’ve seen body shops reassemble liftgates with the ground bolt missing. “Didn’t think it mattered,” they said. It matters.
Apply dielectric grease to every ground terminal you touch. It’s not conductive, but it seals out moisture and prevents corrosion. Takes 30 seconds. Saves hours later.
And test early. Once a month, put the car in reverse and turn on the defroster and headlights. If the image flickers, address it now—don’t wait for it to get worse. On vehicles with known issues (looking at you, 2013–2015 Honda Accords), check for TSBs. Honda issued one for revised grounding in the trunk harness. Use it.
