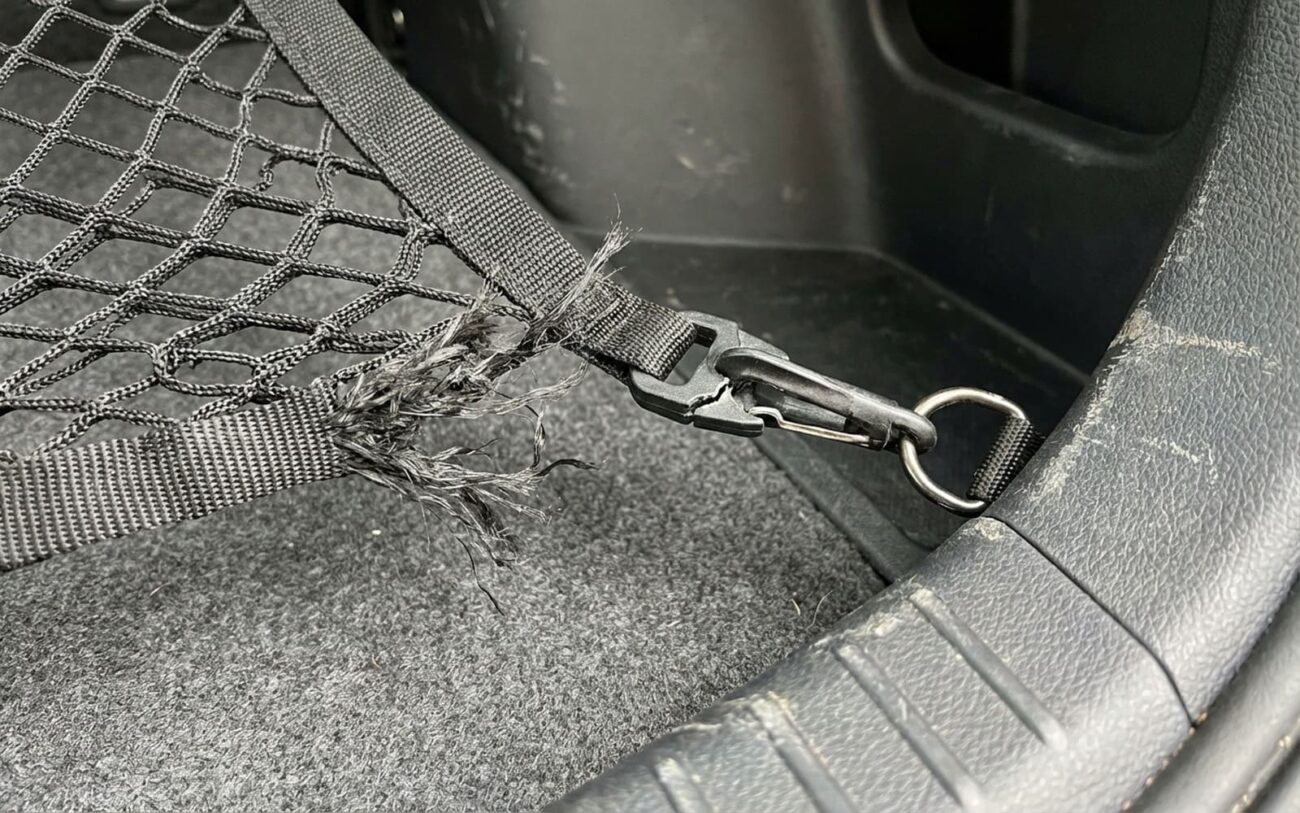
Cargo nets fail. I’ve seen it in everything from a beat-up Corolla hatchback to high-end Teslas with $100 OEM nets that still didn’t last. But “it broke” isn’t a diagnosis—it’s a starting point. And if you’re relying on that net to keep a toolbox from becoming a missile in a fender bender, you need to know exactly what went wrong and why.
Symptom First, Judgment Later
Look at the damage before you start tearing anything apart. I’ve had customers toss a net because it “felt loose,” only to find the anchor point was bent from a rear-end collision they never mentioned. So don’t assume.
If the webbing is tearing through the middle—not at a seam or hook—then the material itself is done. You’ll see individual fibers thinning out, like a rope that’s been pulled too hard for too long. That’s fatigue. It doesn’t matter if the net “looks okay” otherwise. Once the fibers start necking down, strength is already gone.
Permanent stretch is another dead giveaway. A good net should snap back. If it sags like a hammock when empty, that’s polymer creep—microscopic deformation from repeated loading. It’s not “just worn.” It’s structurally compromised.
And UV damage? Don’t underestimate it. Sunlight eats nylon and polyester, especially if the manufacturer skipped UV stabilizers (which cheap nets often do). You’ll see chalky, brittle webbing, faded color, or cracking along the edges. On a 2021 Model 3 I worked on last month, the net looked fine until I bent it—then it snapped like a dry twig. That’s not wear. That’s material death.
Differential Diagnosis: Net or Not?
Here’s where most people get it wrong. They blame the net when the real issue is the car’s hardware. I’ve replaced more cracked plastic hooks than failed nets—especially on older Hondas and Toyotas where the trim around the anchor gets brittle.
Grab a flashlight. Inspect every anchor point. Look for bent metal loops, broken plastic tabs, or missing trim pieces. If the net came off easily, check whether it was actually seated. Sometimes a hook looks engaged but isn’t. I’ve seen nets pop loose from minor bumps because someone didn’t hear the click.
And don’t skip the vehicle side. On a 2018 RAV4 I worked on, the net kept “failing”—turned out the anchor loop was bent from someone forcing a roof rack strap through it. The net was fine. The car wasn’t.
| Symptom | Likely in Net Material | Common External Mimics | Definitive Test to Confirm Source |
|---|---|---|---|
| Net detachment | Failure of elastic cord anchor or sewn loop | Broken plastic hook, bent anchor, improper engagement |
Inspect vehicle-side hardware for damage. Apply moderate hand tension to the net’s loop—if it tears or stitching unravels, the failure is in the net. |
| Webbing tear | Material fatigue or UV degradation | Damage from sharp cargo edge |
Examine tear under bright light. Frayed, fibrous edges suggest material failure; clean, straight cuts indicate contact with a sharp object. |
| Permanent stretch | Polymer fiber creep from repeated loading | Using an undersized or incorrect net |
Measure webbing width with digital calipers. A stretched strand will be noticeably narrower than OEM spec. |
Why It Really Failed
Let’s say the net’s the culprit. Now ask: why?
Material quality is a big one. I’ve cut open cheap aftermarket nets and found inconsistent fiber thickness—some strands thick, some thin. That means uneven load distribution. And if there’s no UV stabilizer in the polymer, it’ll degrade fast, especially in Arizona or Florida sun.
Construction matters just as much. A sewn loop should have at least 8–10 stitches per inch with UV-resistant thread. I’ve seen nets with half that—thread that rots in two years. Elastic cords with poorly tied knots? They chafe against the sleeve and snap. These aren’t wear issues. They’re design flaws.
And fatigue is real. Even within spec, repeated stretching weakens fibers over time. A quality net is built for this—per SAE J2838:2018, it must survive a 20g deceleration force without failure. OEM nets meet this. Most budget nets don’t even come close.
Overloading? That’s user error. But if a 20-lb-rated net fails at 15 lbs, that’s not your fault. That’s a bad net.
What to Do Now
Temporary Fix? Only If You Know the Limits
Internal Failure? Not Worth Fixing
Widespread Damage? Replace It
Did It Work?
For a repair: cycle it ten times by hand. Pull, release. Check for new deformation, cracked adhesive, or slipping stitches. If it holds, fine—but don’t kid yourself. It’s still weak.
For a replacement: make sure every hook clicks in. The net should lie flat when slack, stretch evenly when loaded. Look for a legible load rating. If it’s faded or missing, that’s a red flag.
And no—there’s no way to test a 20g dynamic load at home. You can’t simulate a panic stop. That’s why temporary fixes are a gamble. A proper replacement is the only real solution.
Cost vs. Risk: Don’t Fool Yourself
Temporary Sewn Repair
DIY Cost
Replacement (Aftermarket)
DIY Cost
Replacement (OEM)
DIY Cost
| Repair Type | DIY Cost | Shop Cost | Success Rate | Secondary Risk if Failed |
|---|---|---|---|---|
| Temporary Sewn Repair | <$20 | N/A (not offered) | <30% (fails under real load) | Complete load restraint failure; cargo becomes projectile |
| Replacement (Aftermarket) | $30–$80 | $80–$120 (parts + labor) | 95% (if rated and quality-verified) | Minimal if installed correctly |
| Replacement (OEM) | $75–$200 | $150–$250 | 98% (meets full vehicle spec) | Minimal if installed correctly |
Look, I get it—spending $200 on a cargo net feels ridiculous. But it’s not about the net. It’s about what happens when it fails. A loose suitcase in a rear-end collision can break a rear window. A toolbox? That can injure someone. I’ve seen it.
Aftermarket can be good—just verify the specs. If it doesn’t list a load rating or UV protection, walk away. OEM is the safest bet. It’s matched to your anchor points, your load geometry, your vehicle’s safety system.
Always check your EV battery warranty status before authorizing repairs.
Keep It Working Longer
Stow it when not in use. Don’t leave it stretched across the back window for weeks. UV kills it faster than anything.
Clean it with mild soap and water. No Armor All, no tire shine—those chemicals break down synthetics over time. Let it dry before folding.
Inspect it before every use. Look for cuts, fading, stiffness. Pull each elastic cord—uneven rebound means fatigue. And pad sharp cargo. A metal suitcase edge can cut through webbing in one trip.
And for the love of safety—make sure every hook is seated. A half-engaged clip might hold in the driveway but not at 60 mph. Thirty seconds of checking saves a lot of risk later.
