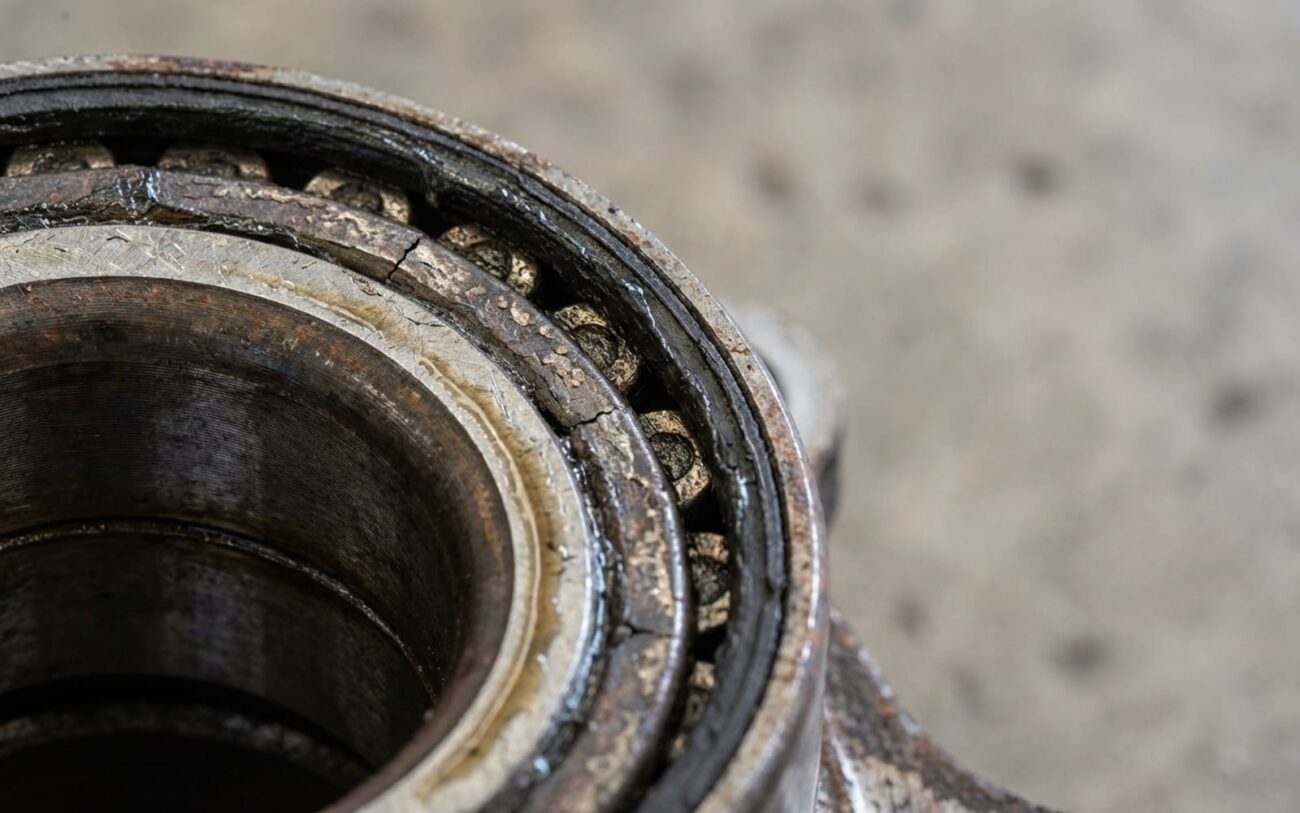
Alright, let’s talk about a classic problem I’ve seen countless times on Skoda Rapids and VW Polos: a failing rear wheel bearing. It’s not just a nuisance; it’s a safety issue that can go from a minor hum to a major headache (or worse) if ignored. My goal here is to give you the straight goods on how to spot it, confirm it, and get it fixed right, based on decades under the hood.
How to Spot a Bad Bearing & Confirm the Diagnosis
When a rear wheel bearing on these cars starts to go, it usually announces itself with a sound. It’s not a squeak or a rattle, but a steady, low-frequency hum or drone. Think of it like a subtle rumble that gets louder as you speed up. Customers often mistake it for tire noise at first, and that’s a fair assumption, but there’s a key difference I always look for.
The real tell is how the noise changes when you shift the car’s weight. Find a quiet road, get up to about 50-70 km/h where you can clearly hear the hum, and then gently swerve left and right. Pay close attention:
-
If the hum intensifies when you turn one way (e.g., turning right, loading the left rear side) and then quiets down when you turn the other way, you’re almost certainly hearing a bad wheel bearing.
-
Tire noise, on the other hand, tends to stay pretty consistent regardless of how you load the suspension. That’s your primary differentiator right there.
Why does this happen? When you turn, the load shifts. If the noise gets louder when you turn right, that means the left rear wheel is taking more load, and if that’s the failing bearing, it’ll protest more loudly. If it gets louder turning left, it’s the right rear bearing under stress. It’s a simple, effective test I rely on daily.
My Go-To Test
“The load transfer test is gold. Tire noise is a constant companion; bearing noise is a moody teenager – it changes its tune with pressure.”
What the Noise Tells You About Severity
The sound isn’t just a yes/no answer; it tells you how bad things are. I’ve seen these progress through distinct stages:
-
Early Stage: That initial low-frequency hum or drone. It’s continuous and shifts with load. This means the raceways or rollers are starting to wear down.
-
Mid Stage: It evolves into a more noticeable growling or rumbling. Still constant, still gets louder with speed. This indicates more advanced wear, maybe some micro-pitting (spalling) on the bearing surfaces.
-
Late Stage: Now you’re hearing a rhythmic clicking or grinding. This is serious. It’s synchronized with the wheel rotation – you’ll hear it once per revolution. This usually means catastrophic internal damage: a broken cage, a cracked race, or a roller that’s come loose.
-
Imminent Failure: A loud roaring, metallic grinding, sometimes accompanied by vibration. This isn’t just a warning; it’s a countdown.
Physical Inspection: Beyond the Noise
Once you’ve done the road test, the next step is to get the car safely in the air. Lift the suspected corner, grab the wheel at 12 and 6 o’clock, and try to wiggle it. If you can feel any play – even a tiny bit – that bearing has exceeded its design clearance and it’s definitely bad. I also like to spin the wheel by hand while listening and feeling for roughness. Sometimes you can even hear a faint grinding or clicking this way.
For more definitive confirmation, especially with rhythmic noises, use a mechanic’s stethoscope (or a long screwdriver held to your ear, carefully). Place the tip against the knuckle, as close to the bearing as you can get it, while spinning the wheel. A loud, consistent noise from the bearing area confirms internal damage. This also helps rule out other culprits like a CV joint or brake issues.
| Symptom | What it Points To (Bearing) | Common Mimics | My Definitive Test |
|---|---|---|---|
| Droning/Hum at speed | Worn raceways, early vibration | Cupped/feathered tires, uneven tread | Load transfer swerve test: bearing noise changes, tire noise stays constant. |
| Rhythmic clicking/grinding | Spalled race, broken cage, collapsed roller | CV joint wear, debris in brake, bent dust shield | Lift, spin wheel, use stethoscope on knuckle. |
| Perceived wheel play | Excessive internal clearance | Worn control arm bushings, trailing arm mounts | Dial indicator on hub flange. Any play >0.05 mm is a bearing failure. |
Why These Bearings Fail: The Root Causes
So, why do these things give up the ghost, especially on certain years of the Rapid and Polo? The rear wheel bearing is a sealed unit, which means it’s packed with grease at the factory and then sealed up tight. There’s no way to re-lube it, no way to get in there and clean it out. Once contamination or material fatigue starts, it’s a one-way ticket to failure.
A Specific Production Issue I’ve Noticed:
I’ve seen a higher failure rate on the 1.6L MPI models from roughly 2012–2015. This was often tied to seal batch issues from the factory. While there wasn’t a formal recall, many VW Group technicians were well aware of the pattern. If your car falls in that window, it’s worth checking if it had a “goodwill” repair done previously.
Beyond that specific batch, the main culprits I see are:
-
Seal Failure: This is huge. If the seal cracks or degrades, moisture gets in, washes away the grease, and then rust and wear accelerate rapidly.
-
Material Quality: Not all bearings are created equal. Some aftermarket units, or even certain OEM batches, use softer steel for the races. This leads to spalling (micro-pitting) and premature failure.
-
Cage Design: The cage holds the rollers in place. If it’s a polymer cage and it deforms under heat or stress, the rollers can get out of alignment, leading to rapid wear.
-
Installation Error: This is a massive, often overlooked factor. The axle nut on these units sets the bearing preload. If you over-torque it, you crush the internal clearances and the bearing fails quickly. Under-torque it, and the bearing can move microscopically, leading to brinelling (indentations from the rollers). Proper torque is critical, and you always use a new axle nut.
The Fix: Replacing the Bearing (No Repairing This One)
Once you’ve confirmed the bearing is bad, let’s be clear: your only real option is replacement. These sealed hub units are NOT REPAIRABLE. Don’t waste your time trying to re-grease or disassemble them; it just doesn’t work.
On the Skoda Rapid and VW Polo, you’ll typically find one of two types of rear wheel bearing assemblies:
Press-Fit Bearing Professional Only
Bolt-On Hub Assembly DIY-Feasible
Post-Repair: Don’t Skip the Validation
Replacing the bearing isn’t the finish line. I always tell people you need to verify the repair actually fixed the original issue and, just as important, that you didn’t introduce any new problems. Here’s my checklist:
My Validation Checklist
-
Road Test: Take the car out and perform those load-transfer swerves again. The hum or grind should be completely gone. If you hear anything, something’s still wrong, or another bearing is on its way out.
-
Thermal Check: After a good 20-30 minute drive, use an infrared thermometer to check the temperature of both rear hubs. They should be within 10°C (18°F) of each other. A significantly hotter hub indicates excessive friction, meaning the bearing is either over-torqued or defective.
-
Dial Indicator (if applicable): If you had play before, remount your dial indicator on the hub flange. There should now be zero detectable axial or radial play. I typically look for a maximum of 0.05 mm (0.002 inches) – anything more and I’m concerned.
Cost & The Hard Truth: When to Fix, When to Walk
Let’s talk money, because that’s always a factor. Here’s a general idea of what you’re looking at, and my thoughts on the risks involved:
| Repair Type | DIY Cost (Parts) | Shop Cost (Est.) | Success Rate (My Experience) | Biggest Risk |
|---|---|---|---|---|
| Press-Fit Bearing | $80 – $150 | $350 – $500 | 95% (if done right) | High: DIY pressing often leads to cracked knuckles ($400+ extra part, plus labor). |
| Bolt-On Carrier | $180 – $300 | $400 – $600 | 98% (pretty straightforward) | Low: Main risk is improper bolt torque, leading to premature failure. |
Economically, you’ve got to consider the whole picture. If you’re also looking at worn shocks, new brake pads, and maybe some suspension bushings, the total repair cost for the rear end can add up fast. On an older car worth, say, $3,000, spending $1,000 on rear-end repairs might not make long-term sense. But here’s the kicker: ignoring a bad bearing is never an option. The safety risk is just too high. It’s a non-negotiable repair.
Prevention & My Monitoring Tips
My Maintenance Habits for Bearings
Look, you can’t prevent every bearing failure, but you can catch them early. Every time you rotate your tires, take an extra 30 seconds to drive slowly and just listen for any new sounds. Once a year, when the car’s lifted, grab each wheel at 12 and 6 o’clock and check for play. During any brake service, always take a good look at the bearing seal for cracks or grease leakage. A leaking seal is basically a preview of failure – it’s telling you that moisture is getting in and the clock is ticking. Being proactive here saves you a lot of grief down the road.
