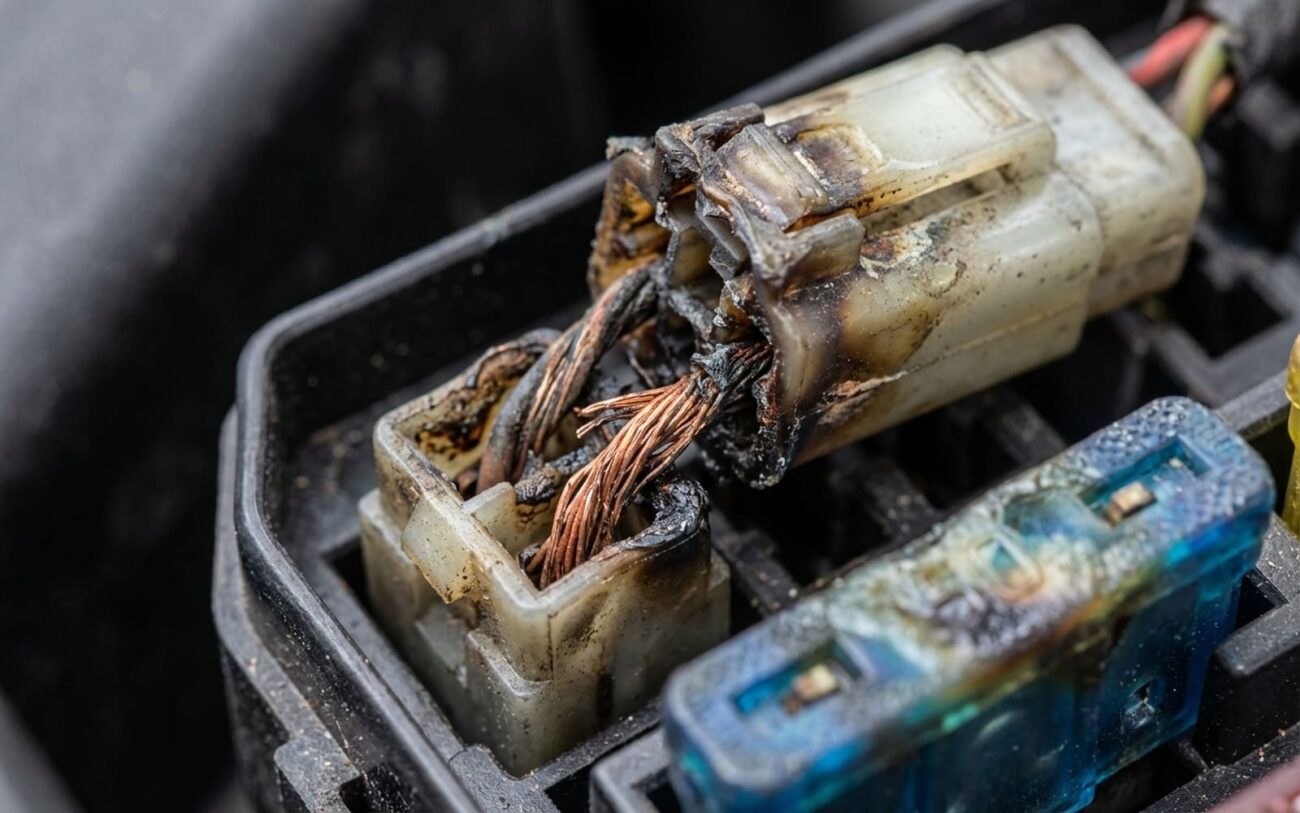
Alright, let’s talk about blown fuses. If you’re just swapping them out, one after another, you’re not fixing a problem—you’re just feeding a symptom. After 25 years under the hood, I can tell you that a blown fuse is a warning light, not the fault itself. It’s doing its job, protecting your wiring from melting down or, worse, starting an underhood fire. I’ve seen melted harnesses take out entire systems because someone kept resetting a fuse like it was a circuit breaker. That’s a mistake that costs big money and can be dangerous.
First Clues: What Your Fuse Is Telling You
The single most important piece of diagnostic information you have is when that fuse decides to pop. This tells you the type of fault you’re chasing. Don’t skip this observation—it’s your roadmap.
1. Blows Immediately? That’s a Hard Short.
If the fuse blows the instant you activate the circuit—the second you flip the headlight switch, or touch the window button—you’ve got a classic hard short to ground. This means a live wire is making direct contact with the chassis metal, or another ground path, offering almost zero resistance. Current spikes instantly, and the fuse sacrifices itself to save the rest of the circuit.
2. Blows After a Delay or Under Load? That’s an Overload.
If the fuse holds for a bit, or only blows when the component is working hard (like when the A/C compressor kicks on, or a power window motor struggles to move a sticky window), you’re likely dealing with an overload. Here, the circuit path is correct, but something is drawing more current than it should. A failing motor, a binding mechanism, or even a partially seized bearing can cause this.
3. Blows Intermittently (Bumps, Rain, Heat)? That’s an Intermittent Short.
This is often the trickiest one. If the fuse only blows when you hit a pothole, it rains, or the engine bay heats up, you’re looking at an intermittent short. This usually means damaged insulation, a corroded connector, or a wire that’s only grounding out under specific conditions, like vibration or moisture. I’ve spent hours chasing these, only to find a single frayed wire in a door boot grounding against the striker plate every time the door closed.
4. Fuse Looks Good, But Nothing Works? That’s an Open Circuit or High Resistance.
Sometimes, the fuse is perfectly fine, but the component still doesn’t work. This isn’t a blown fuse scenario, but it’s related. It indicates an open circuit (a break in the wire) or a high-resistance connection (like corrosion in a connector) preventing power from reaching the component. Don’t assume a good fuse means a good circuit.
Tech Tip: Check the Obvious First! Before you dive deep, always verify the correct fuse rating using the fuse box lid diagram or owner’s manual. I’ve seen a 10A fuse put into a 20A circuit more times than I can count. It’ll blow under normal load, and it’s not a fault, just human error. Also, visually inspect the fuse box itself for corrosion, loose terminals, or cracked holders. These can create hot spots that melt fuses without any downstream fault—that’s a power distribution issue, not a wiring fault.
Diagnosing the True Source: My Approach with a DMM
You can’t fix what you haven’t found. Guessing will cost you time and money, and often leads to more damage. My key tool for electrical diagnosis is a good Digital Multimeter (DMM) and, for current draw, a DC clamp meter. Here’s how I break down each fault type.
Hard Short to Ground: Finding the Dead Short
This is where a live wire is touching ground directly. It’s usually physical damage. My go-to test here is a resistance-to-ground test. First, disconnect the battery negative terminal—safety first, always. Set your DMM to ohms (Ω). Place one lead on the load-side fuse terminal (the side that feeds power into the circuit), and the other on a clean chassis ground. If you get a reading below 2 Ω, you’ve confirmed a hard short. Anything above 10,000 Ω (or “OL” for open loop) means no short.
To isolate it, you start disconnecting components or harness sections along that circuit. If you unplug a connector and your resistance reading suddenly jumps to “OL,” you know the short is after that connector, or in the component itself. It’s a process of elimination. Common culprits I see are wires rubbing through on sharp metal edges, pinched during aftermarket installations (like trailer wiring or LED light kits not routed properly), or, unfortunately, rodent damage. I’ve pulled apart harnesses where a mouse had a feast.
Circuit Overload: Is Something Working Too Hard?
With an overload, the circuit path is actually correct, but the component is drawing too much current. This means your resistance-to-ground test might not show a short. Instead, you need a current draw test. You’ll need a DC clamp meter, which lets you measure current without breaking the circuit, or you can put your DMM in series with the circuit (though this is often limited to 10A on most DMMs, so be careful). Measure the inrush current (initial spike) and the running current with the circuit active. Compare this to the component’s specification. A sustained draw exceeding 80% of the fuse rating is a red flag, even if it doesn’t blow immediately. For example, a 15A fuse circuit drawing 14A continuously is faulty—it’s just a matter of time before that fuse gives up the ghost. What I typically find here are failing motors (blower motors, power window regulators) with seized bearings or internal shorts in their windings, or a mechanism that’s binding up, forcing the motor to work harder.
Intermittent Short: The Elusive Fault
These are the ones that make you pull your hair out. Since they only happen under specific conditions, you have to try and recreate those conditions. My go-to is a dynamic wiggle test. With the battery disconnected, I’ll put my DMM in continuity mode (it usually beeps for continuity). Then, I’ll bridge the fuse terminals with a fused jumper wire (or a test light if you don’t have a DMM with a continuity beep) and start wiggling harnesses, tapping on connectors, and flexing components like door or trunk hinges. When that DMM beeps (or the test light flickers), you’ve found your fault zone. It means you’ve momentarily completed the short. This often points to abraded wires in flex points, or corroded terminals that briefly make contact with ground when disturbed. It takes patience, but it works.
Open Circuit/High Resistance: Power Not Getting Through
When the fuse is good but the component is dead, you’re looking for a break in the circuit or too much resistance. The best test here is a voltage drop test under load. With the circuit active and the component trying to run, place one DMM probe on the power side of the fuse (or the load-side fuse terminal), and the other at the component’s positive terminal. The voltage difference should be less than 0.5V. If you see more than that—say, 2 or 3 volts—it indicates excessive resistance somewhere between those two points. That resistance could be from corrosion in a connector, a loose terminal, or a partially broken wire. I often find this in older vehicles with corroded headlight or taillight sockets, or in main power feeds to modules.
Fixing It Right: Repair Strategies and My Shop Wisdom
Once you’ve nailed down the fault type and, ideally, the location, it’s time to fix it. How you go about it depends on what you found, where it is, and what tools you have. Be realistic about your own capabilities—some jobs are just not worth the frustration if you lack the right equipment or experience.
DIY Feasible Repairs
If you’re dealing with a chafed wire in an accessible area—say, along the firewall, under the hood, or in a visible harness—that’s usually something you can tackle. My method: cut out the damaged section completely. Splice in a new piece of wire of the same gauge using high-quality crimp connectors, and always, always use adhesive-lined heat shrink over the crimp. That adhesive-lined stuff seals out moisture, which prevents future corrosion and resistance issues. Never use standard butt connectors without sealing them. Soldering is optional, but if you do, make sure it’s a good mechanical connection first, then solder, and again, insulate with adhesive-lined heat shrink. After the splice, re-wrap the harness with proper harness tape (not cheap electrical tape that unwraps in a year) and secure the loom away from any abrasion points. Done right, this fix will outlast the car.
Replacing a faulty component, like a blower motor, a power seat module, or a headlight switch, is also often DIY-feasible with basic hand tools. The critical step here is to isolate the fault first. Unplug the suspect component, then retest the circuit for a short or overload. If your resistance-to-ground now reads “OL” or your current draw is within spec, you’ve confirmed the component was bad. Reconnect and test current draw after replacement to verify normal operation.
When to Call a Pro: Professional-Only Recommended Repairs
Some electrical faults are just beyond the scope of a typical DIYer, and honestly, even for experienced pros, they can be a headache. If a short is buried deep inside a door boot, under the carpet, or within a complex dash harness, it’s time to consider a professional. You’ll need factory wiring diagrams, pinout specifications, and specialized tools like a borescope or a tone generator to trace those wires. The process involves splitting connectors, testing segments, and methodically narrowing down the fault zone. On some vehicles, like certain GM BCM fuse blowing issues or Volkswagen electrical gremlins, the problem often traces back to a corroded C3 connector or a failed junction block—areas that require deep system knowledge and often specialized tools to access. In these situations, running a new sub-harness is often faster, more reliable, and ultimately more cost-effective than trying to repair a damaged one in situ.
Non-Repairable: When Replacement is the Only Option
There are also times when repair isn’t an option. If the short is internal to an ECU (Engine Control Unit), BCM (Body Control Module), or an instrument cluster, you simply don’t repair circuit boards in the field. These are sealed units, and attempting to fix them is usually futile. The same goes for harnesses that are molded into structural components or sealed within panels—if you can’t access the wire to splice it properly, you replace the entire assembly. For high-value modules, be aware that compatibility is key. Many require programming or VIN matching to the vehicle, which is another reason a professional shop with the right scan tools is necessary.
Post-Repair Validation: Don’t Just Assume It’s Fixed
This is a step too many people skip. Never assume a repair worked just because the fuse held for five minutes. You need to validate it properly. For any wiring repair, I always start with the battery disconnected and recheck my resistance-to-ground on the load-side fuse terminal. You should see “OL” or at least 10,000 ohms. Any lower, and there’s still a path to ground you missed, or your splice isn’t perfect.
Then, reconnect the battery and activate the circuit. Perform a voltage drop test under full load. Place one DMM probe on the power side of the fuse, and the other at the component’s positive terminal. With the device running, that difference should be less than 0.5V. Higher readings mean resistance remains—possibly a poor splice, a corroded connector you missed, or even an issue with the ground side of the circuit (which also needs to be checked).
For a replaced component, run the circuit for 10–15 minutes, cycling it on and off. Use your clamp meter to verify the current draw is within spec. A healthy blower motor, for instance, should draw 8–12A on high, not 15A or more. If it’s pulling near the fuse limit, the new part might be defective, or the mechanical load is still binding somewhere.
For those tricky intermittent faults, you need to simulate the conditions again. Wiggle harnesses, open and close doors, spray water on seals (if it was a moisture-related issue). If the fuse holds and the function is stable, you’re likely in the clear. But don’t be afraid to leave it running for a good half hour and come back to check for any signs of heat or unusual operation.
Cost, Risk & When to Walk Away
Repairs aren’t just about technical feasibility; they have to make financial sense. As a tech, I have to have these conversations with customers all the time. Here’s how I typically see the numbers break down:
Simple Wire Repair (accessible):
DIY Cost: $20–$50 (for good tools/materials).
Shop Cost: $100–$300.
Success Rate: High (>95%) if done correctly.
Secondary Risk if Failed: A poor splice creates a high-resistance joint, leading to heat buildup or a recurring short. This can melt insulation and cause more damage.
Component Replacement (e.g., blower motor):
DIY Cost: $50–$200 (part cost).
Shop Cost: $300–$600.
Success Rate: Very High, provided the diagnosis correctly identified the component as faulty.
Secondary Risk if Failed: Low, unless the underlying mechanical issue (like a binding mechanism) wasn’t addressed, which will just kill the new part.
Professional Harness Diagnostics/Repair:
DIY Cost: Not really applicable, as specialized tools and knowledge are required.
Shop Cost: $500–$1500+. This can climb quickly depending on how deep the fault is.
Success Rate: High.
Secondary Risk if Failed: Misdiagnosis can lead to repeated labor charges; an incomplete repair may leave latent faults that come back to haunt you.
ECU or BCM Replacement:
DIY Cost: $300–$1000+ (part cost).
Shop Cost: $500–$2000+ (including programming, which is often mandatory).
Success Rate: Very High.
Secondary Risk if Failed: Incorrect programming, mismatched software, or an undiagnosed wiring fault can damage the new unit, turning a costly repair into an even costlier one.
The hard reality is this: if the repair involves deep harness work or a major control module, and the total cost approaches half the car’s market value, it’s worth asking whether the fix makes sense. I’ve seen people spend $1,200 replacing a BCM and harness on a $3,000 car—technically possible, but economically questionable. Factor in the downtime, the frustration, and the risk of secondary failures, and sometimes the smartest move is cutting your losses and putting that money towards a more reliable vehicle. It’s tough to hear, but it’s the truth.
Prevention: Keep Those Fuses From Blowing Again
Most hard shorts are preventable. The biggest cause I see? Poor routing. Any time you run new wires—whether it’s for an aftermarket stereo, trailer lights, or auxiliary lamps—you absolutely have to use grommets where wires pass through metal, use split loom to protect them, and secure them away from sharp edges, excessive heat, and any moving parts. I always recommend adhesive-lined heat shrink for any splice, even factory ones if I’m repairing them. It’s a small step that prevents moisture ingress and insulation breakdown down the road, saving you headaches later.
And don’t ignore early warnings. A flickering light, a window that hesitates, or a fuse that blows once then works again—that’s not random. That’s an intermittent fault evolving into a full failure. Investigate it early, before it leaves you stranded or causes more damage. For testing, always use a fused jumper wire or an in-line circuit breaker. It resets automatically and lets you safely power the circuit without blowing a dozen fuses during diagnosis.
Finally, understand your vehicle’s electrical layout. Know where the main power distribution box is, how to read a fuse box diagram, and what each circuit powers. Familiarity with Ohm’s Law helps too—voltage divided by resistance equals current. Lower resistance (like in a short) means higher current, which trips that overcurrent protection. This isn’t just theory; it’s the foundation of diagnosing why your fuse keeps blowing.
