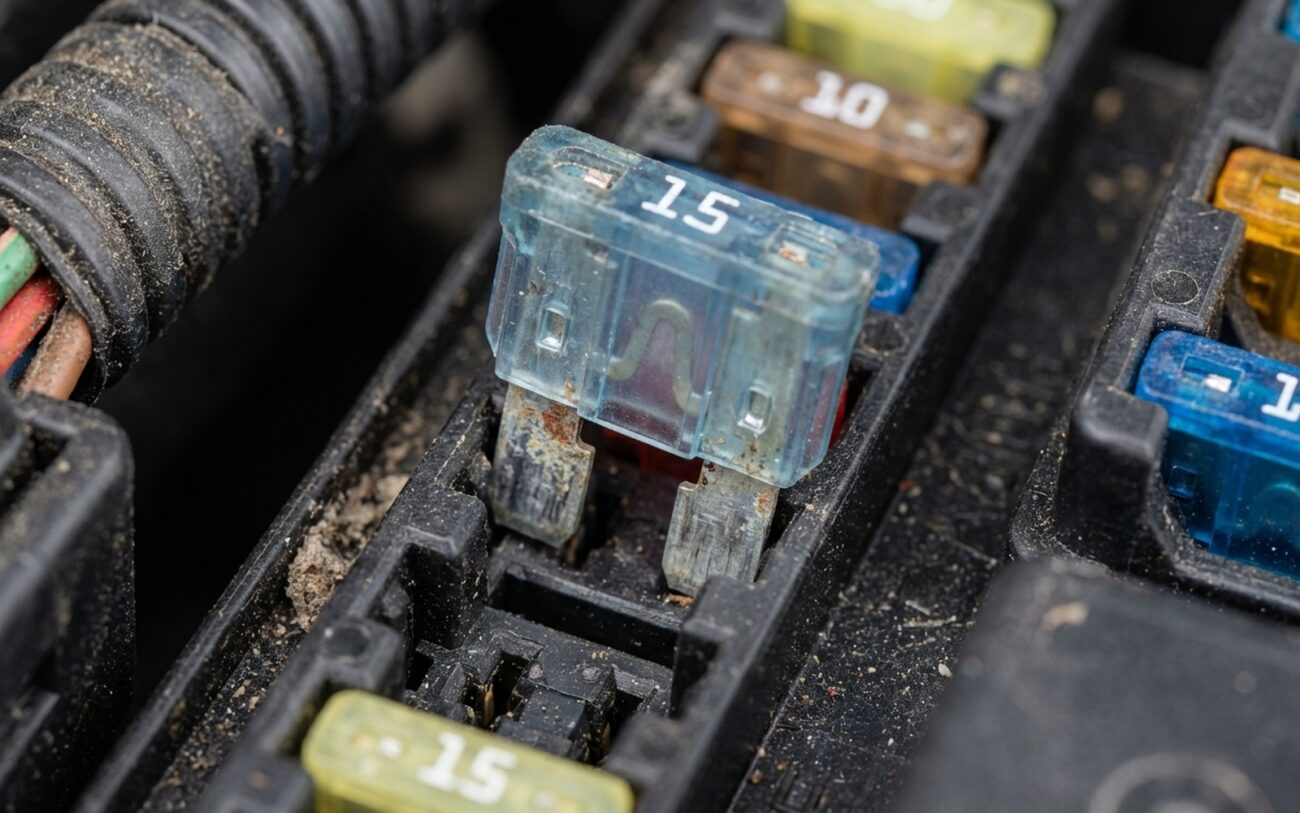
Electrical Gremlins? It’s Probably Not a Ghost, It’s a Loose Fuse.
Look, after 25 years turning wrenches, I’ve seen my share of “ghost in the machine” electrical problems. Windows that quit, radios that cut out, blower fans that die mid-blast. Most folks immediately blame the component itself, or maybe a bad switch. But what I’ve found, more often than not, is the real culprit is something far simpler and often overlooked: a loose fuse.
A fuse isn’t just there to blow when there’s an overload. It’s a critical connection point. If it’s not seated properly, or if the terminals in the fuse box are spread, you get what we call a high-resistance connection. This isn’t a dead short, and it’s not an open circuit (yet). It’s a partial connection that can mimic just about any electrical failure you can imagine, from a dying motor to a faulty module.
Delta: 145mV
The dead giveaway for a loose fuse? Intermittent operation, especially when it’s triggered by vibration or temperature changes. You hit a pothole, and suddenly the radio comes back on. You tap the dash, and the power window decides to work again. That’s not magic; it’s just basic physics. When that fuse isn’t making full, solid contact, the circuit breaks under movement or thermal stress. Think about it: engine bay temperatures swing wildly. Metal expands and contracts at different rates, and that tiny gap in the fuse holder opens and closes, playing havoc with your electrical system. It’s like a flickering light bulb that only works if you jiggle it – the power’s there, but the bridge is broken.
How I Confirm It’s the Fuse, Not Something Else
Before you go tearing into the fuse block, it’s always smart to rule out other common issues. A blower motor with worn brushes can act exactly the same way. A corroded ground strap or a wire that’s chafed and intermittently shorting out will also fool you. The key here is isolating the fault. You need to be sure the problem is right at the fuse interface, not further down the line in the circuit.
| What You See (Symptom) | Why I Suspect the Fuse/Holder | Other Things That Can Fool You | My Go-To Test |
|---|---|---|---|
| A single electrical component acts up intermittently (e.g., radio cuts out, window stops mid-roll). | The fuse blade isn’t making good contact with the terminal, maybe due to a loose fit or some corrosion. | A failing motor, a bad ground connection, or damaged wiring further down the circuit. |
Perform a voltage drop test across the fuse while the circuit is under load. Anything over 0.1V DC tells me there’s a problem right there. |
| The device starts working again after you wiggle the fuse or tap the fuse box. | This is classic. It means the fuse is physically loose or there’s contamination (dirt, corrosion) preventing consistent contact in the holder. | A loose connector at the component itself, a cracked solder joint inside a module, or even an internal relay starting to fail. |
With the circuit active, gently twist or lift the fuse with a plastic pick. If the device flickers or cuts out, you’ve found your spot. |
| You notice localized heat, discoloration, or even melting around a specific fuse. | That’s a definite sign of a high-resistance connection generating heat right at the terminal. The current can’t flow easily, so it turns into heat. | A downstream short circuit that’s drawing too much current (though usually the fuse would blow), or a poor splice in the power feed wire. |
Check the current draw on that circuit with a clamp meter. Also, pull the fuse and inspect the blades for isolated pitting or burn marks. |
Why Fuse Connections Go Bad: The Root Causes
So, why does this happen? It’s rarely just random. Most of these failures come down to one of three root causes, all centered on the fuse and its holder: mechanical fatigue, corrosion, or physical damage.
Important Distinction:
Remember, a blown fuse element means the circuit did its job and interrupted an overcurrent. A loose connection means the fuse isn’t doing anything because it can’t make proper contact. These are completely different failures, and you diagnose them differently.
First, let’s talk about the terminals themselves. That small female clip inside the fuse box is essentially a spring. Over years of thermal cycling – especially in engine bays that can hit well over 100°C (212°F) – that metal fatigues. It loses its spring tension, and the grip on the fuse blade weakens. It’s just like a worn-out spring in anything else.
Corrosion is the second big culprit. I see a lot of galvanic corrosion, which happens when dissimilar metals meet. Imagine a tin-plated fuse blade going into a nickel or copper alloy terminal. Add some moisture and time, and you’ve got a recipe for resistance. You’ll often see a white or green powdery residue.
And finally, physical damage. This is more common than you’d think. Someone tries to pull a stubborn fuse with pliers or a screwdriver, and they accidentally spread the terminal wider. Or maybe they force the wrong size fuse in. Once that terminal is spread, it’s never going to hold a fuse correctly again.
My Approach to Fixing a Loose Fuse
Safety First, Always.
Before you touch anything in a fuse box, disconnect the battery. If you’re working on an engine bay fuse box that shows visible signs of melting or serious heat damage, this might be beyond a DIY job. Those often require specialized terminal extractors and professional attention.
Clean and Reseat the Fuse
Adjust the Terminal Pro Tip
Fuse Box Replacement
How I Make Sure the Repair Actually Worked (No Guesswork)
Don’t just plug everything back in and call it a day. You need to test your repair under real-world conditions. After you’ve cleaned or adjusted a terminal, power up that circuit under full load. If it’s a blower motor, crank it to max. If it’s a window, run it up and down a few times. Let it run for at least 10-15 minutes, or even take the vehicle for a short drive if it’s safe to do so.
My Validation Checklist
-
Recheck the voltage drop across the fuse: it absolutely needs to be under 0.1 volts DC. If it’s higher, you still have resistance.
-
If it’s an intermittent issue, use the Min/Max function on your multimeter during a test drive, especially over rough roads. This will catch any momentary voltage drops.
-
Scan the fuse box with an infrared thermometer. Hot spots are a dead giveaway for hidden resistance that you can’t see.
-
Perform a physical stress test: gently wiggle the fuse and lightly tap the fuse box while the device is operating. If it cuts out, you’re not done yet.
What’s This Going to Cost Me? Is It Worth the DIY?
| Repair Type | DIY Cost (Approx.) | Shop Cost (Approx.) | My Success Rate | Secondary Risk |
|---|---|---|---|---|
| Clean/Reseat Fuse | <$10 (for cleaner/brush) | ~$50 (diagnosis + labor) | 90% (for simple cases) | Minimal; if it fails, you just move to the next step. |
| Terminal Adjustment | $20–$50 (for picks/tools) | $150–$300 (diagnosis + labor) | 95% (if done carefully) | Improper adjustment can spread the terminal further or cause a short. |
| Fuse Box Replacement | $200–$600 (part cost) | $500–$1000+ (part + labor + programming) | 100% (if done correctly) | Incorrect programming or wiring can lead to widespread system failures. |
Stopping the Problem Before It Starts
Proactive Maintenance
During routine maintenance, I always recommend taking 30 seconds to just press each fuse down firmly with your thumb. It’s a quick check that can prevent a headache. And this is a big one: always use OEM-spec fuses. I’ve seen countless cheap aftermarket fuses with thinner plating or undersized blades that just don’t maintain proper contact. They’re not worth the few cents you save.
I see this misdiagnosed constantly in my shop. Other technicians, even experienced ones, will replace motors, switches, or entire modules without ever taking a good look at the power source. But the fuse is the very first link in that electrical chain. Treat it with the respect it deserves, and you’ll spend a lot less time chasing those imaginary ghosts.
