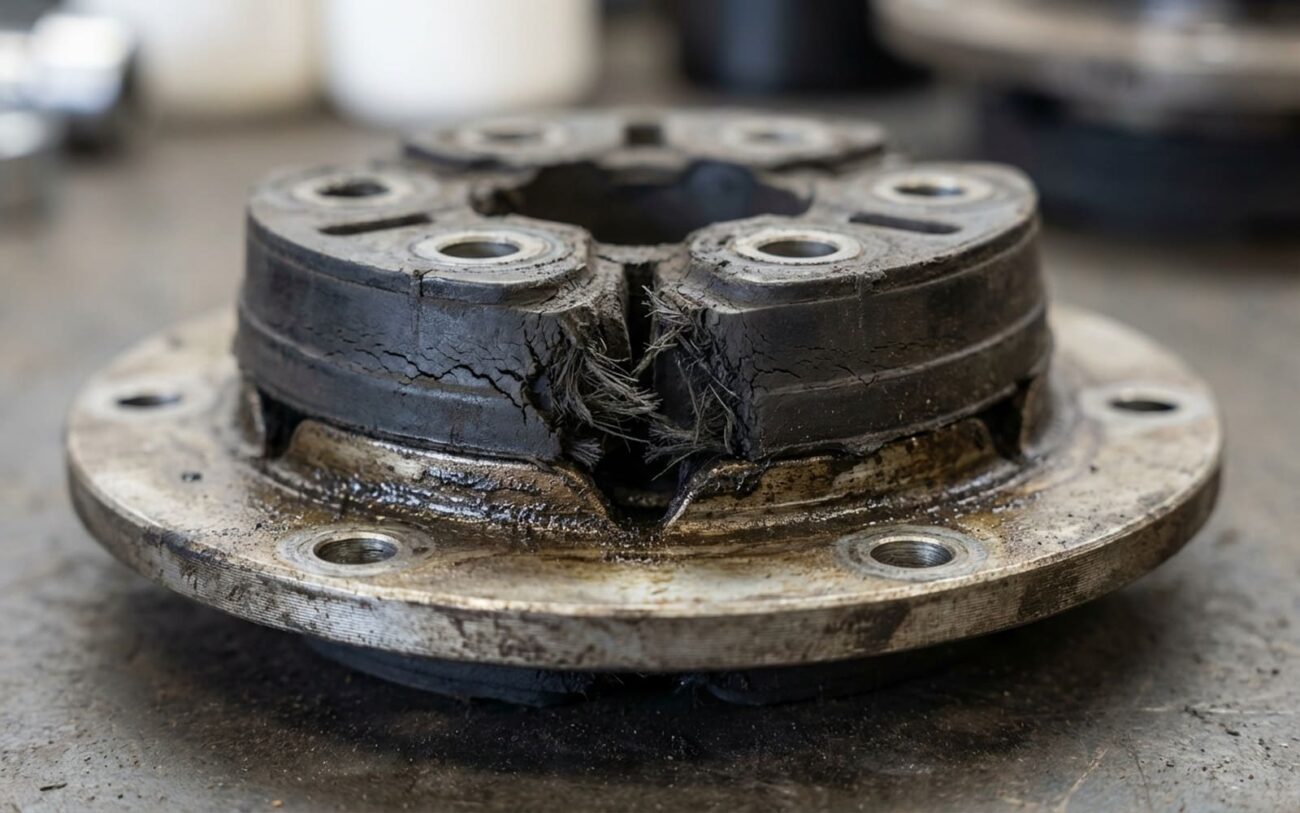
Alright, let’s talk about that nagging vibration you’re feeling. I’ve been turning wrenches for over 25 years, and when a customer comes in with a “shake” at highway speeds, especially in an AWD or 4WD vehicle, my ears perk up. This isn’t just a simple tire balance issue; often, it’s something deeper, something in the driveline. And if you catch it early, you can save yourself a ton of grief and cash.
That Highway Shake: What It’s Telling Me
When you’re cruising along, say between 60 and 80 mph, and you feel a vibration growing through the seat, the floor, or even the center console – that’s your first big clue. This isn’t the light shimmy you get from a slightly unbalanced tire; those usually hit a peak at 55-65 mph and sometimes smooth out above that. This is a deeper, more rhythmic thrum. It often comes with a low-frequency hum that feels tied directly to your road speed, not the engine’s RPM.
Here’s how I confirm that initial hunch: If I downshift, and the engine revs climb but the rhythm or frequency of that vibration doesn’t change, then I know the problem isn’t in the engine or the transmission. It’s further down the line – in the driveshafts, differentials, or, yes, the transfer case.
Now, pay attention to how it reacts to load. Does that vibration get worse when you gently press the accelerator to maintain speed on a slight incline? Does it fade or disappear when you lift off the throttle and just coast? That load-dependent behavior is a dead giveaway for internal driveline wear, often in the center differential or the transfer case itself. You’re feeling mechanical backlash – worn planetary gears, degraded clutch packs, or loose bearings that only really show their slop when torque is applied. It’s the difference between a tight, precise gear mesh and one that’s developed play over time, knocking slightly under pressure.
And then there’s the silent killer: a sudden, unexplained loss of all-wheel drive. You might not get a warning light right away, but if the car suddenly feels like it’s only driving two wheels, the transfer case’s internal clutch or pump might be overheating and cooking itself. That’s why early diagnosis, even without a clear warning light, is so important.
My Approach to Pinpointing the Problem
Okay, so you’ve got a vibration. Now, how do we know it’s really the transfer case and not something simpler, like a bad tire or a worn U-joint? I’ve seen too many guys throw expensive parts at this problem without proper diagnosis. Here’s the logical flow I use in my shop to isolate the issue:
First, rule out the easy stuff. A simple tire imbalance or an out-of-round tire usually shows up first in the steering wheel and tends to be speed-specific, often smoothing out at higher speeds. A driveline vibration, especially from the transfer case or center differential, is felt more in the chassis and often persists or worsens across a broader speed range, especially under load. If you’ve got mismatched tire diameters (even slightly), that can cause driveline wind-up and mimic a transfer case issue, so check those tire sizes and pressures carefully.
The key is isolating the rotating components. Here’s a quick breakdown of how I differentiate transfer case issues from common mimics, along with the definitive tests I rely on:
| Symptom | Likely in Transfer Case/Center Diff | Common External Mimics | Definitive Test to Confirm Source |
|---|---|---|---|
| Vibration at highway speed (60–80 mph) | Worn center differential planetary gears or bearings; unbalanced or failing active clutch pack in electronically controlled AWD systems. | Unbalanced or bent driveshaft; driveshaft with worn U-joints or center support bearing; out-of-round tires or wheel runout. |
Run vehicle on a lift, in gear, at the problem speed. Shift to NEUTRAL. If vibration persists, the source is driveline. Disconnect driveshafts one at a time (front then rear) to isolate. Safety critical: Ensure proper lift and wheel chocks. |
| Binding or clunking during slow, tight turns | Failed or seized center differential (e.g., Torsen, viscous coupling, or clutch-based); incorrect fluid causing friction issues. | Worn outer CV joints; failing wheel bearings; mismatched tire diameters causing driveline wind-up. |
Measure tire circumference (max 3/8″ difference between any two tires). Perform slow, tight figure-eights in an empty lot. Use an IR thermometer on the transfer case housing; if it’s >50°F above ambient after a minute or two, you’ve got internal friction. |
What Actually Breaks Inside (and What Doesn’t)
Look, these transfer cases and center differentials don’t just fail for no reason. When they do, it usually boils down to one of three things: a factory defect, a lubrication issue, or just plain old wear and tear that’s been accelerated by neglect. But let’s be clear: a bad CV joint, a worn driveshaft U-joint, or a collapsed center support bearing isn’t a transfer case problem—it’s a driveshaft issue. Likewise, a noisy rear differential is just that—a rear differential issue. Diagnosing correctly means tracing the vibration to its exact origin, not assuming the worst.
I’ve seen my share of material defects. For instance, some BMW xDrive units from the mid-2000s had input gears that weren’t properly heat-treated. They’d pit prematurely and get noisy. Or you’ll find porosity in the aluminum housing – tiny casting voids that cause slow fluid leaks, making you think a seal has failed. And if the bearing bores were misaligned during manufacturing, no amount of perfect maintenance will save it. These are factory screw-ups, not something you did.
Lubrication is another huge factor. Modern transfer cases use hypoid gears and multi-plate clutches that rely on very specific fluid film strength and friction modifiers. Using the wrong fluid – even one that claims to be “compatible” – can lead to clutch slippage, accelerated wear, or even electrolytic corrosion in aluminum housings. I’ve seen it happen. Over time, these hygroscopic fluids absorb moisture, degrading performance and promoting internal rust. Sometimes, it’s just a poor oiling gallery design or clogged passages starving critical bearings, especially in high-torque applications.
And then there’s wear. Planetary gear sets can wear their bores in the housing, creating play that translates directly into vibration. In active AWD systems, the internal oil pump that pressurizes the clutch pack can weaken or fail. When that happens, you get delayed or incomplete engagement. I’ve seen plenty of these misdiagnosed as a “bad AWD system” when the real culprit was just a failing pump.
Your Options: Repair, Rebuild, or Replace?
A Note on Safety & Complexity
Once you’ve confirmed the issue is in the transfer case or center differential, your options depend entirely on the severity and location of the damage. There’s no magic bullet here – just realistic choices based on the failure mode. And let me tell you, most of these jobs are not for the faint of heart or the weekend warrior.
External Porosity or Minor Housing Leak Professional Only
Internal Mechanical Failure (Rebuild) Professional Only
Severe Internal Damage (Replacement) Non-Repairable → Replace
Fluid Refresh for Early Clutch Chatter
Verifying the Fix: Don’t Just Assume It’s Done
This is where a lot of guys mess up. You can’t just bolt it back together and call it a day. Repairs are only as good as the validation that follows. Each repair type needs a specific verification process to ensure you actually fixed the problem and didn’t create new ones.
For an external epoxy repair: Add UV dye to the new fluid. Then, drive the vehicle through at least three full thermal cycles – cold start to full operating temperature, let it cool, then repeat. After that, inspect the repaired area with a UV light in a dark space. Any fluorescence means the repair isn’t holding, and that leak will be back.
For an internal overhaul: A simple road test isn’t enough. You need a loaded drive, preferably on a chassis dyno, to simulate highway loads. Listen for any new noises. If you have access to a vibration analysis tool, use it. For active systems, use a scan tool to perform a clutch actuation test. Confirm that engagement pressures build correctly and that adaptation values fall within the normal range. My goal is always at least an 80% reduction in vibration amplitude at the problem speed, compared to the pre-repair data.
For a full unit replacement: The electronic side is just as critical as the mechanical. Run a full system scan to confirm no fault codes are present and that the transfer case status reads “OK.” Complete the basic settings or adaptation procedure using a factory-level scan tool – this is non-negotiable on modern vehicles. Finally, check the fluid level using the level plug (not just the fill plug) after warming the vehicle to the correct temperature. Overfilling or underfilling can cause performance issues or even damage the new unit.
The Hard Truth: Cost vs. The Car’s Value
Let’s talk money, because that’s usually where the rubber meets the road with these repairs. The cost can quickly exceed the value of older vehicles, especially when you factor in labor. Here’s a realistic breakdown of what you might face:
| Repair Type | DIY Cost (Parts/Tools) | Shop Cost | Success Rate | Secondary Risk if Failed |
|---|---|---|---|---|
| External Porosity Repair | $100 (epoxy, fluid, UV dye) | $500–$800 | 85% | Residual leak leads to fluid loss and internal damage. |
| Internal Overhaul | $800–$1,500 | $2,500–$4,000 | 70–90% | Improper assembly can cause catastrophic failure. |
| Unit Replacement | $3,000–$6,000 | $4,000–$7,000 | 98% | Programming error can disable AWD or trigger emergency mode. |
The 50% Rule
Here’s a rule I use in the shop, and I tell my customers this all the time: if the repair estimate exceeds 50% of your car’s current fair-market value, you need to seriously consider whether it’s worth it. Throwing $5,000 into a $9,000 car is a financial decision, not just a mechanical one. Sometimes, selling or trading it as-is is the smarter move.
How to Prevent This Headache in the First Place
You want to avoid this whole mess? Prevention is always cheaper than repair, plain and simple. With transfer cases and center differentials, two things make the biggest difference: proper fluid maintenance and paying attention to your vehicle.
My Maintenance Checklist
-
Stick to the OEM-recommended fluid change interval. Better yet, if you drive hard or tow, cut that interval in half. Fluids like BMW’s TF-0870 are hygroscopic – they absorb moisture and degrade even if the car isn’t driven much.
-
Don’t ever assume “it’s sealed for life.” That myth has killed more transfer cases than heat or heavy loads combined. Change it with the correct fluid, on schedule. It’s cheap insurance.
-
Add an annual visual inspection to your routine. Get under there and look for fresh seepage at output seals, mounting flanges, or gasket seams. A slight damp spot can signal the start of a leak, and catching it early saves you from running dry.
-
Stay in tune with how your car feels. That faint vibration at 65 mph during a light cruise? That’s often the very first sign of internal wear. Don’t wait for it to get worse, because it will.
