Alright, let’s talk transfer cases. After 25 years under the hood, I’ve seen just about every way these things can fail, and trust me, they rarely go out without a fight. If your 4WD or AWD rig is acting up, making strange noises, or just not engaging like it used to, there’s a good chance your transfer case chain or coupling is trying to tell you something. This isn’t just about replacing parts; it’s about understanding the symptoms, diagnosing it right, and getting it fixed without throwing money at the wrong problem.
What a Failing Transfer Case Sounds and Feels Like
Your transfer case is the heart of your vehicle’s four-wheel drive system, splitting power between the front and rear axles. Inside, it’s either a heavy-duty chain driving sprockets or a sophisticated coupling—think multi-plate clutches, viscous units, or Haldex systems—that gets the front wheels involved when needed. When these internal bits start to wear out, they don’t exactly keep quiet. They give you some pretty clear mechanical warnings, if you know what to pay attention to.
The most common complaint I hear in the shop is a loud, sharp “clunk” or “bang” when 4WD engages or disengages. This isn’t some gentle thud; it’s a jolt you feel right through the chassis. What’s happening? Worn chain links or damaged coupling splines have developed too much slack. When the system kicks in, that slack suddenly disappears with a violent impact. I’ve seen this countless times, and it’s never “normal operation.”
Another big one is a rising whirring or gear whine. You’ll notice it increases with speed, but here’s the kicker: it only shows up when 4WD or AWD is active. If you’ve got a part-time system, this noise will be there in 4HI or 4LO but vanish when you switch back to 2WD. That’s usually a stretched chain trying to run over worn sprockets. As the chain elongates from wear, it doesn’t seat properly on the sprocket teeth anymore, leading to slippage and vibration. You get this high-frequency gear noise right from the center of the vehicle, where the transfer case lives.
Sometimes, though, the failure is silent, but just as serious: an intermittent or complete loss of 4WD engagement, often with no warning lights. You twist the dial or press the button, and nothing happens. Your truck drives like it’s stuck in FWD or RWD only. This usually points to a degraded clutch pack in an electronically controlled coupling, common in Haldex or active all-wheel drive systems. The friction plates wear thin, glaze over from heat, or the internal gerotor pump fails, meaning there’s not enough pressure to apply the clutch. No pressure, no torque transfer, simple as that.
Finally, you might feel a rhythmic shudder or vibration through the floor or seat, especially under acceleration in 4WD. This “transfer case shudder” comes from inconsistent chain movement or slipping coupling plates, sending torque pulses through the driveline. It can feel a lot like a driveshaft imbalance, but it’s directly tied to 4WD use. If you ignore these symptoms—especially that clunk or vibration—you’re asking for a catastrophic failure. A severely worn chain can jump a sprocket and tear up the case. A slipping coupling can overheat, weld itself together, or seize the output shafts. At that point, you’re looking at replacement, not a repair.
Is It Really the Transfer Case? My Diagnostic Approach
Here’s the reality: a lot of these symptoms can easily be mistaken for problems elsewhere in the drivetrain. A clunk could be a bad U-joint. A whine might be a worn differential bearing. Before you even think about pulling the transfer case, you’ve got to isolate the source. Jumping to conclusions just wastes time and money. Here’s how I typically approach it in the shop:
Diagnosing the “Clunk” on Engagement
This is the classic symptom, but it has plenty of imposters: worn U-joints, loose axle shafts, or excessive backlash in the front or rear differentials. To really nail it down, I put the vehicle up on a lift or sturdy jack stands. With the transfer case in neutral, I manually rotate the front and rear output shafts. If I see more than 10–15 degrees of rotational lash, that’s a strong indicator of internal wear in the transfer case. Then, I’ll use a mechanic’s stethoscope or electronic chassis ears to pinpoint the source of the clunk during electronic engagement. You can often hear the exact component making the noise.
Pinpointing the Whirring or Gear Whine in 4WD
This whine could be a failing front differential pinion bearing or a worn center support bearing on the driveshaft. My go-to test is a road test on a lift, if it’s safe to do so. If the noise only appears when 4WD is engaged and completely disappears in 2WD, the problem is almost certainly inside the transfer case or somewhere along the front output path. Electronic chassis ears are invaluable here; I’ll compare sound levels at the transfer case versus the front differential to confirm the source.
Troubleshooting Loss of 4WD Function
This one can be tricky because it can be an electrical issue. Common mimics include a faulty shift actuator, an electrical fault in the control module, low fluid, or even bad wheel speed sensors. I always start with a professional scan tool. I’ll command 4WD engagement and monitor the actuator position, current draw, and system pressure (if the vehicle provides that data). I’ll also check the fluid level and pull the magnetic drain plug to look for metal debris. If the scan tool shows the actuator is doing its job but there’s no pressure rise when commanded, that often confirms a failed internal pump or a worn clutch pack.
It’s worth remembering that electrical issues can definitely mimic mechanical failure. For example, a failing DC-DC converter can cause all sorts of erratic behavior in control modules, especially in hybrids and EVs. But in traditional 4WD systems, if your scan tool shows proper actuator operation and all the electrical signals are good, yet you still have no torque transfer, the fault is almost certainly internal to the transfer case itself.
Why These Parts Fail: The Root Causes
These failures aren’t random. Mechanical wear follows predictable patterns, especially when components are stressed or maintenance is ignored. Understanding the root cause helps you prevent it and fix it right the first time.
Chain Stretch and Sprocket Wear
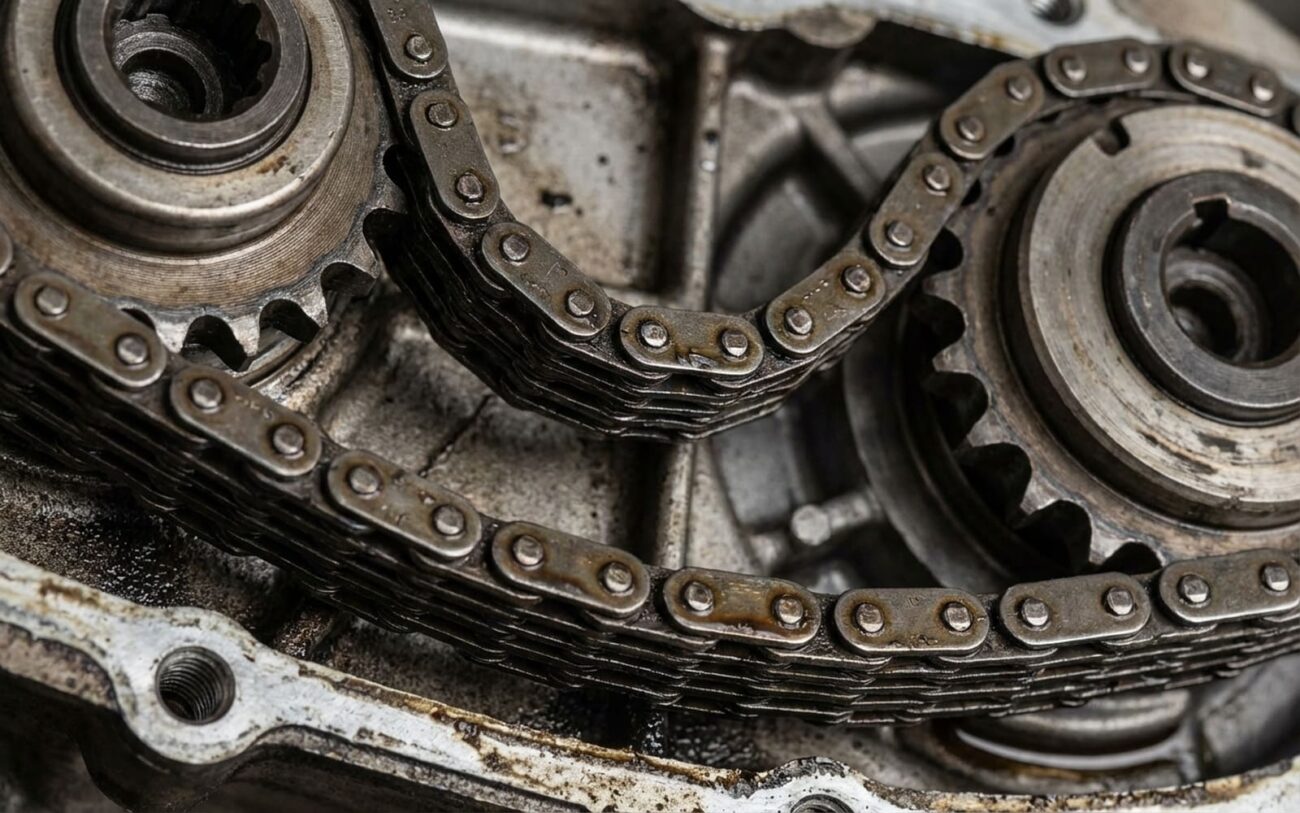
In a chain-driven transfer case, the main culprit is chain stretch. Over time, the pins and bushings in the chain links wear down. This isn’t like stretching a rubber band; it’s metal-on-metal wear that increases the effective length, or “pitch,” between the links. As the chain gets longer, it rides higher on the sprocket teeth, leading to impact loading and accelerated wear on both the chain and the sprockets. I’ve torn apart units where the sprockets were polished and had a distinct “hooked” appearance from years of chain slap. They wear together, and once it starts, it only gets worse.
Coupling Clutch Pack Failure
Coupling failures vary by design. In electronically controlled systems, like those in many modern AWD SUVs, the usual failure point is the clutch pack. The friction material wears down or glazes over from heat, especially if the fluid breaks down or gets contaminated. Repeated high-torque engagements—think heavy towing, off-roading, or even just aggressive driving—really compound the wear. I’ve seen steel plates warp from overheating, which drastically reduces the clamping efficiency.
Gerotor Pump Issues
Another common failure in hydraulic coupling systems is the gerotor pump. This small internal pump generates the pressure needed to engage the clutch pack. When its rotor or housing wears—often due to dirty fluid or prolonged use—the pressure drops, and the coupling can’t fully engage. This leads to slippage, overheating, and eventually, a complete failure.
Spline Wear
And don’t overlook spline wear. The internal splines that connect the coupling or chain drive to the output shafts can wear down from poor lubrication or torsional shock. This creates rotational lash, which is what often shows up as that “clunk” during engagement. In extreme cases, the splines strip out completely. When that happens, you’re usually looking at replacing the entire shaft or the whole unit, because a repair isn’t really feasible.
Technician’s Note:
Manufacturers are well aware of these weak points. For instance, GM issued service information for certain GMT900 trucks (2007–2013) specifically citing premature chain wear due to inadequate lubrication of the chain guides. They responded with revised fluid specs and updated guide kits. This tells you something important: design improvements exist, and using the correct fluid and following service procedures can make a huge difference in longevity.
Your Repair Options: From Simple to Severe
Your repair path depends entirely on what’s broken and how far the damage has gone. But let me be clear about one thing:
Professional Territory Only
Be advised: nearly all internal transfer case repairs are professional-level jobs. They demand precision, cleanliness, and the right specialized tools. Don’t try this at home unless you’ve got experience rebuilding transmissions or other complex driveline components.
External Repairs: Actuators and Motors
If the issue is purely external—like a failed shift actuator or motor—the fix is usually manageable. You’ll need a quality scan tool to recalibrate the new unit, a good Torx bit set, and an inch-pound torque wrench. Those mounting bolts are often torqued to around 89 in-lbs (about 10 Nm). Overtighten them, and you risk cracking the aluminum housing—a mistake I’ve seen more than once, and it turns a simple job into a nightmare.
Internal Repairs: Chains, Sprockets, and Clutch Packs
For internal issues like a worn chain, damaged sprockets, or degraded clutch packs, the transfer case has to come out and be completely disassembled. This is a major job. You’ll need a transmission jack, a holding fixture, seal drivers, and an OEM repair kit with updated components. Torque specs are absolutely critical: case half bolts might be 35 ft-lbs, while an output shaft nut could require 185 ft-lbs plus an additional 60-degree angle turn. And always, always use only the sealant specified by the manufacturer—generic RTV can clog oil passages and cause early failure.
When Replacement is the Only Option
If the chain has jumped and cracked the case, or the coupling has seized solid, the unit is not realistically repairable. At that point, replacement with a new or high-quality remanufactured transfer case is your only viable option. Trying to patch up a severely damaged case is just throwing good money after bad.
Making Sure the Fix Actually Worked
Just replacing parts isn’t enough. You have to verify the repair under real-world conditions. A transfer case that seems fine on a hoist might fail the minute you put it under load. Here’s how I confirm a job’s done right:
For Chain and Sprocket Replacements
The key indicators are simple: no abnormal noise or vibration during 4WD engagement or operation. I always test it under load—ideally on gravel or loose dirt where the system actually has to work. After a good 50-mile drive to get everything up to full operating temperature, I’ll put it back on the lift and inspect for leaks at all resealed surfaces. Even a small seep can lead to big problems down the road, so I’m looking for bone dry.
For Clutch Pack or Coupling Repairs
You absolutely need a scan tool for this. The system must show that the commanded and actual coupling positions match. Any discrepancy suggests incomplete engagement or calibration issues. Then, I’ll perform a traction test—either on a dyno or a controlled, low-traction surface—to confirm full torque transfer. No slippage, no warning lights, and the vehicle performs as expected.
Useful Tools for Final Validation
A professional scan tool is non-negotiable. Chassis ears or a good mechanic’s stethoscope are great for picking up any lingering noises. And an infrared thermometer can be useful to check for hot spots on the case. A properly functioning transfer case should run warm, but never excessively hot. Excessive heat suggests internal drag or incomplete lubrication, which means something isn’t quite right.
What This Is Going to Cost and How to Decide
Let’s be realistic—this isn’t a cheap repair. Costs vary significantly by vehicle, local labor rates, and whether you’re repairing components or replacing the whole unit. Here’s a rough idea based on what I typically see:
Typical Cost Estimates:
- Chain & Sprocket Kit Replacement:
- DIY (Parts Only): $300–$600
- Shop Cost (Parts & Labor): $1,200–$2,500
- Success Rate: Usually around 95% if done correctly.
- Risk if Failed: Catastrophic chain failure, case damage, driveline seizure.
- Coupling Clutch Pack Replacement:
- DIY (Parts Only): $400–$800
- Shop Cost (Parts & Labor): $1,500–$2,200
- Success Rate: Around 90%.
- Risk if Failed: Overheating, complete 4WD loss, damage to front differential or driveshaft.
Here’s my advice, and it’s something I tell customers all the time: if the repair quote from a trusted shop exceeds 50% of your vehicle’s current value as a reliable daily driver, stop and think hard. At that point, investing in a quality remanufactured transfer case may be the smarter move. A proper reman unit often comes with updated components, better seals, and a solid warranty. It can be far more reliable than trying to rebuild an old, worn housing—especially if the case itself is already fatigued or slightly warped from years of stress.
How to Prevent This (Or Catch It Early)
The best repair is the one you never need. And the single most effective preventive step? Service the transfer case fluid on schedule. I can’t stress this enough. Most manufacturers specify a “severe service” interval for transfer case fluid—often every 30,000 to 50,000 miles, especially if you tow, off-road, or do frequent stop-and-go driving. Don’t skip it.
Maintenance Tip
Use only the fluid specified in your owner’s manual. Whether it’s a specific ATF, gear oil, or dedicated transfer case fluid, the chemistry matters. The wrong fluid can break down under heat, fail to protect clutch packs, or damage seals. I’ve seen cases where a simple fluid swap with “any gear oil” led to coupling slippage within months. It’s not worth the risk.
For early detection, make a few simple checks part of your routine. Once a year—or with every oil change—check the transfer case fluid level if your vehicle has a dipstick or fill plug. The fluid should be clean, at the correct level, and free of strong burnt odors. A magnetic drain plug with fine metallic “glitter” is normal; metal chunks or sludge mean internal wear has definitely started.
Also, do a seasonal 4WD function check. Find a safe gravel lot or dirt road—somewhere you won’t bind up the driveline on dry pavement. Engage 4WD and drive in a slow circle. Listen for clunks, whines, or any binding sensations—especially during tight turns. AWD binding symptoms like shudder or resistance in turns can signal a seized coupling or viscous unit. Catching a problem early—like a slight whine or minor clunk—can mean the difference between a $150 fluid change and a $2,500 rebuild. Believe me, I’ve seen it happen.
