Alright, let’s talk about these 48-volt belt-driven starter generators, or BSGs. They’re clever pieces of tech, designed to give you that stop-start smoothness and a little extra kick of torque. But when they start to fail, they can really throw you for a loop. After twenty-five years wrenching on everything from classic muscle to the latest hybrids, I can tell you these units usually give clear warnings before they completely check out. The trick is knowing what to look for, because a lot of these symptoms can mimic other electrical gremlins or even just general drivability issues.
Spotting a Failing 48V Generator: My Experience
In my shop, I categorize the signs into two main buckets: electrical headaches and mechanical noises. You’ll often see both, but sometimes one shows up before the other, giving you a head start.
Electrical Red Flags
First up, the electrical side. A check engine light is almost a given, usually with some pretty specific fault codes. The one I see most often is P0D1F – that’s a common one manufacturers use for 48V generator performance issues. You might also get P0D1D, P1E00, or other codes pointing to things like phase current imbalance, rotor position errors, or torque delivery faults. What these really mean is the hybrid control module isn’t seeing what it expects from the generator. It’s like the computer is saying, “Hey, you’re not pulling your weight!”
Beyond the codes, you’ll notice the stop-start system acting up. It might not work at all, or the engine cranks really sluggishly even if your regular 12V battery is strong. When you hit the gas, that electric torque assist might feel weak or just cut out sometimes. And on deceleration, regenerative braking won’t feel as effective; you’ll see less energy going back into that 48V lithium-ion battery. Now, some of these symptoms can feel like general hesitation or power loss, which we’ve all seen before, but in a mild hybrid, the BSG should be high on your suspect list.
Mechanical Warning Sounds
On the mechanical side, noise is usually the dead giveaway. A failing generator bearing will make a high-pitched whine, a grinding sound, or sometimes a low-frequency rumble. It’ll get louder as the engine RPMs climb. It’s easy to mistake this for a bad idler pulley or a tensioner, but if you listen closely with a stethoscope, the sound will be loudest right at the generator itself. The most definitive internal clue I’ve ever found? Metallic glitter. If you manage to inspect the unit and see fine, shiny particles clinging to the rotor or inside the stator housing, that’s bearing material. The generator is literally tearing itself apart from the inside.
Is It Really the 48V Generator? Don’t Guess. Test.
Just because the symptoms scream “48V generator” doesn’t mean it’s actually the culprit. These systems are incredibly interconnected, and I’ve seen more than a few misdiagnoses over the years. Before you condemn a component that costs a small fortune, you absolutely have to rule out simpler, cheaper issues. The key here is isolating the problem with targeted testing. Here’s how I approach it in the shop:
| Symptom I’m Seeing | What It Often Means for the Generator | Common Mimics (Don’t Get Fooled) | My Go-To Test to Pinpoint the Problem |
|---|---|---|---|
| P0D1F / Torque Performance Codes | Worn rotor bearings causing air gap variation, degraded stator winding insulation, failed rotor position sensor. | Faulty Power Electronics Controller (PEC), corroded 3-phase connector, 48V battery with high internal resistance. |
First, disconnect the 48V system (safety first!). Then, perform a stator winding resistance test. You’ll measure resistance between each pair of the three phase terminals. The spec is usually super low, like 0.010–0.100 ohms. If you see a deviation >10% between phases, or an open circuit, you’ve found your internal winding damage. |
| Slow/No Engine Crank via BSG | High internal resistance in stator windings, brush/slip ring wear, or bearing drag. | Low 48V battery state of charge, faulty PEC, high resistance in power cabling. |
This one’s pretty straightforward: conduct a mechanical drag test. Remove the serpentine drive belt completely. Now, try to spin the generator pulley by hand. It should spin smoothly with minimal resistance. If it feels rough, notchy, or binds up, you’re almost certainly looking at a bearing failure. |
| Whining/Grinding Noise | Generator rotor bearing failure, rotor imbalance. | Serpentine belt idler/tensioner bearing, water pump bearing, or even sometimes a power steering pump (if applicable). |
My first move here is always a stethoscope – pinpoint the loudest spot. But the absolute best test? Remove the drive belt entirely and briefly run the engine (just for a minute or two, no longer). If the noise disappears, you know it’s in the accessory drive. If it’s still there, well, then it’s an internal engine noise, and you’re chasing something else. |
| Lack of Torque Assist | Internal stator short reducing magnetic field, damaged permanent magnets on rotor. | Faulty accelerator pedal sensor, wheel speed sensor issue, PEC software glitch, or even a bad 48V battery. |
This requires an OEM-level scanner. You need to command a static torque test. This test will try to make the generator produce a specific amount of torque. Monitor the actual torque output and the DC bus voltage. If the actual torque is off by more than 15% from the commanded value, and your DC bus voltage is stable, then the generator itself is failing to produce the juice. |
The Guts: Why These 48V Generators Give Up the Ghost
These aren’t your grandpa’s alternators. We’re talking high-speed motor-generators, built to recover energy fast and give you a kick of torque when you need it. That means they live a tough life, constantly under extreme thermal, mechanical, and electrical stress. And that stress leads to some pretty predictable failure points.
Mechanical Breakdown
Mechanically, those rotor bearings are usually the weakest link. They’re spinning at up to 20,000 RPM, exposed to brutal engine bay heat cycles. They’re going to wear out. As a bearing degrades, the rotor starts to wobble (we call that runout), which widens the air gap between the rotor and stator. That drops efficiency and creates more vibration. Some designs also use slip rings and brushes for the rotor position sensor, and those wear down too, leading to intermittent signal loss and erratic control. I’ve seen a lot of premature bearing failures on certain Ford EcoBoost mild hybrids, for example, often due to lubrication issues or contamination from the factory. That’s where you get that grinding noise early on.
Electrical Failure
Electrically, the stator windings are constantly battling thermal cycling and voltage spikes from the Power Electronics Controller (PEC). Over time, that insulation breaks down. This is especially true if you have a liquid-cooled unit (common on Mercedes-Benz M256 and Audi BAS systems) and coolant leaks in. Once the insulation fails, you get phase-to-phase or phase-to-ground shorts. The permanent magnets on the rotor can also degrade. If the generator overheats severely, it can exceed the Curie temperature of the magnets, causing partial demagnetization and a permanent loss of power. And, of course, physical damage from bearing debris can chip or crack those magnets, too.
But—and this is absolutely critical—not every 48V system problem is the generator’s fault.
A squealing belt? That’s probably just the belt or tensioner. A dead 48V battery or a failed DC/DC converter? Those are separate components entirely. Software glitches in the hybrid control module can easily mimic hardware faults. I’ve personally seen shops replace expensive $3,000 generators only to find a $40 ground strap was loose. Always verify your diagnosis before you condemn a major component.
Fixing It: What Are Your Options?
This Ain’t a DIY Job for Most Folks. Seriously.
Look, most internal 48V generator repairs demand specialized tools, specific high-voltage safety training, and precision balancing. Trying to work on these units without the right equipment isn’t just risky for the car; it can be dangerous for you. You’re looking at catastrophic mechanical failure or serious electrical shorts if you mess up. Leave this to the pros.
External Electrical Fixes (The Easy Ones)
Internal Mechanical Repair (Bearings, Brushes) Professional Only
Internal Electrical or Catastrophic Failure (Full Replacement) Professional Only
Temporary Signal Fix (The Hail Mary) Last Resort
Did It Actually Work? Verifying the Repair.
Validation is non-negotiable in my shop. You can’t just clear the codes, take a quick spin around the block, and call it a day. The verification process depends entirely on what you fixed.
For those external connector or grounding repairs (Path A), clear all the fault codes and then put the vehicle through a thorough road test. You need a capable scan tool hooked up, monitoring live data: generator torque output, phase currents, and voltage response during both acceleration and regenerative braking. All those values should track within about 5% of the commanded parameters. If they’re fluctuating wildly or not responding correctly, the issue isn’t resolved, and you’re back to square one.
After a bearing or brush replacement (Path B), you’re checking for two things: noise and performance. Use that stethoscope again to confirm the whine or grind is completely gone across the entire RPM range. Then, with your scan tool, check the drag torque during a motored crank, if your system supports it. Also, keep a close eye on the current draw during assist and regen; abnormally high amperage can point to lingering internal resistance or an imbalance, meaning the repair wasn’t perfect.
With a full generator replacement (Path C), you absolutely have to run the full OEM MHEV system functional test. If your scanner supports it (and it should for this kind of work), this guided procedure will walk you through checking stop-start operation, torque assist, regenerative braking, and all the communication between modules. It often includes essential initialization routines. Skipping this step is just asking for poor hybrid function or those annoying recurring faults. Don’t do it.
The Cost Reality: When to Fix, When to Fold.
Let’s be realistic here: 48V generator repairs are not cheap. And the decision to fix shouldn’t be taken lightly. You really need to weigh the cost against your vehicle’s current value and how long you plan to keep it. Here’s a quick rundown of what you’re looking at:
| Repair Type | DIY Cost (Parts Only) | Professional Shop Cost | Typical Success Rate (In My Experience) | Secondary Risk if Repair Fails |
|---|---|---|---|---|
| Connector Cleaning | < $50 | $100 – $200 | 95% | None, assuming no further disassembly was attempted. |
| Bearing/Brush R&R | $200 – $600 | $1,000 – $2,500 | 80% | Catastrophic. An imbalanced rotor can quickly destroy the stator or even damage the PEC. |
| Complete Generator Replacement | $1,500 – $3,500+ | $2,500 – $4,500+ | 98% | Low. The main risk is incorrect installation damaging the PEC or other components. |
Here’s the hard truth I tell every customer who’s looking at a big bill: if the repair cost starts to approach 40% of your car’s current market value, especially on a high-mileage vehicle, you really need to ask yourself if it’s worth it. A new generator is a major investment in a complex system. It might make perfect sense if you absolutely love the car and plan to keep it for years, but it could also be the moment to seriously reconsider. There’s no shame in walking away – but go into that decision with your eyes wide open.
Keeping Trouble Away: Prevention and Early Detection.
The best repair, in my book, is the one you never have to do. While you can’t prevent every factory defect, you can definitely extend the life of your 48V system with some smart, proactive maintenance.
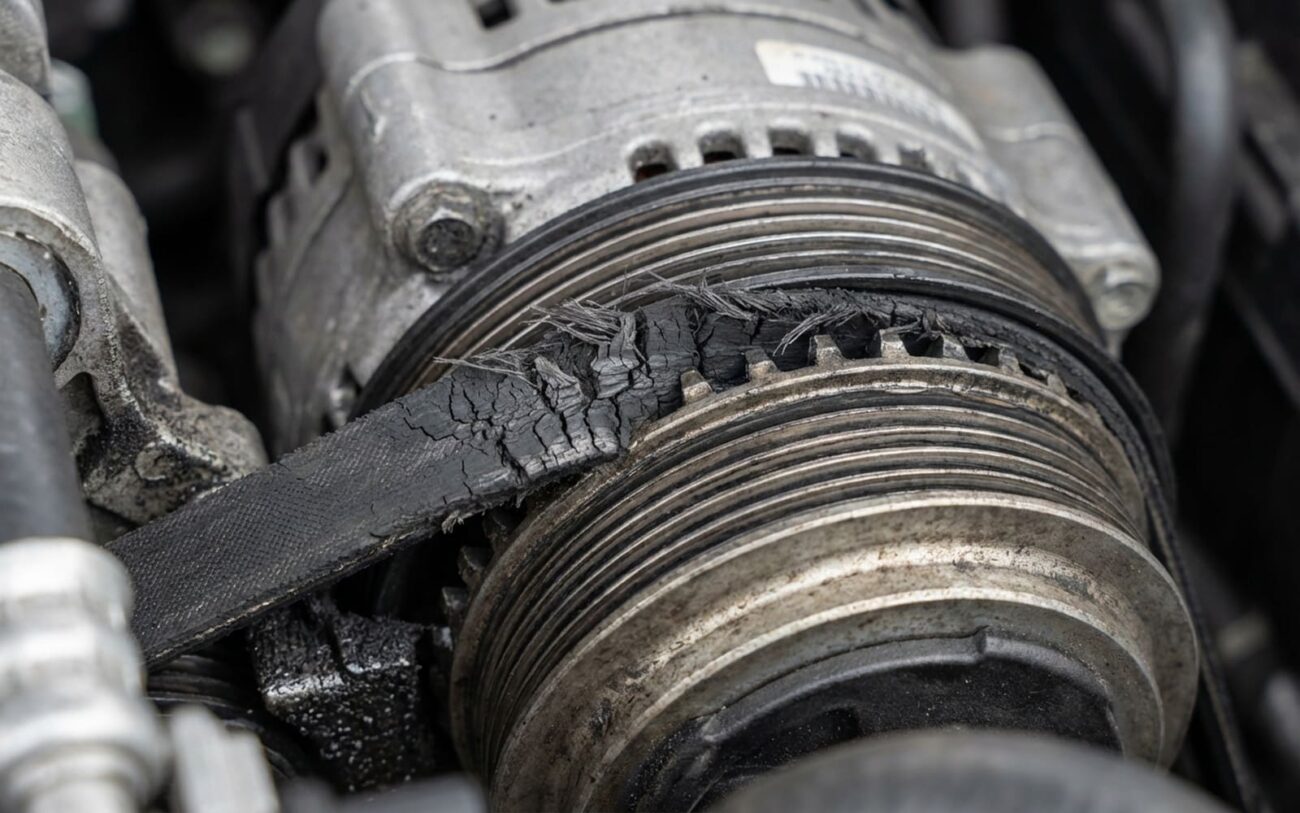
First, service that accessory drive system exactly as recommended. A worn tensioner or a cracked serpentine belt transmits shock loads directly into the BSG’s bearings. Replace both on schedule – don’t wait for them to start making noise. If your generator is liquid-cooled (and many European models are), use only the manufacturer-specified coolant mix. The wrong concentration can cause electrolytic corrosion in internal passages, which leads directly to insulation failure inside the generator. I’ve seen it happen.
My Advice: Proactive Monitoring
Stay ahead of problems with early detection. Many 48V systems will log “soft codes” or pending faults long before they trigger a check engine light. Scanning for these pending faults every few months with an OBD2 tool that can read hybrid modules can catch issues when they’re small. And listen – really listen – to your engine. A new, high-pitched whine at idle, especially when you’re putting an electrical load on it (like turning on the A/C or defroster), is often the very first sign of bearing wear. Don’t ignore it.
