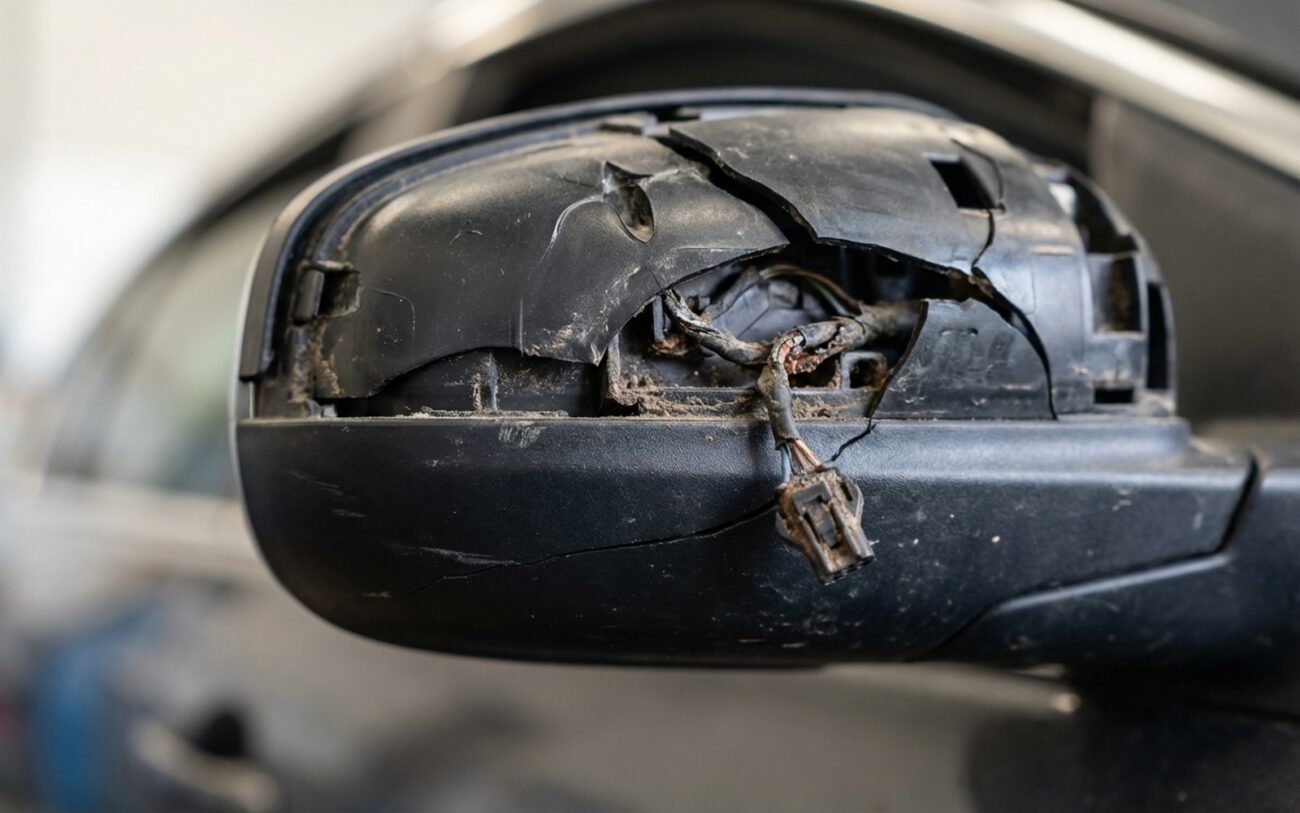
Digital Side Mirrors: How They Work, Why They Fail, and What to Do When They Go Dark
I’ve been turning wrenches for over 25 years. Seen tech come and go. But camera-based mirror systems? That’s one that’s here to stay—on paper, anyway. In practice, they’re still rare outside of high-end EVs and luxury models like the Audi e-tron, Lexus ES, and ID.4. And I’ll tell you why: they’re elegant, efficient, and when they work, they work well. But when they fail? You’re flying blind.
Forget the old-school mirror on a stalk. These systems replace that with a sealed camera pod—smaller, sleeker, and aero-optimized. The video feed goes straight to a screen mounted near the A-pillar or in the dash. Low-Voltage Differential Signaling (LVDS) carries the signal—same tech as your laptop screen, just hardened for the road. Latency is under 50 milliseconds. You don’t notice a delay. The field of view? Wider than any flat mirror, especially in the blind spot behind the rear doors. That’s not marketing fluff—that’s real safety gain.
And yeah, there are real engineering wins. Less drag means more range for EVs. No glass means no fogging from inside condensation. Smaller profile means less chance of getting clipped in a parking garage. But here’s the catch: these benefits come at a cost. A big one. Both in dollars and in long-term reliability.
What Goes Wrong — And How to Tell Where
When a digital mirror fails, it doesn’t creak or vibrate. It goes dark. Or it glitches. Or it shows garbage. And that’s where most techs get tripped up—they assume it’s the camera. But the camera is just one part of a chain. Break any link, and the whole system fails.
Blank screen on one side? Could be the camera. Could also be the LVDS cable, the display, or the head unit’s video processor. I’ve seen shops swap out a $1,500 camera only to find the fault was a $12 connector pin in the door harness. Don’t guess. Test.
Here’s what I do:
| Symptom | Likely in Camera/Mirror Assembly | Common External Mimics | Definitive Test to Confirm Source |
|---|---|---|---|
| Blank video feed on one side. | Camera sensor failure, internal connector, or local image processor. | Faulty LVDS coaxial cable, head unit video input failure, or power interruption. |
Swap test: unplug left and right camera assemblies at the mounting point and swap them. If the problem moves to the other side, it’s the camera. If it stays on the same display, it’s the wiring or head unit. |
| Poor image quality—grainy, discolored, or washed out in low light. | Degraded CMOS sensor or failing image signal processor (ISP). | Poor grounding, low system voltage, or EMI on the signal line. |
Check voltage and ground at the camera connector. Key on, engine running: you want ≥13.0V and ground resistance under 0.5 Ω. If power’s good, the camera’s toast. |
| Fogging or water droplets inside the camera housing. | Failed lens seal or housing crack—this is a hard failure. | Temporary condensation from rapid temp changes (clears in minutes). |
Inspect for cracks. Dry it out, then run a vacuum decay test: seal ports, pull 10 in-Hg vacuum, watch for 60 seconds. Drop >2 in-Hg? Seal’s blown. |
And don’t confuse blind spot warnings with camera issues. On most cars, the blind spot detection uses radar in the rear bumper—not the mirror camera. If the warning light flashes when no car’s there, check the radar module and calibration. Not the camera.
What’s Actually Failing Inside the Camera
Once you’ve confirmed it’s the camera, here’s what’s going on under the hood.
The lens is polycarbonate with anti-scratch and hydrophobic coatings. UV exposure degrades that coating over time. I’ve pulled units off 3-year-old Audis that looked like frosted glass. That’s not just ugly—it kills image clarity and dynamic range. Headlights turn into white blobs at night. Dangerous.
CMOS sensors develop dead or stuck pixels. Small clusters can interfere with blind spot algorithms. And thermal cycling? That’s a silent killer. Plastic expands and contracts. Seals fatigue. Solder joints crack. I’ve seen image processors with lifted leads from thermal stress—especially on vehicles driven in mountain climates or desert heat.
Moisture gets in? Corrosion follows. Not surface rust. We’re talking fine copper traces on the sensor board getting eaten away. This isn’t like TPMS sensor vent corrosion—it’s worse. Shorts, signal loss, total failure.
And physical damage? Road debris cracks the lens. Even a small impact can misalign optics or break internal connectors. And because these are sealed units, you can’t open them without trashing the weatherproofing. No warranty, no repair path.
Can You Fix It? Or Just Replace?
Short answer: replace.
For light lens hazing? A pro shop might restore it. But it’s not DIY. You need OEM-approved lens polishing kits, specific abrasives, and UV-curing sealant. One mistake in the seal bead, and you’re back to moisture ingress. This is Professional Only – Specialized Tools Required.
For anything inside—failed seal, corroded board, dead sensor—it’s NON-REPAIRABLE → REPLACE ASSEMBLY. These are built in clean rooms, often nitrogen-purged. Open it, and you’re done. No aftermarket repair boards. No component-level fixes. And even if you could solder a new sensor, you’d still need OEM calibration tools to align it.
And don’t fall for the “run the heater to dry it out” trick. Yeah, it might clear the fog for a day. But you’re heating a wet circuit board. That accelerates corrosion. I’ve seen units work fine Monday morning and be dead by Wednesday. Not worth it.
Post-Replacement: Calibration Is Not Optional
Swapping the camera is half the job. Calibration is the other half. Skip it, and you’ve created a hazard.
First, boot-up time. Image should appear within 2 seconds of ignition-on. Any longer, and you’re blind during pull-out. That’s a liability.
Image quality? Test it in sun and shade. No dead pixels, no flicker, no color cast. Dynamic guidelines (if equipped) must track steering input accurately. A misaligned line could make you think you’re clear when you’re not.
Field of view must match OEM spec. Even 2–3 degrees off can create a new blind spot. That’s why you need a factory scan tool. It runs a warp correction and alignment routine based on vehicle geometry and steering angle.
And yes—do a high-pressure spray test after install. Check it 24 hours later. Any internal moisture? Seal wasn’t seated. Do it again.
The Real Problem: Cost vs. Value
This is why these systems aren’t mainstream. They’re expensive to fix.
| Repair Type | DIY Cost | Shop Cost | Success Rate | Secondary Risk if Failed |
|---|---|---|---|---|
| Camera Assembly Replacement | $800–$1,500 (part only) | $1,200–$2,200 (part + labor + calibration) | 99% when properly calibrated | Incorrect calibration creates distorted field of view, leading to blind spots and potential liability in an accident. |
That’s for one side. Double it if both go. Now ask: is your car worth $2,000 to fix a mirror? On a $10,000 used EV, that’s 20% of the value. That’s not a repair—that’s a financial decision.
And unlike traditional mirrors—where you can slap on a $100 aftermarket part—there’s no cheap alternative here. No junkyard swaps. No universal fit. It’s OEM-only. You’re locked into dealer or specialist pricing.
How to Keep It Working
Since repairs cost a fortune, prevention is everything.
Treat the lens like a camera lens—because it is. No abrasive cleaners. No ammonia-based sprays. No waxes. They strip the hydrophobic coating. Use only a soft microfiber cloth and mild automotive glass cleaner.
After a car wash or heavy rain, check the display. If water beads are sticking and distorting the image, the coating’s failing. That’s your early warning.
Once a month, walk around. Look for cracks, discoloration, or loose mounting. Gently wiggle the pod—if it moves, the mount’s failing. Vibration will kill the internal connections over time.
These systems are designed to last the life of the vehicle. But only if you treat them right. There’s no “limp mode.” When they fail, they’re done. And that’s why I always tell customers: enjoy the tech while it works. But know the cost of keeping it alive.
