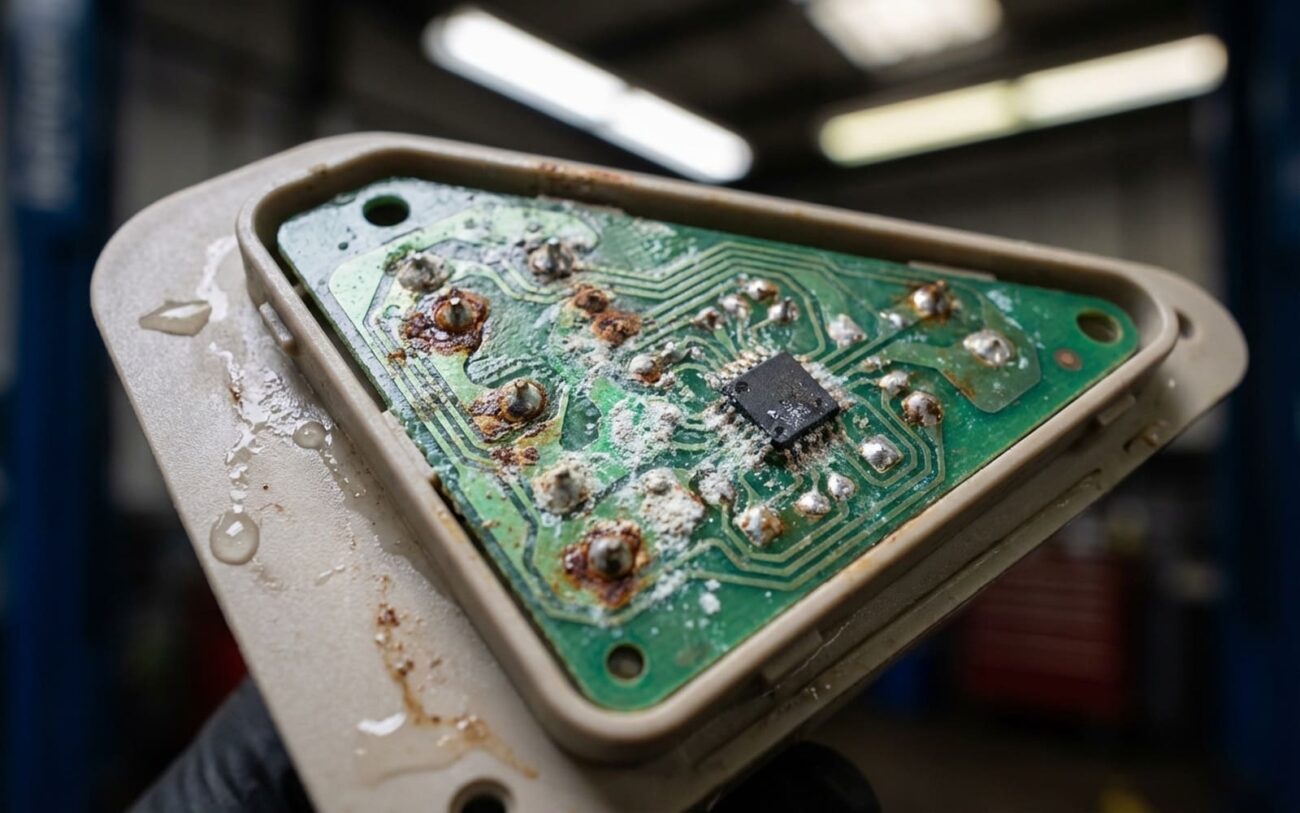
You get a car in with a power seat that won’t move. Or maybe it creeps forward on its own. Customer says, “I spilled coffee last week.” Or, “We had snow on the floor mats for days.” That’s when you stop thinking switch, stop thinking fuse — you start looking under the seat. Because I’ve been doing this for 25 years, and let me tell you: moisture in the seat control module (SCM) is one of the sneakiest failures out there. It doesn’t blow up. It doesn’t throw a clear code. It just… degrades. Slowly. Until the whole thing’s toast.
What You’re Actually Dealing With
The seat module isn’t just a relay box. It’s a tiny computer. Mounted under the driver’s seat on most vehicles, it runs motors, manages memory positions, controls heating circuits — all through solid-state drivers on a single board. And when liquid gets in? That’s when corrosion starts eating copper traces, killing transistors, and creating phantom paths across the board.
Salt. Sugar. Even plain water with minerals — they all conduct electricity. And when voltage runs through a contaminated board, it’s not just corrosion. You get dendritic growth. Tiny conductive filaments that bridge gaps between circuits. That’s what causes uncommanded movement — seat sliding forward when no one touched the switch.
How to Tell It’s the Module — Not Just a Bad Wire
You can’t guess. You test. Start simple: check fuses. Then verify power and ground at the module. If those are good, now you dig deeper.
Use a multimeter. Back-probe the output pin for the motor that’s not working. Activate the switch. If you see 12V at the module but nothing at the motor, the problem is in the harness — not the SCM. But if there’s no output at the module despite valid input? That’s your first red flag.
For heater issues, disconnect the heater pad and check resistance. Should be 1–4 ohms. Infinite? Open element. If the heater tests good, power it from a bench supply to confirm it heats. Then go back to the module. No output when commanded? Likely internal failure.
Erratic behavior — like the seat moving on its own — needs a scan tool. Look at live data. Are switch inputs registering when no one’s touching them? If yes, and the switches test clean electrically, the fault is inside the module. Dendrites or carbon tracking are sending false signals.
What You Can Actually Fix
Clean the Connector Pins DIY-FEASIBLE for a skilled hobbyist
Board-Level Repair PROFESSIONAL-ONLY
Replace the Module NON-REPAIRABLE
Spraying the Board? Don’t. TEMPORARY / LAST-RESORT
Did It Actually Work?
Don’t just press the switch and call it good. Test under load.
After pin cleaning: run each motor through full travel. Ten times. Listen for grinding, hesitation, or stuttering. Test heater — feel for even heat. Check memory positions. If anything’s off, the corrosion’s deeper.
After board repair: do a voltage drop test. With the motor running, measure across the repaired trace. Should be under 0.1V. More than that? High resistance. It’ll overheat. Fail again.
After replacement: scan tool check. Is the module online? Any DTCs? Clear them. Drive the car. Recheck. If you get U3000 (Network Failure), programming failed. Don’t hand it back.
What This Costs — Real Numbers
| Repair Type | DIY Cost | Shop Cost | Success Rate | Secondary Risk if Failed |
|---|---|---|---|---|
| External Pin Cleaning | <$20 | $100–$200 | High | Minimal |
| Internal Board Repair | $50 (if you have tools) | $300–$600 | Low–Moderate | Complete failure; may damage motors |
| Module Replacement | $300–$800 + programming | $500–$1500 | Very high | BCM conflict if misprogrammed |
Reality Check
If the fix costs more than 40% of the car’s value, rethink it. A used, professionally programmed module from a salvage yard can save hundreds. But verify it’s programmed correctly before you install it. Some shops specialize in module repair — often cheaper than dealer, more reliable than DIY.
How to Keep It From Happening Again
Prevention Plan
-
No drinks in the car. I know, that’s unrealistic. But if you spill, pull the seat, dry under it, use a shop vac. Don’t let moisture sit.
-
Rubber floor mats. Not fabric. Not thin liners. Thick, full-coverage, with high walls. They trap slush, salt, and mud before it reaches the module. On Subarus and Fords in northern states? Non-negotiable.
-
Inspect early. If the seat hesitates or the heater flickers, check the connector. Pull back the carpet. Look for dampness, crust, discoloration. Catch it at the pin stage, and you might save the whole module.
