Alright, let’s talk about that moment. You’ve parked your car for a few weeks, maybe a month or two, and when you finally get back in, turn the key, and try to pull away, you hear it: a sharp, unsettling “clunk” or “bang” from one of the wheels. The car feels like it’s fighting you for a split second, then thwack, it lets go. After that, everything seems normal. Sound familiar?
In my 25+ years in the shop, I’ve seen this scenario play out countless times. What you’re experiencing there isn’t usually a catastrophic failure like a seized caliper, though it can feel like it. More often than not, it’s a classic case of brake pads temporarily bonding to the rotors due to surface corrosion. It’s the friction material literally sticking to the rotor face, held there by rust and a bit of galvanic action.
Another common symptom I see, especially after a car has been sitting, is a pulsating brake pedal or even a vibration in the steering wheel during the first few stops. But here’s the kicker: it usually smooths out and disappears after a few more brake applications. That’s typically caused by uneven deposits of pad material transferred onto the rotor in high spots, again, a direct result of long-term static contact between the pad and rotor.
What’s Really Going On: The Science Behind Stuck Brakes
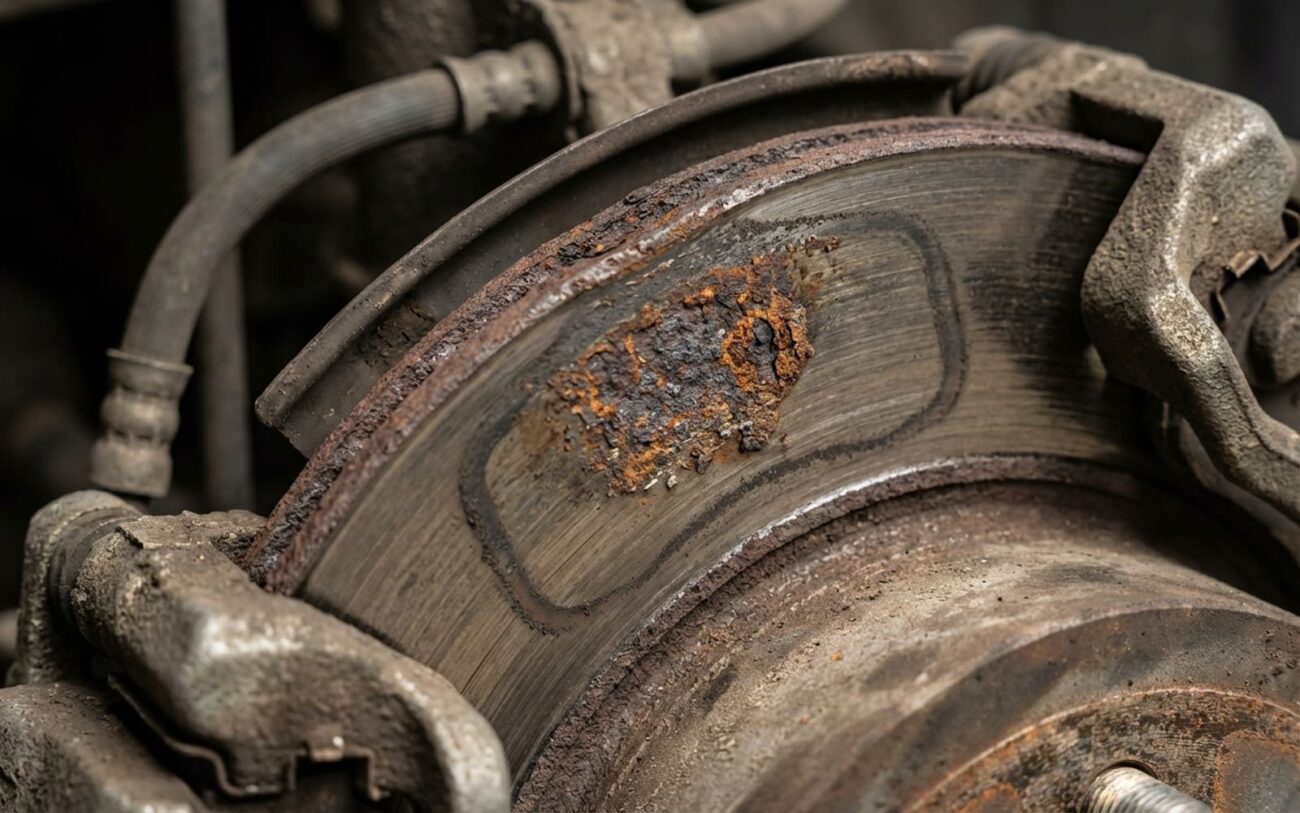
It’s not a design flaw, believe me. It’s just basic chemistry and physics doing their thing. When your car sits, especially in humid conditions or where salt is present (think coastal areas or winter climates), moisture gets between the brake pad and the cast iron rotor. That moisture, particularly if it’s salty, acts like an electrolyte.
The Concept
Think of it like a tiny battery: moisture and salt create an electrolyte between the pad and rotor, literally welding them together with rust. It’s called galvanic corrosion, and it’s a real pain.
Then there’s what we call rust jacking. Iron oxide (rust) takes up more space than the original metal. So, when a thin layer of rust forms between the pad and rotor, it expands like a tiny wedge, jamming them together. This is why vehicles in coastal areas or places that use road salt are far more prone to this issue.
Diagnosing the Difference: Adhesion vs. Real Problems
This is where experience comes in. Not every brake noise or vibration means you need a whole new brake job. That initial “clunk” or a pulsation that fades away is often mistaken for something much more serious, like truly warped rotors or a failing wheel bearing. The trick is knowing what each symptom is really telling you.
Definitive Tests I Use:
-
For a single clunk/bang: Lift the vehicle safely and try to spin the wheel by hand. If it takes a good initial yank to break free, but then spins easily, that’s adhesion. If it’s constantly dragging, you’ve got a mechanical issue.
-
For fading pulsation: This is a bit trickier. If the pulsation truly disappears after a few stops, it’s likely pad transfer. If it persists or gets worse, you need to measure rotor thickness variation with a micrometer and check lateral runout with a dial indicator. True rotor warpage will show up here, but it’s actually pretty rare compared to pad transfer.
Getting Them Unstuck: Your Options for Resolution
Safety First
Look, some of these fixes are DIY-friendly, but if you’re dealing with severe corrosion, ongoing drag, or deep pitting, you need professional tools like an on-car lathe and precision measuring equipment. Your brakes are your life, so don’t cut corners on safety.
Minor Adhesion: The “Driving-Off” Procedure DIY Feasible
Moderate Adhesion: Rotor Resurfacing Professional Only
Severe Adhesion: Full Replacement Professional Only
Temporary Workaround: Mechanical Release
Confirming the Fix: Post-Repair Validation
Once you’ve done the work, you need to make sure it’s actually fixed. Here’s how I validate a brake job in my shop:
Validation Checklist
-
After the driving-off method: Verify that the clunk and any pulsation disappear completely within the first 10 stops. If not, you need to look deeper.
-
For resurfaced rotors: Use a dial indicator to verify that lateral runout is less than 0.003 inches. That’s the industry standard for a smooth, pulsation-free brake.
-
After full replacement: Spin each wheel by hand. It should rotate freely with minimal drag. If you feel significant resistance, something is still binding.
-
Thermal Test: After a good test drive, use an infrared pyrometer to check the temperature of each rotor. Rotors on the same axle should be within 100°F of each other. A significant difference points to a caliper still dragging or not engaging properly.
Keeping It From Happening Again: Prevention Tips
Prevention is always better than cure, right? Especially if you know your car is going to sit for a while, here are a few things I recommend to my customers:
Prevention & Monitoring
- Consider ceramic pads: They’re generally less prone to galvanic corrosion and tend to be gentler on rotors, which can help reduce adhesion.
- Ease up on the parking brake: If you’re parking for a long time, especially on a flat surface, use wheel chocks instead of cranking down hard on the parking brake. This prevents the parking brake shoes (or pads, if it’s a caliper-based system) from sticking.
- Move the car: If possible, move your car a few inches every few weeks. This changes the contact patch between the pads and rotors, preventing corrosion from building up in one specific spot.
- Wash your wheels: If you’ve driven in salty conditions, a good rinse of the wheels and brake components can help remove corrosive elements before they have a chance to bond.
The Bottom Line: Costs and Decisions
Here’s a quick look at what you can expect to pay for these fixes, based on what I see in the industry:
| Repair Type | DIY Cost | Shop Cost | Success Rate |
|---|---|---|---|
| Driving-off procedure | $0 | $0 (though a diagnosis fee might apply if you bring it in) | Near 100% (for mild adhesion) |
| Rotor resurfacing | $40–$60 (for a lathe rental, if you can find one) | $150–$300 per axle | 95% |
| Rotor & Pad Replacement | $200–$600 (parts only) | $400–$1,000+ per axle (depending on vehicle) | 99% |
For more on maintaining brake system integrity, especially in electric power steering-equipped vehicles where brake assist can be affected by electrical issues, see Why Nissan Qashqai J10/J11 Electric Power Steering (EPS) Fails After an Engine Wash.