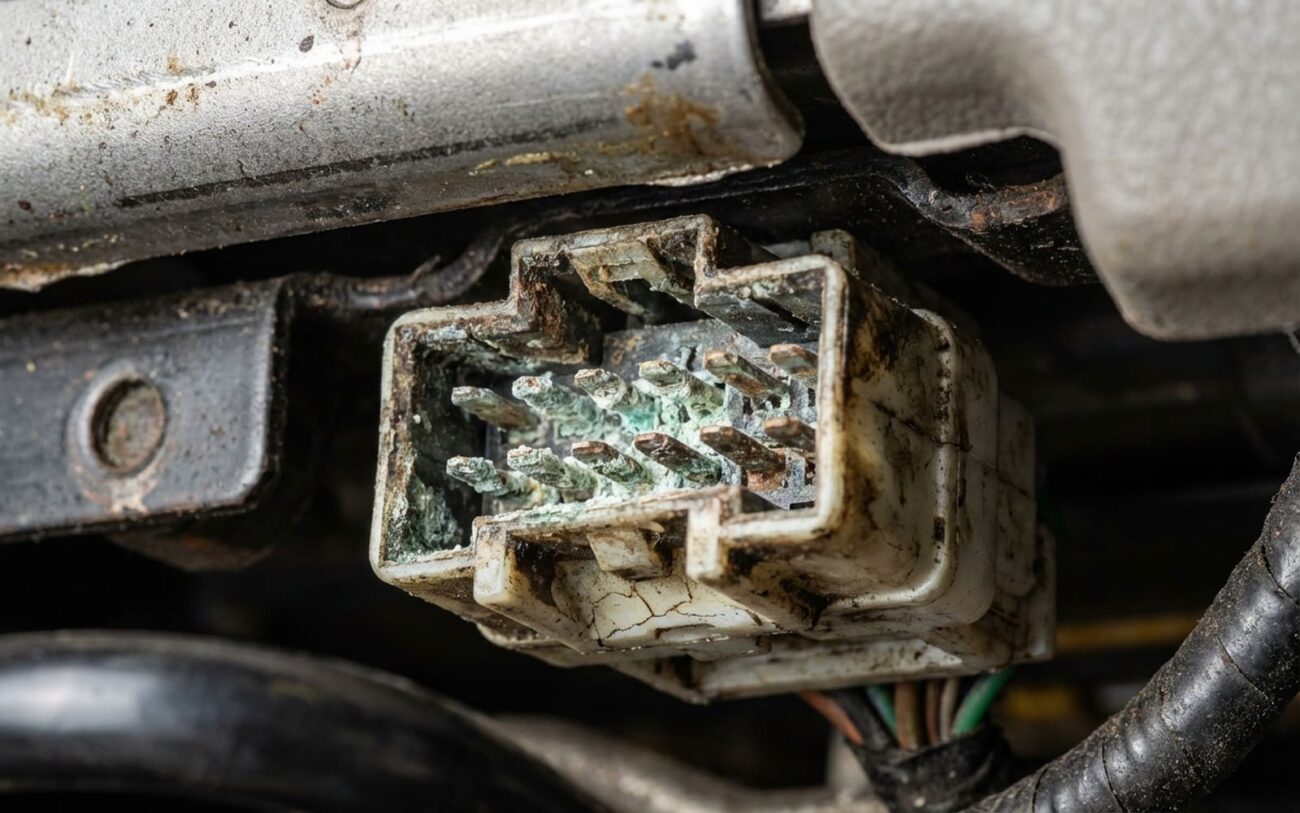
Your seat sinking on its own isn’t a glitch. It’s electricity going where it shouldn’t—plain and simple. I’ve pulled apart hundreds of these systems over 25 years, and 9 times out of 10, it’s corrosion sneaking through the switch or connector, tricking the motor into thinking “down” is being pressed. No magic, no Matrix—just moisture, time, and bad chemistry.
Symptom First: What the Seat Is Telling You
If your driver’s seat creeps down overnight with the car off, that’s not normal wear—it’s a live circuit where there should be none. Power seat motors don’t move without current. So if it’s moving, current is flowing. The real question is: where’s the leak?
And don’t ignore how it moves. That matters.
-
Slow, gradual lowering over hours? Classic corrosion.
-
Sudden drop, jerky motion, or burning smell? That’s a hard short. Shut the car down and disconnect the battery. You’re one step from melted wires or a fire.
-
Only goes down, never up? Points to isolated failure in the “down” circuit—usually the switch or its trace on the PCB.
-
Moves in multiple directions randomly? Then it’s likely the control module or wiring harness—not just corrosion.
Diagnosis: Find the Leak Like a Pro
You don’t guess. You test. The tool? A digital multimeter (DMM) set to measure milliamps. This isn’t optional.
Here’s what I do in my shop:
First, make sure the car is asleep. Close all doors, wait 2–3 minutes for modules to power down. Tape the door jamb switch closed if needed. Then pull the seat motor fuse and connect your DMM in series—positive lead to fuse holder, negative to the fuse leg. You’re measuring parasitic draw on that circuit.
Now watch the reading. A healthy system should drop below 10mA after a few minutes. If you see 50mA or more—and especially if it spikes when the seat starts moving—you’ve got a fault.
Next, isolate it. Start disconnecting components: unplug the seat switch, then the motor, then the control module (if equipped). Recheck the draw after each. When the current drops, you’ve found the culprit.
Pro Tip:
On models like the 2012–2018 Toyota Camry or Honda Accord, I’ve seen the switch assembly fail internally even when the buttons feel fine. The corrosion is under the membrane. So don’t trust the feel—test the current.
How Corrosion Actually Works—It’s Not Just Rust
It’s electrochemistry. Spilled soda, coffee, or even sweat from wet clothes introduces electrolytes into the switch. Those liquids bridge tiny gaps between copper traces, tin plating, and solder joints on the PCB. Over time, galvanic corrosion kicks in—and worse, conductive dendrites grow like microscopic wires across insulating paths.
These dendrites complete the circuit between the “down” switch terminal and ground. So even with no button pressed, the motor gets a signal. It’s like a ghost pressing the button every time humidity rises.
I pulled a switch last month from a 2017 F-150—driver had spilled a latte six months earlier. No one thought much of it. But inside? White powder corrosion on the PCB, and a visible silver filament running from the down contact to ground. That’s what was sinking the seat every rainy morning.
And yes—some manufacturers admit this. There are TSBs (technical service bulletins) from Ford, GM, and Toyota specifically citing liquid intrusion into seat switches as a cause of uncommanded movement. It’s not rare. It’s just underreported.
Repair Paths: What Actually Works
Clean External Connectors (DIY-Friendly)
If the corrosion is on the motor plug or harness connector under the seat, you can fix it. I’ve done this dozens of times on GM trucks and Fords.
Steps: Disconnect the battery. Unplug the connector. Spray with non-residue electrical contact cleaner. Scrub gently with a nylon brush. Let dry 15 minutes. Apply a thin coat of dielectric grease. Reconnect.
The grease is critical—it blocks moisture long-term. Skip it, and you’ll be back in six months.
Replace the Switch Assembly Pro Job
If the switch itself is bad—especially on Toyotas, Lexuses, or Nissans—you can’t clean it. These are sealed units. Pry it open, and you’ll break the membrane or dislodge the PCB.
Replacement takes 30–45 minutes. You’ll need trim tools and usually a Torx T25 or T30. But here’s the non-negotiable: disable the airbag system before disconnecting anything. The seat has live SRS connectors. One wrong move, and you’re looking at a $1,200 airbag module replacement.
Follow the service manual’s procedure. Don’t wing it.
Replace Control Module Pro Job
If the seat control module (usually under the seat) is corroded internally, forget cleaning. The conformal coating traps moisture, and once dendrites form under it, you’re done.
Replacement is the only fix. And on many cars—BMW, Mercedes, newer Hondas—you’ll need a scan tool to relearn seat positions or code the new module. No shortcut.
Also: check for water pooling under the seat. If the module’s wet, find out why. A clogged sunroof drain or leaking door seal could be feeding it.
Contact Cleaner as a Band-Aid (Use Sparingly)
On early-stage corrosion, a deep spray might help. But be careful—forcing cleaner into a sealed switch can push gunk deeper and make it worse.
I only recommend this if the seat’s still mostly functional and you’re buying time. It won’t fix dendritic growth. And if the PCB is compromised? You’re delaying the inevitable.
Verification: Did You Really Fix It?
Don’t just assume it’s fixed because the seat stopped moving. Test it.
Recheck the parasitic draw. It should be under 10mA with the car asleep. Cycle the seat up and down 10 times—make sure response is crisp, no hesitation.
Then park it overnight. No movement? Good. But wait—scan for codes. Some modules store soft faults even after replacement. And if the seat doesn’t respond after install, it may need a relearn. (Check Alldata or Mitchell for your model.)
Prevent It From Coming Back
-
No open drinks in the car. I don’t care if it’s water—spills happen. I’ve seen more seat switches killed by water bottles than coffee.
-
Spill? Shut off the car. Blot. Unplug the seat fuse. Dry with a wet-dry vac and silica gel for 48 hours. Don’t skip this.
-
Avoid thick aftermarket seat covers. They trap moisture against connectors. I’ve pulled up covers to find green corrosion underneath—perfect storm for dendrites.
-
Check under the seat every few months. Look for dampness, old bottles, or white/green crust on connectors. A 30-second check saves $500 later.
When to Walk Away: The Fuse Pull Option
Sometimes, the fix costs more than it’s worth. If you’re looking at $800 for a new control module on a car worth $4,000, ask yourself: do I really need power seats?
Here’s what I tell customers: pull the seat motor fuse. It disables all power functions, but it stops the creeping and prevents further electrical damage. It’s a permanent workaround—but a safe one.
Just make sure you can still adjust the seat manually to a safe driving position. And keep the fuse. You might want it later.
This isn’t failure—it’s smart triage. Same as leaving a non-critical CAN node offline if the repair cost doesn’t justify it. Function over perfection.
