Can a Torn CV Boot Really Destroy the Joint That Fast?
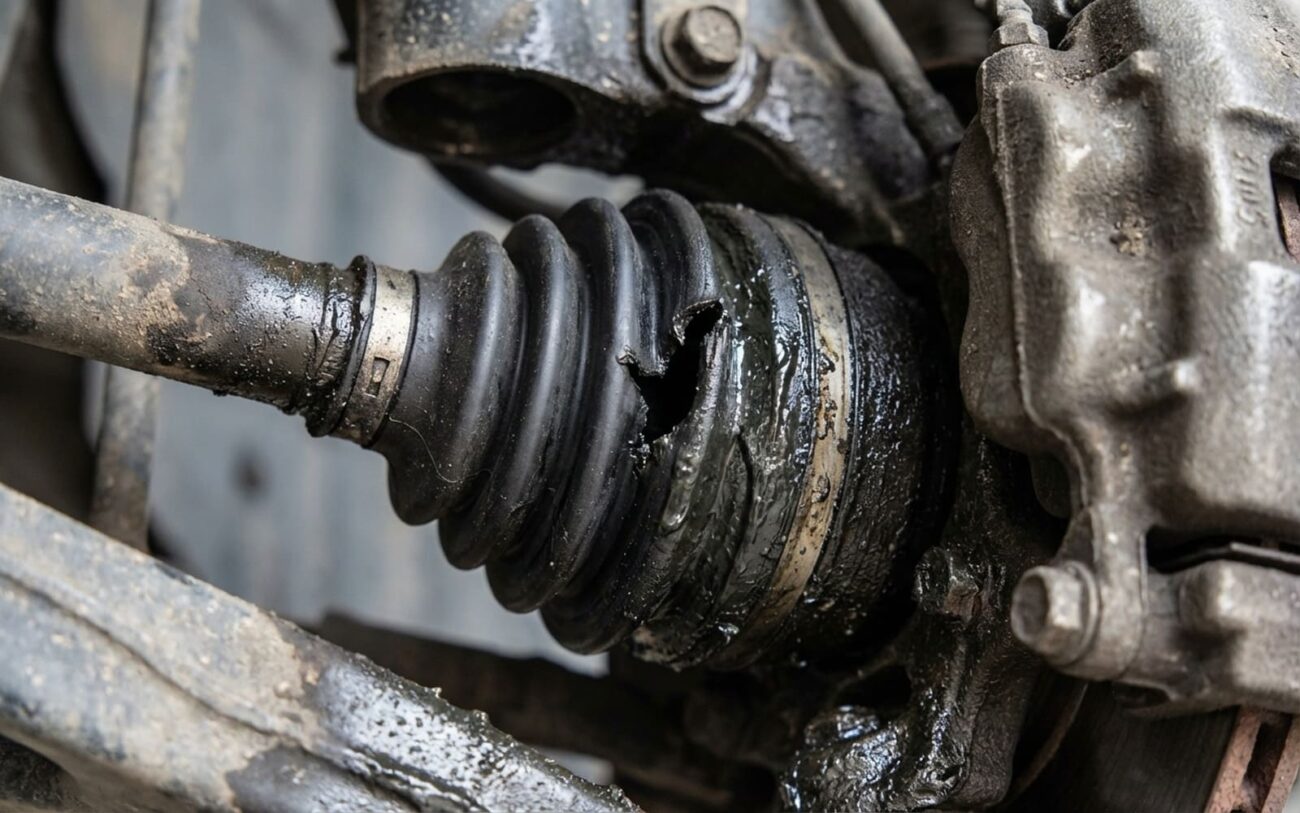
Alright, so you’ve spotted a torn CV boot on your car. You’re probably wondering if it’s a “get to it next week” kind of job or a “pull over right now” situation. Let me tell you straight: a torn CV boot can absolutely destroy your Constant Velocity (CV) joint in a matter of a few hundred miles. Sometimes even less.
I’ve seen axles come into my shop completely grenaded after just 200 miles of daily driving on a damaged boot, especially if it’s been wet, gritty, or off-road. It’s not a “maybe”; it’s a “when.” Once that rubber seal is compromised, the clock starts ticking immediately. The joint might feel fine today, but the damage is already starting.
Est. Remaining: ~180 Miles
Why a Torn Boot Spells Disaster So Quickly
Here’s the deal: your CV joint isn’t just a simple pivot; it’s a precision piece of engineering, like a fancy watch. It’s packed with a special, thick, extreme-pressure grease (NLGI #2 EP, if you’re curious) that keeps all those moving parts happy. The rubber boot’s only job is to keep that grease in and everything else out. When that boot tears, it’s a one-two punch that starts the clock ticking on failure.
The Concept
“Think of a CV joint like a precision watch: it works perfectly until you drop it in the sand. Once grit gets inside, the clock starts ticking.”
-
Grease Loss: First, centrifugal force—the spinning of the axle—flings that precious grease right out through the tear. Without proper lubrication, you get metal-on-metal friction, and heat builds up rapidly, accelerating wear.
-
Contamination Ingress: Second, and this is the real killer, dirt, sand, water, and road salt get sucked right into the joint. That gritty mess mixes with whatever grease is left, turning it into an abrasive paste. Think of it like sandpaper grinding away at those precisely machined ball bearings and their races.
What You’ll Hear and Feel: Recognizing the Symptoms
Before we talk fixes, you need to know what you’re actually dealing with. A lot of things can make noise or cause vibrations, so don’t jump to conclusions. But the classic signs of a failing CV joint are pretty distinct once you know what to look for – and listen for.
The most unmistakable symptom, especially for an outer CV joint, is a loud, rhythmic clicking or popping noise when you’re turning, particularly at low speeds—like pulling into a parking spot. Inside that joint, you’ve got hardened steel ball bearings rolling in precise tracks. When the grease is gone and grit gets in, those bearings pit and wear. As they roll over those damaged spots, they “skip,” and that’s the click you hear. Ignore it, and that joint can seize up or even break apart, leaving you stranded – or worse, losing power mid-turn.
Then there’s the grease. This is often the first visual cue. A torn boot doesn’t just leak a little; it slings thick, dark, sticky grease all over the inside of your wheel, the suspension components, and the underside of your car. If you see that mess, you know the boot’s compromised, and the joint is exposed.
Another clue—and this one fools a lot of guys—is vibration under acceleration. This usually points to the inner CV joint, which operates under different stresses. When it wears out, it can bind and release as you apply torque, causing a shudder or vibration that you’ll feel when you press the gas, but it often fades when you coast. A lot of folks mistake this for a tire balance issue or a bad motor mount, but if it’s directly tied to throttle input, put the CV joint high on your suspect list.
Confirming the Diagnosis: It’s Not Always a CV Joint
Okay, so you’ve got symptoms. Now, how do you know for sure it’s the CV joint and not something else? Because trust me, throwing parts at a problem you haven’t properly diagnosed is just burning money. A clicking noise doesn’t automatically mean a CV joint; it could be a worn wheel bearing, a loose ball joint, or even a bad torque converter on an automatic. Here’s how I confirm it in the shop:
| Symptom | Likely CV Joint Cause | Common Mimics | Definitive Test |
|---|---|---|---|
| Clicking or Popping When Turning | Worn or contaminated outer CV joint (Rzeppa or tripod type) | Worn wheel bearing, loose ball joint, damaged hub |
Rotate wheel by hand at full lock (engine off, car safely supported). A gritty catch or audible click confirms joint damage. |
| Grease Flung on Wheel | Torn CV boot allowing grease ejection | Leaking brake caliper, failed wheel bearing seal |
Inspect texture. CV grease is thick and black; brake fluid is thin and oily. Trace the source directly to the boot. |
| Vibration During Acceleration | Worn inner CV joint or damaged tripod bearing | Unbalanced tire, bent rim, worn motor mount |
Does vibration increase with throttle pressure (torque) rather than just road speed? If yes, suspect the inner CV joint. |
Your Repair Options: From Proper Fix to Last-Resort Measures
Alright, you’ve confirmed it’s a CV joint issue. Now, what are your options? This is where you need to be honest about the joint’s condition.
Rule #1 in My Shop
If that joint is clicking or causing vibrations, it’s already damaged—there’s no coming back from that. Trying to clean and repack a noisy joint is a waste of time and money. You might get a few more miles, but it will fail again.
Boot-Only Rebuild (If the joint is still silent)
Full Axle Assembly Replacement (If you hear clicks or feel vibrations)
Split Boots / Repair Sleeves (Temporary, Last-Resort ONLY)
Validating the Repair: How to Know It Actually Worked
Any repair is only as good as how you check your work. After a boot-only repair, drive it for about 50 miles, then get under there with a flashlight. The new boot should be smooth, tight, and show absolutely no grease seepage. If you replaced the whole axle, perform several full-lock turns in a parking lot – left and right. There should be zero clicking. Then, accelerate firmly on a straight road to make sure there’s no shuddering or vibration. Trust your senses; if something feels off, it probably is.
Cost, Risk, and the Real-World Math
Now, let’s talk brass tacks: what’s this going to cost you, and what are the risks? Here’s a general breakdown, but remember, prices vary wildly by vehicle and region:
| Repair Type | DIY Cost | Shop Cost | Success Rate | Secondary Risk |
|---|---|---|---|---|
| Boot-Only Repair | $30 – $80 | $250 – $400 | High (if joint is intact) | Joint fails later; requires second labor charge. |
| Axle Replacement | $150 – $300 | $500 – $800 | Moderate to High | Improper torque can damage hub bearings. |
Pro Mechanic Tip
Here’s a tip from years in the trenches: Never, ever drive with active clicking. That noise isn’t just annoying; it means metal is already damaged, and continued use risks breaking the axle completely. And if that happens at speed, it can damage your transmission output seal, your wheel bearings, or even cause a loss of control. Once you hear that click, the “rebuild the boot” window has slammed shut.
Preventing Future CV Joint Failures
Look, an ounce of prevention is worth a pound of cure, especially with CV joints. A little proactive checking can save you a big headache and a lot of money down the road.
-
Inspect those boots: Every time you get your tires rotated, or even when you’re just washing your wheels, take a flashlight and look at those rubber boots. Check for cracks, cuts, or any signs of weeping grease.
-
Listen carefully: Faint clicking at full-lock turns in quiet parking lots is the earliest warning sign. Don’t dismiss it.
-
Upgrade if you’re tough on it: If you’re regularly off-roading or driving on rough gravel roads, consider upgrading to heavy-duty, reinforced boots. They’re built to take more abuse.
-
Know your noises: A car hesitating on startup might be the transmission, but clicking on turns? That’s almost always your CV joint screaming for help.
