Alright, let’s talk about that dreaded “rock hard” brake pedal. If you’ve ever stomped on your brakes and felt like you were pushing a brick wall, you know exactly what I mean. That’s a complete loss of power assist, and it’s one of the most immediate and dangerous failures you can have in a brake system. You’re relying purely on your leg strength to move that brake fluid, and trust me, it takes a lot more effort. Stopping distances go way up, and in an emergency, that’s a recipe for disaster.
Now, when that pedal goes stiff, most folks — and even some younger techs — immediately point the finger at the brake booster. And yeah, a failed booster diaphragm is often the culprit. The booster uses engine vacuum to multiply your pedal force, so without it, you’re fighting physics. But here’s where my 25+ years in the shop come in: a hard pedal doesn’t automatically mean the booster itself is dead. It could be a vacuum supply issue, and that’s a much cheaper, easier fix if you diagnose it right.
What a Failing Booster Feels, Sounds, and Acts Like
Beyond the obvious hard pedal, there are a few other clues I look for. These can help you narrow down the problem, or at least give you a heads-up that something’s brewing before it becomes a full-blown emergency.
-
The “Rock Hard” Pedal: This is the big one, the primary symptom. You press the pedal, and it just doesn’t want to go down. It feels like there’s no power assist at all. This means you’re relying entirely on mechanical force to push fluid through the master cylinder. It takes significantly more effort and increases your stopping distances.
-
A Hissing Noise: Listen carefully from the firewall area when you press or release the brake pedal. That distinct hiss is air moving through a breach in the system. It could be the diaphragm itself, a failing check valve seal, or even a cracked vacuum hose. I’ve had customers come in convinced the booster was toast, only to find a $10 rubber hose was the real culprit. Don’t overlook this sound; it’s a huge diagnostic clue.
-
Drop in Fuel Economy: This one is often missed, but it’s a dead giveaway for a significant vacuum leak. If the booster diaphragm has a large, continuous tear, it acts just like an unmetered vacuum leak in your intake manifold. Your engine control module (ECM) senses that extra air and adds more fuel to compensate, trying to maintain the correct air-fuel ratio. Your engine runs rich, you burn more gas, and you might even throw diagnostic trouble codes like P0172 (system too rich) or P0420 (catalyst efficiency).
Diagnosing the Real Problem: Don’t Guess, Test!
You absolutely cannot afford to guess when it comes to brake assist failure. Replacing a brake booster is a labor-intensive, expensive job. Before you even think about pulling parts, you need to confirm whether the problem is actually inside the booster or if it’s an external vacuum supply issue. I’ve seen too many good boosters get swapped out because of a simple hose.
Common Culprits Beyond the Booster Itself:
-
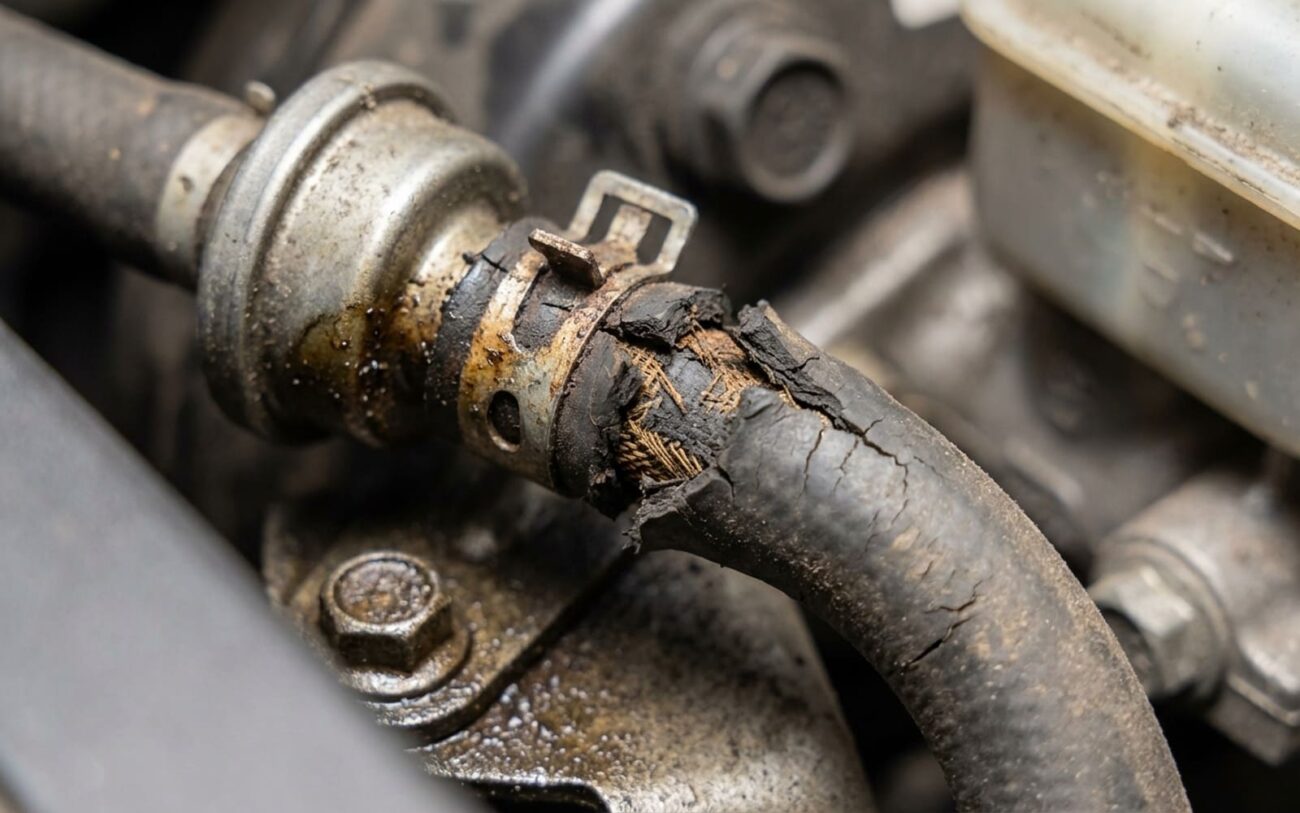
Vacuum Supply Problems: On diesel engines, which don’t naturally generate intake vacuum, an electric vacuum pump is used. If that pump fails, you lose assist. On any vehicle, a cracked, collapsed, or disconnected vacuum hose between the engine and the booster can cut off airflow. Always check these first.
-
Low Engine Vacuum: Sometimes the engine itself isn’t pulling enough vacuum. This can be due to worn valves, incorrect camshaft timing, or even a clogged exhaust system (like a blocked catalytic converter). These issues can mimic a booster failure because the booster isn’t getting the vacuum it needs to operate.
-
Seized Master Cylinder: This is rare, but I’ve seen a seized primary piston inside the master cylinder create a similar rock-hard pedal feel. It’s not a vacuum issue, but a hydraulic one that prevents pedal movement.
My Go-To Diagnostic Tests:
These are the tests I run in the bay to pinpoint the exact cause. They’re simple, but they’ll save you a lot of time and money.
| Symptom | What I’m Checking For | The Test |
|---|---|---|
| Hard Brake Pedal | Is the booster actually providing assist, or is the problem upstream in the vacuum supply or even the master cylinder? |
Booster Function Test: With the engine off, pump the brake pedal 3–5 times to deplete any residual vacuum. Hold the pedal down firmly and then start the engine. If the booster is working, the pedal should drop slightly (about 1/2 to 1 inch) as the engine creates vacuum. No movement means no assist. |
| Increased Fuel Consumption / DTCs (P0172, P0420) | Is there a large, constant vacuum leak from a torn diaphragm pulling unmetered air into the intake? |
Smoke Test: Disconnect the vacuum hose from the booster and cap it off at the engine side. Pressurize the intake manifold with a smoke machine. If smoke escapes from the booster flange area (where it bolts to the firewall), you’ve got an internal diaphragm leak. This is my preferred method for confirming a major internal leak. |
| Hissing Noise | Is the leak internal to the booster, or is it an external seal like the check valve grommet or a vacuum hose? |
Listen & Locate: Use a mechanic’s stethoscope (or even a long screwdriver to your ear) to pinpoint the exact source of the hiss. Check around the booster, the check valve, and all vacuum hose connections. Spray some soapy water on the check valve grommet and hose connections; if you see bubbles, you’ve found an external leak. No bubbles and the hiss is clearly from the booster itself usually points to an internal diaphragm failure. |
Why Boosters Fail: The Root Causes
Once you’ve confirmed the booster itself is the problem, it usually comes down to one of three things. These aren’t just guesses; they’re what I’ve seen over thousands of repairs.
-
Material Aging: The diaphragm inside is made of reinforced rubber. After 10-15 years, sometimes more, sometimes less depending on the climate, it just dries out. All those heat cycles under the hood, plus atmospheric ozone, cause micro-cracks to form. Eventually, one of those cracks gives way.
-
Mechanical Fatigue: Think about how many times you press that brake pedal over the life of a car. Each press flexes that rubber diaphragm. After hundreds of thousands of cycles, stress concentrates, especially at the outer sealing edge. That leads to fatigue cracking, and once it starts, it only gets worse.
-
Chemical Exposure: This is a big one, and often preventable. Brake fluid is nasty stuff, and if your master cylinder leaks backward into the booster (which happens more than you’d think), it’ll eat away at that diaphragm. Oily vapors from engine blow-by can also degrade the rubber over time. This is why I always tell people to address even minor master cylinder leaks quickly.
Tech Tip: Check for TSBs
While there’s no universal bulletin for every booster, I’ve definitely seen some mid-2000s Nissan and Toyota models with known issues of premature diaphragm wear, often linked to specific environmental conditions. It’s always worth a quick check for model-specific Technical Service Bulletins (TSBs) before you start wrenching.
The Fix: Repair or Replace?
No Rebuild Kits for This
If your diagnostics confirm an internal diaphragm tear, the entire booster unit must be replaced. Period. The brake booster is a sealed assembly, and there are no OEM rebuild kits for the diaphragm. Trying to patch it up creates a latent failure point in a safety-critical system, and that’s just not worth the risk.
So, once you’ve done your tests and know what’s truly going on, here are your options:
Complete Brake Booster Replacement Professional Recommended
Check Valve & Grommet Replacement DIY Feasible
Post-Repair Validation: Don’t Skip This!
Replacing a part isn’t the end of the job; it’s the start of verification. You’ve just worked on a critical safety system, so you absolutely must validate its function and safety before putting the vehicle back on the road. I always do these three checks:
-
Static Test: With the engine off, pump the brake pedal a few times to use up any residual vacuum. Then, hold your foot firmly on the brake pedal and start the engine. The pedal should drop slightly (confirming assist). Keep holding it for at least 30 seconds; it should not sink further. If it sinks, you still have a leak or a master cylinder issue.
-
Vacuum Hold Test: Run the engine for a minute or two to build up full vacuum (you should see 18–22 in-Hg on a gauge). Shut the engine off and monitor the pedal. You should be able to press the pedal 2-3 times with assist before it gets hard. This confirms the booster is holding vacuum. If it gets hard on the first press, you still have a leak.
-
Road Test: In a safe, clear area, perform several controlled stops from 15–20 mph. Confirm consistent, smooth assist. The pedal feel should be firm but not hard, and consistent every time. Listen for any new noises.
Cost, Risk, and Making the Call
When you’re looking at a brake repair, especially one involving the booster, it’s not just about the immediate fix. You need to weigh the cost, the risks, and the overall value to decide on the best path forward.
| Repair Type | DIY Parts Cost | Shop Cost (Parts & Labor) | Success Rate (If Diagnosed Correctly) | Key Risks / Considerations |
|---|---|---|---|---|
| Full Booster & Master Cylinder (often replaced together) | $200–$600 | $800–$1,500 | Near 100% | Improper bleeding can leave air in lines or ABS module, requiring specialized tools. Messy job. |
| Check Valve or Grommet Only | $15–$40 | $100–$200 | ~95% | High risk of misdiagnosis if the internal diaphragm is actually bad. Always verify with tests. |
My Economic Rule of Thumb
I always tell my customers: if the repair cost is going to exceed 40% of your vehicle’s current fair market value, it’s time to seriously reconsider the investment. Spending $1,200 on a $3,000 car might not be the most logical choice, especially if other major components are also showing their age. Sometimes, it’s better to save that money for a down payment on something newer.
Prevention & Monitoring: Keep an Eye Out
There’s no scheduled maintenance for a brake booster, but that doesn’t mean you can’t be proactive. A little attention can go a long way in catching problems early and avoiding a dangerous situation.
-
Perform the Booster Function Test Annually: Just like I described above (engine off, pump pedal, hold, start engine). Do this once a year during your routine maintenance, or if you ever feel the pedal getting a little stiffer.
-
Listen for Any Hissing: Pay attention to any faint hissing sounds from the firewall area, especially when you press or release the brake pedal. It might be subtle at first, but it’s often the earliest sign of a leak.
-
Inspect Vacuum Hoses and Grommets: During every oil change or under-hood check, take a minute to visually inspect the vacuum hose leading to the booster and the check valve grommet. Look for cracks, brittleness, or any signs of collapse.
