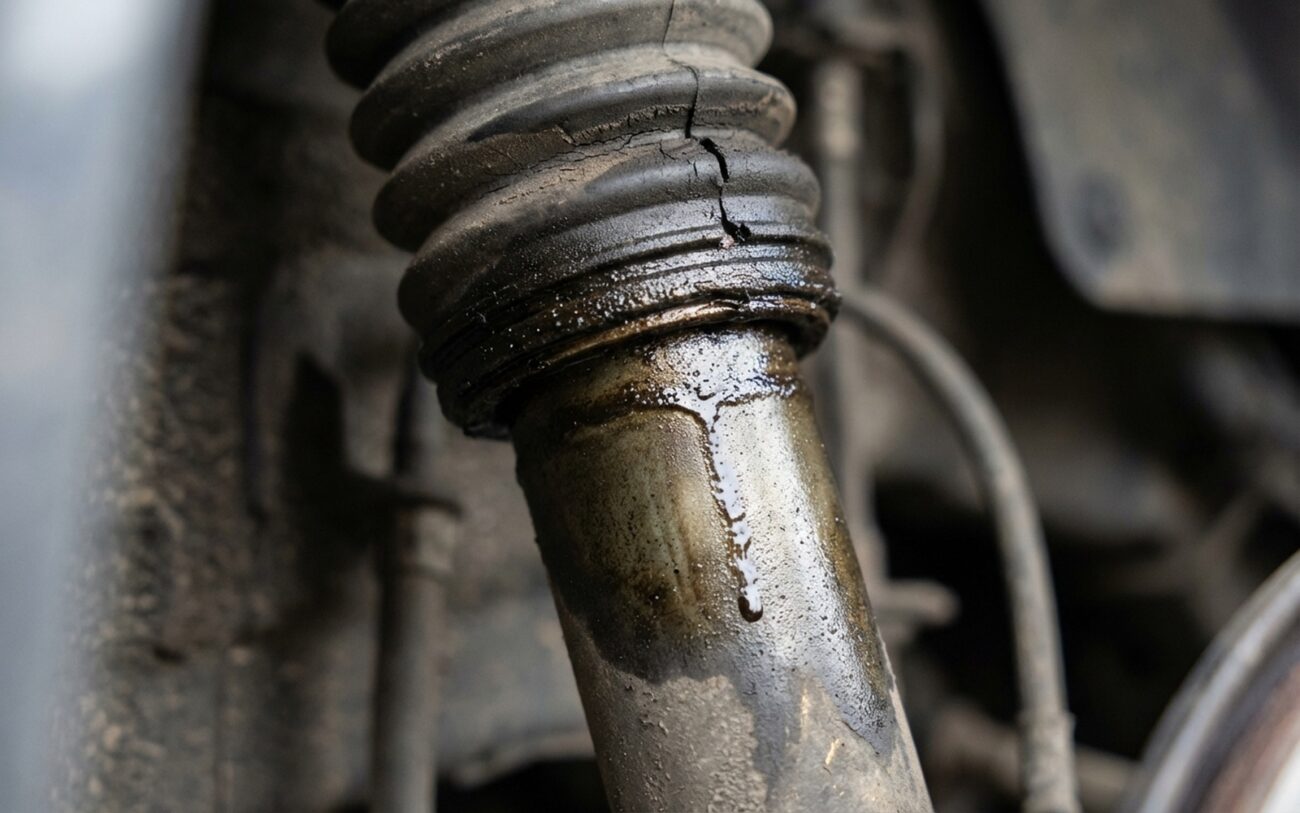
After more than 25 years under the hood, I can tell you this: a leaking shock absorber isn’t just a messy nuisance, it’s a safety hazard waiting to happen. People often overlook them, but your shocks are critical for handling, braking, and even tire wear. When they start to leak, your whole suspension system goes out of whack. Let’s talk about how to spot a leak, figure out if it’s actually the shock, and what to do about it.
Spotting the Leak: Symptoms & What They Really Mean
The most obvious sign of a leaking shock is, well, a leak. If you see a wet, oily residue running down the side of the shock body, that’s hydraulic fluid, not just condensation. That fluid is sealed inside under pressure, controlling how the shock dampens spring movement. When it escapes, the shock can’t do its job.
What I typically see is the main rod seal failing. It’s the most common culprit. But sometimes, you’ll find a crack in the pressure tube itself, or a weld seam has given up the ghost. On those fancy performance shocks with external reservoirs, don’t forget to check the hoses and fittings — they can leak too.
But here’s the kicker: the real problem isn’t the mess. It’s what happens when that fluid level drops. Without enough oil, the shock is basically just a spring. You’ll feel the car bouncing excessively after hitting bumps, getting floaty in corners, and losing stability when you brake hard or accelerate. Over time, this beats up your tires and other suspension parts like control arm bushings and ball joints way faster than they should wear out.
Beyond the Visual: Sounds and Driving Feel
Sometimes, you’ll hear it before you see it. A wet, muffled squishing or sucking noise over bumps often means air is mixing with low fluid inside the shock. That’s a strong clue that the internal pressure is compromised. A clunking sound, though? That’s usually not the shock itself. That sound typically comes from worn mounting hardware, like a failing strut mount bearing or a loose top nut. We’ll get into how to pinpoint those in a bit.
Your driving behavior tells a story too. If the nose dives sharply when you hit the brakes, the rear squats hard under acceleration, or the body rolls excessively in turns, you’ve likely lost damping control. But don’t jump to conclusions and assume it’s the shocks. A broken coil spring or a disconnected sway bar link can mimic these symptoms exactly. That’s why proper diagnosis is critical.
My Diagnostic Approach: Separating Fact from Fiction
I’ve seen countless times where an oily spot near a shock isn’t the shock at all, or a bouncy ride points to something other than worn dampers. Misdiagnosis is common, especially when fluids migrate or sounds overlap with other worn parts. Here’s how I go about isolating the true source:
-
Oily Film or Dripping Fluid: First, clean the shock and the surrounding area thoroughly with brake cleaner. Drive for 15-20 minutes on smooth roads, getting the suspension to cycle a few times, then inspect it with a bright light. A true shock leak will almost always originate at the rod seal, which is at the top of the main body. If it’s a rebuildable unit, sometimes I’ll add UV dye to the fluid to confirm an internal leak, but that’s pretty rare for standard passenger cars. Be aware of mimics here: power steering fluid, brake fluid, or even grease slung from a torn CV joint boot can all end up on your shock.
-
Clunking Noise: As I mentioned, a clunk is rarely the shock itself unless it’s had a severe impact causing internal piston separation or valve collapse. Usually, it’s a worn strut mount bearing, a loose mounting nut, or a failed control arm bushing or ball joint. To check, perform a bounce test: push down firmly on the corner of the vehicle and release. If it bounces excessively, the shock’s damping is gone. For clunks, have an assistant turn the steering wheel lock-to-lock while you listen at the top of the strut assembly. Noise there points directly to the strut mount bearing.
-
Vehicle Sits Lower on One Corner: This is never a shock issue. Shocks do not support the vehicle’s weight. If you see this, you’re almost certainly looking at a sagged or broken coil spring, especially common in MacPherson strut assemblies. To confirm, measure the vertical distance from the center of the wheel hub to the fender lip on all four corners. A difference of more than half an inch usually means a spring failure. Visually inspect the spring for cracks or broken coils.
And don’t forget about driveline vibrations. A worn driveshaft U-joint or center support bearing can create sensations similar to rear suspension instability, especially under load. I always eliminate those possibilities before I assume the shocks are the culprit.
Quick Clarification: Strut vs. Shock
On a MacPherson strut assembly, if you see fluid leaking from the top mounting plate, that’s usually not the shock cartridge itself failing. It’s the strut mount bearing or the strut rod seal within the mount. That’s a separate component, even though it’s part of the same assembly. Don’t confuse a failed strut mount with a failed shock absorber. They often get replaced together, but it’s important to know the distinction for proper diagnosis.
Why Shocks Fail: Root Causes
Once I’ve confirmed a leak is definitely from the shock, the root cause almost always starts with the rod seal. This is a dynamic seal; it moves with every inch of piston rod travel, constantly exposed to heat, pressure, and all the crud the road throws at it. Over time, if the dust boot is torn or missing (and believe me, I see that a lot), grit and grime get past it. That stuff acts like sandpaper, scoring the rod surface and accelerating seal wear. Once that seal degrades, fluid bypasses it, leading to the external leak and, more importantly, a complete loss of damping.
Physical damage is another major cause. A hard hit from a pothole, curb, or road debris can dent the pressure tube. Even a small dent can distort the internal piston path or damage the seal surface, causing either an immediate, catastrophic failure or a slow, gradual leak. Cracks at the weld where the tube meets the mounting eyelet are less common, but when they happen, they’re serious. They often result from fatigue or corrosion in high-stress areas.
I’ve also seen material defects, like casting porosity in the pressure tube. It’s rare in quality mass-produced shocks, but it does pop up, especially on some of the cheaper imported units. Microscopic voids in the aluminum or steel can allow a slow seepage over time.
And then there are manufacturing issues. For example, some 2019–2021 Ram 1500 trucks had front shocks prone to early leakage due to suboptimal rod seal material, which led to a recall. I always check for any relevant service bulletins or recalls for the vehicle I’m working on — it can save a lot of head-scratching.
What To Do: Repair Options & When to Replace
Once you’ve confirmed the shock is leaking, your options are pretty straightforward, but they depend heavily on the type of shock and the nature of the failure. Let’s be realistic here: for nearly all modern passenger vehicles, replacement is the only viable fix. Most shocks today are sealed, non-serviceable units with no provision for disassembly or repair.
Standard Shock Replacement
Professional Shock Rebuilding Professional Only
Non-Repairable Damage (Replace Only)
Confirming the Fix: Post-Repair Validation
After replacing or rebuilding a shock, you absolutely need to verify the repair worked. Don’t skip this step. Here’s how I do it:
-
No Visible Leakage: After about 50 miles of mixed driving — make sure to include some dips, bumps, and full suspension cycles — inspect the shock with a bright light. Even a slight seep at the rod seal means the unit may be defective or improperly assembled. You want it bone dry.
-
Controlled Damping: Perform a bounce test. Push down firmly on the corner of the vehicle and release. A properly functioning shock should allow one full rebound, then settle with minimal oscillation — no more than 1.5 cycles total. If it keeps bouncing like a pogo stick, the shock is either faulty or not installed correctly.
-
Driving Feel: Take it for a proper road test. The car should track straight, respond predictably in turns, and show no excessive nose dive, rear squat, or body roll. Any lingering instability means another issue may be present — possibly in the mounts, bushings, or even an alignment problem.
Validation doesn’t require special tools — just a flashlight, a flat surface, and a short road test. But it’s essential to ensure safety and performance, and honestly, it’s just good practice.
Cost, Risk & Making the Smart Decision
Replacing shocks is an investment, no doubt about it. But it’s also a critical safety issue. Here’s a realistic breakdown of what you’re looking at:
Aftermarket Shock Replacement
DIY (parts only): $80 – $200 per unit. Shop (parts & labor): $300 – $500 per corner (often includes alignment). High success rate when installed correctly.
Professional Shock Rebuild
Specialty shops only, per shock. Not DIY. Success rate 85–90% with experienced technician. Moderate risk of seal failure or nitrogen loss under hard use, especially if not done by a top-tier specialist.
Here’s the bottom line from my experience: shocks are a fundamental part of your braking and handling system. If the cost of replacing a pair exceeds 20% of your vehicle’s market value, it’s a tough call, and you might consider if it’s time for a new vehicle. But if the rest of the car is solid, replacing worn shocks is still the right move. Driving with failed dampers increases stopping distances, reduces tire contact with the road, and significantly raises the risk of losing control — especially in an emergency.
And I can’t stress this enough: always replace shocks in axle sets. Putting a new shock on one side with a worn one on the other creates uneven damping, which completely messes up your handling and safety. You might think you’re saving a hundred bucks now, but you’re compromising control and putting yourself and others at risk. Don’t do it.
Keeping Your Shocks Healthy: Prevention & Monitoring
You can’t stop wear entirely, that’s just how parts work, but you can definitely extend shock life with smart habits. The main enemies are contamination and physical damage. If your vehicle has exposed shock rods — like on a lifted truck or some older designs — keep them clean. Road grime, salt, and mud act like sandpaper, scoring the rod and destroying the seal over time. It’s a simple thing, but it makes a huge difference.
Inspect the dust boot regularly. It’s just a simple rubber sleeve, but it’s the first line of defense against dirt and debris getting to that critical rod seal. If it’s torn or missing, replace it or the entire unit before the rod gets damaged. Trust me, it’s cheaper in the long run.
Make visual checks part of your routine. Every oil change, every tire rotation, that’s your chance to get a good look at all four shocks. Look for:
-
Any oily residue or wet streaks on the shock body.
-
Any drips on the ground directly beneath the shock.
-
Dents, cracks, or bent mounting hardware.
Catching a small seep early lets you plan the repair on your terms — not in the middle of a road trip or after the handling has already degraded to a dangerous level. It’s one of the easiest and most effective ways to maintain your ride quality, get the most out of your tires, and keep your vehicle safe.
