Alright, let’s talk about a problem I’m seeing more and more in the shop: your electric or hybrid vehicle’s battery cooling pump acting up. When this thing goes, it’s not just an inconvenience; it can really mess with your high-voltage battery. I’ve been turning wrenches for over 25 years, and while EVs are different, the principles of cooling are the same. When a pump fails, things get hot, and hot batteries are unhappy batteries.
What You’ll See (and Why It’s Serious)
The most common complaint I hear from customers is that their EV or hybrid just won’t charge right. Maybe it stops charging unexpectedly, or it gets “stuck” at a certain state of charge—say, 50%—even when they’ve set it to go to 80% or 100%. You might also see specific warnings pop up on the dash, things like “Service Charging System,” “Battery Temperature High,” or even just a generic check engine light.
Now, when I hook up my scan tool, I often pull codes like P0E2F. That’s a pretty common OBD2 code pointing to battery cooling circuit issues. You’ll also see manufacturer-specific diagnostics that might directly call out the pump or its control system. But here’s the critical thing to understand: the car isn’t being difficult; it’s trying to protect itself. That high-voltage battery generates a ton of heat during charging, especially if you’re hitting a DC fast charger. Without proper cooling, those temperatures climb fast, triggering the vehicle’s safety protocols. The battery management system (BMS) will then cut back on the charging current or just halt charging altogether to prevent damage.
Another big tell-tale sign, and one I always listen for, is a lack of sound during charging. Most EVs and hybrids use an electric coolant pump, usually located near the battery pack or the power electronics. When it’s working, you’ll typically hear a faint hum or a whirring noise from under the hood or somewhere else on the vehicle, depending on the model. If you don’t hear that sound during a charging cycle—especially after the car has been preconditioning or if the battery is already warm—that’s a strong indicator the pump isn’t running.
And yes, this is serious. Don’t ignore it. Repeatedly trying to fast charge with a compromised cooling system is just asking for trouble. While a full thermal runaway is rare, sustained overheating will absolutely accelerate battery degradation. I’ve seen vehicles where the BMS permanently disables high-voltage charging after a few too many over-temperature events. At that point, you’re looking at a full battery module reset or replacement, and that’s a repair nobody wants.
Diagnosing the Cooling Pump: Don’t Guess, Test.
Just because your scan tool throws a code for the battery cooling pump doesn’t automatically mean the pump motor is dead. I’ve seen too many guys jump straight to replacing parts without proper diagnosis. Think of it like a light that won’t turn on: it could be the bulb, sure, but it could also be the switch, a fuse, or the wiring. You need to test the entire circuit before you start swapping expensive components.
The battery thermal management system is complex. It’s a network that includes the pump itself, a control module (often part of the BECM or a dedicated thermal control unit), various relays, fuses, temperature sensors, and a whole lot of wiring. A failure anywhere in that chain can easily mimic a dead pump. Rushing to replace the pump without confirming it’s the culprit is a quick way to waste time and money, and believe me, these parts aren’t cheap.
My Diagnostic Approach:
When a vehicle comes in with these symptoms, here’s how I typically narrow it down:
-
Scan Tool Bi-Directional Control: This is my first go-to. I use a capable scan tool to command the pump to run at 100%. While it’s commanded on, I’m listening for the pump, checking live data for pump speed feedback, and looking for any changes in coolant flow (if accessible).
-
Verify Power and Ground: If the pump isn’t responding to the command, I’ll safely disconnect the pump’s electrical connector. With the pump still commanded on via the scan tool, I use a multimeter to check for 12V supply and good ground at the pump harness connector. If power and ground are present, but the pump isn’t running, that’s a strong indicator of an internal pump failure.
-
Check Current Draw: If you’ve got power and ground but no pump action, a clamp meter can confirm it. If the pump draws no current (or very minimal current) when commanded on, it’s internally open or seized. If it draws excessive current, it might be shorted internally.
-
Coolant Flow Test: For a more definitive check on pump function, especially if it’s making noise but not cooling, I’ll perform a coolant flow test. This involves safely disabling the high-voltage system, depressurizing the loop, and disconnecting an outlet hose from the pump (or a convenient point downstream). Then, I command the pump on with the scan tool. If no coolant flows, and I’ve already confirmed the coolant level is good and there’s no airlock, then the pump isn’t doing its job.
Common Mimics to Rule Out:
Before you condemn the pump, always consider these other possibilities:
-
Blown Fuse or Faulty Relay: Always check these first. A simple fuse can cause a pump DTC.
-
Damaged Wiring Harness: Rodent damage, chafing, or corrosion in the wiring can interrupt the circuit.
-
BECM Software Fault: Sometimes, a control module just needs a software update or a hard reset.
-
Low 12V Battery Voltage: This is a big one. A weak 12V battery can cause all sorts of communication issues and throw false pump faults. Always check the 12V system health.
-
Low Coolant Level or Airlock: If there’s no coolant in the system or a big air bubble, the pump can’t circulate anything, even if it’s running perfectly.
-
Failed Battery Temperature Sensor: A faulty sensor could be sending incorrect high-temp readings, causing the BMS to shut down charging even if the battery is cool.
-
Clogged Cooling Plate: This isn’t a pump failure, but a restriction after the pump can stop flow. You’d still hear the pump running, but see no cooling effect.
Why These Pumps Fail: The Inside Story
Once you’ve done your due diligence and ruled out everything external—fuses, relays, control issues—and you’re holding a suspect pump, here’s what I typically find going wrong inside:
Electrical failure is probably the most common. These pumps use brushless DC motors with integrated electronics. Over time, all that thermal cycling—repeated heating and cooling—can cause solder joints to crack or the insulation on the motor windings to degrade. This leads to open circuits or internal shorts, and the motor just stops dead. Unlike older mechanical pumps, there aren’t any brushes or commutators to wear out, but the electronics are definitely a weak point.
Mechanical wear is another big culprit. The pump relies on small bearings to spin the impeller. If the coolant breaks down, loses its lubricity, or gets contaminated (which can happen if you mix incompatible coolants or neglect service intervals), those bearings will wear out prematurely. I’ve also seen cavitation—where vapor bubbles form and then violently collapse inside the pump—erode the impeller and bearings over time, increasing the load until the motor just stalls.
Internal corrosion is a known issue, especially in some earlier EV and hybrid models. When you have dissimilar metals (like an aluminum housing and steel shafts) in the same coolant loop without the proper corrosion inhibitors, galvanic corrosion can occur. This can bind up the impeller or damage seals. Some manufacturers even issued service bulletins for specific models where this was a recurring problem, often linked to non-OEM coolant use or ignored service schedules.
Just to be clear, when I talk about pump failure, I’m not talking about a clogged radiator, a blocked battery cooling plate, or a failed temperature sensor. Those will definitely cause overheating and similar symptoms, but they’re separate issues from the pump’s own mechanical or electrical health. You’ve got to diagnose each part of the system independently.
The Fix: Replacing the Pump (Professional-Only, No Shortcuts)
⚠️ This is Professional Territory Only ⚠️
Let me be absolutely clear: in nearly every case, the solution here is replacing the entire pump assembly. This is a Professional-Only job. It’s not necessarily about mechanical complexity, but about the high-voltage battery cooling system. This system demands strict safety protocols. Working on a high-voltage battery pack requires specialized tools, specific HV safety training, and proper personal protective equipment (PPE)—including Class 0 insulated gloves rated for 1,000V DC. There are no safe shortcuts here, and attempting this without the right training and gear can be deadly.
Even if the pump itself is a low-voltage (12V) unit, it’s an integral part of the high-voltage battery’s thermal loop. Opening that system without properly disabling the high-voltage circuit risks severe electrical shock. You must follow OEM procedures to isolate the battery pack, which usually means disconnecting the service plug and waiting for capacitors to discharge. And yes, that often involves scan tool access and specific service mode entry on many vehicles.
What I Need for the Job:
-
OEM-specified replacement pump: Aftermarket units vary wildly in quality; I always stick to OEM for critical systems like this.
-
Correct coolant: This isn’t just any antifreeze. You need the OEM-specified type and mix of glycol coolant (e.g., Toyota SLLC, Ford XT-12-FL22, or equivalent). Using the wrong stuff can cause corrosion and further issues.
-
Scan tool: One with bi-directional control and support for the coolant bleed procedure is essential.
-
Safety Gear: Insulated gloves (1000V rated), safety glasses, and other proper PPE.
-
Torque wrench: Many pump mounting bolts are small and easily over-tightened, leading to stripped threads or cracked housings.
General Procedure (Always Consult OEM Service Manuals):
- First, disable the high-voltage system following the manufacturer’s service mode procedure. This is non-negotiable.
- Depressurize and drain the specific coolant loop that the battery cooling pump is part of.
- Carefully remove the old pump. Be meticulous here; you don’t want to drop any debris into the coolant lines.
- Install the new pump, making sure to use fresh seals and torque all mounting bolts to the manufacturer’s exact specifications.
- Refill the system with the correct type and concentration of coolant.
- Perform an automated or manual bleed cycle using the scan tool. This runs the pump and purges any air from the system. Air pockets are killers in these systems.
- Verify there are no leaks anywhere in the system.
- Finally, re-enable the high-voltage system.
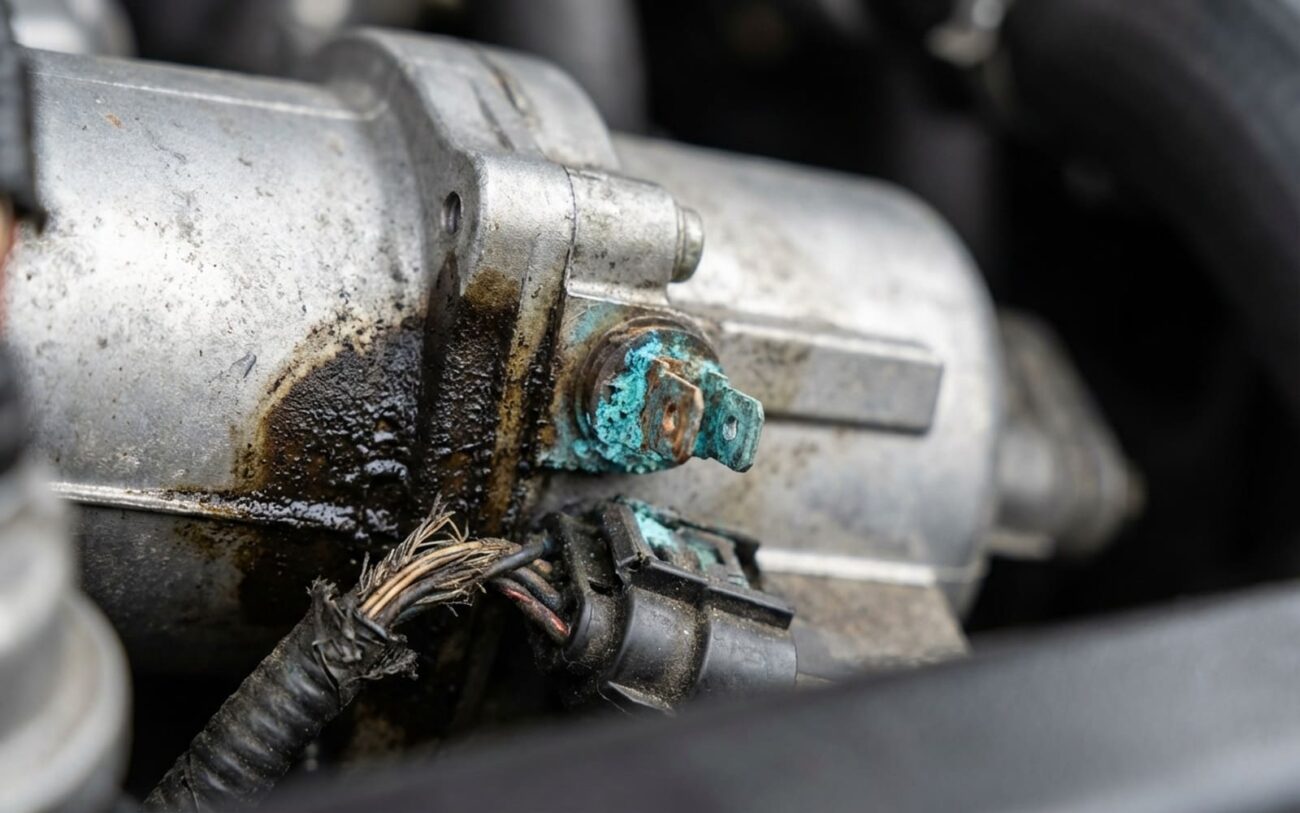
There’s one rare exception where you might not need a new pump: if your diagnosis clearly points to corrosion in the pump’s electrical connector. If the high-voltage system is confirmed off, the connector is accessible, and the rest of the circuit tests perfectly, sometimes cleaning that connector with electrical contact cleaner and applying dielectric grease on reassembly can restore function. But in my experience, the pump itself fails far more often than just the connector.
And let’s kill a few myths right here: no, you can’t bypass the pump. No, you can’t use a universal pump. No, sealants or stop-leak products won’t fix this. Running without proper battery cooling risks catastrophic thermal events. There are absolutely no safe workarounds.
Verifying the Repair: Don’t Just Bolt It On and Hope.
Replacing the pump isn’t the finish line; it’s the start of the validation process. You need to confirm the system is actually moving coolant and that the BMS recognizes normal operation. I always tell my guys: if you didn’t verify it, you didn’t fix it.
With a capable scan tool, you need to monitor live data PIDs. I’m looking for:
-
Commanded vs. actual pump speed: These should match up pretty closely, usually within 10%.
-
Battery module temperatures: These should stabilize or even decrease during charging.
-
Coolant temperature: Specifically, at the inlet and outlet of the battery pack, looking for a healthy differential.
-
Any pending or historical DTCs: After clearing, they should stay clear.
After clearing all codes, I’ll perform a drive cycle or a simulated charge cycle. Then, I run a real-world charging test—preferably on a Level 2 charger—for at least 30 minutes. I’m watching those battery temperatures like a hawk. A healthy system will bring temps down or hold them steady in the ideal range (typically 20–30°C). If the battery temperature climbs steadily, you still have an issue. It could be an airlock, incorrect coolant mix, or an incomplete bleed procedure. Don’t release the car until it’s right.
Also, it’s a good practice to recheck for codes after a few days of normal use. Some faults only appear after multiple thermal cycles.
What This Is Going to Cost and the Tough Decisions
Here’s the reality check on a battery cooling pump replacement. It’s not the cheapest repair, but it’s often less than the complete battery replacement that some folks immediately jump to fearing.
| Repair Type | DIY Cost | Shop Cost | Success Rate | Secondary Risk if Failed |
|---|---|---|---|---|
| Pump replacement (Professional) | Not applicable (HV safety risk) | $800 – $1,800 (parts and labor) |
>95% if diagnosis is correct and system is properly bled |
Repeated over-temperature charging cycles leading to irreversible battery degradation or permanent charging disablement via BMS lockout. |
The real decision point comes with older EVs or hybrids that already have marginal battery health. If the repair cost starts to creep up past, say, 40% of the vehicle’s market value, and a battery capacity test shows significant degradation, you really have to weigh whether this investment makes sense. I’ve seen owners spend $1,500 on a pump, only to be looking at a $10,000 battery replacement a year later. Get a full battery state-of-health (SOH) check before you commit to anything.
Always check your EV battery warranty status before authorizing any repairs. You might be covered!
Cost-Saving Tip
If you’re out of warranty, independent EV specialists are becoming more common. They often offer services at a lower cost than dealerships, sometimes 30–50% below dealership pricing. Just make sure you verify their experience and certifications—this isn’t a job for a general mechanic. A qualified indie shop can save you thousands.
Keeping It From Happening Again
Prevention starts with using the correct coolant. This isn’t just “antifreeze” off the shelf; it’s a carefully engineered fluid with specific inhibitors designed to prevent galvanic corrosion and maintain lubricity for those pump bearings. Mixing coolants or using generic brands can void your warranty and absolutely accelerate wear. Follow the manufacturer’s replacement interval—usually every 5–8 years. There’s no such thing as “lifetime” coolant in a high-performance thermal system like this.
For early detection, I recommend building a few habits:
To Prevent Recurrence
-
Listen for the pump: Pay attention when your car is charging or preconditioning. Silence where there should be a hum is a red flag.
-
Monitor battery temperature: If your infotainment screen or a third-party app gives you battery temperature, keep an eye on it. A rapid or sustained rise during charging needs immediate attention.
-
Routine service checks: During your regular maintenance, ask your technician to pull data on pump operation, coolant level sensor status, and any stored codes in the battery thermal management system.
Finally, don’t forget about your 12V battery. A weak 12V system can disrupt communication with the BECM and cause false pump faults or prevent proper system initialization. If your car has a start/stop system, that’s even more reason to monitor charging voltage and battery condition. It’s all connected, and a healthy 12V system is foundational to a healthy EV.
