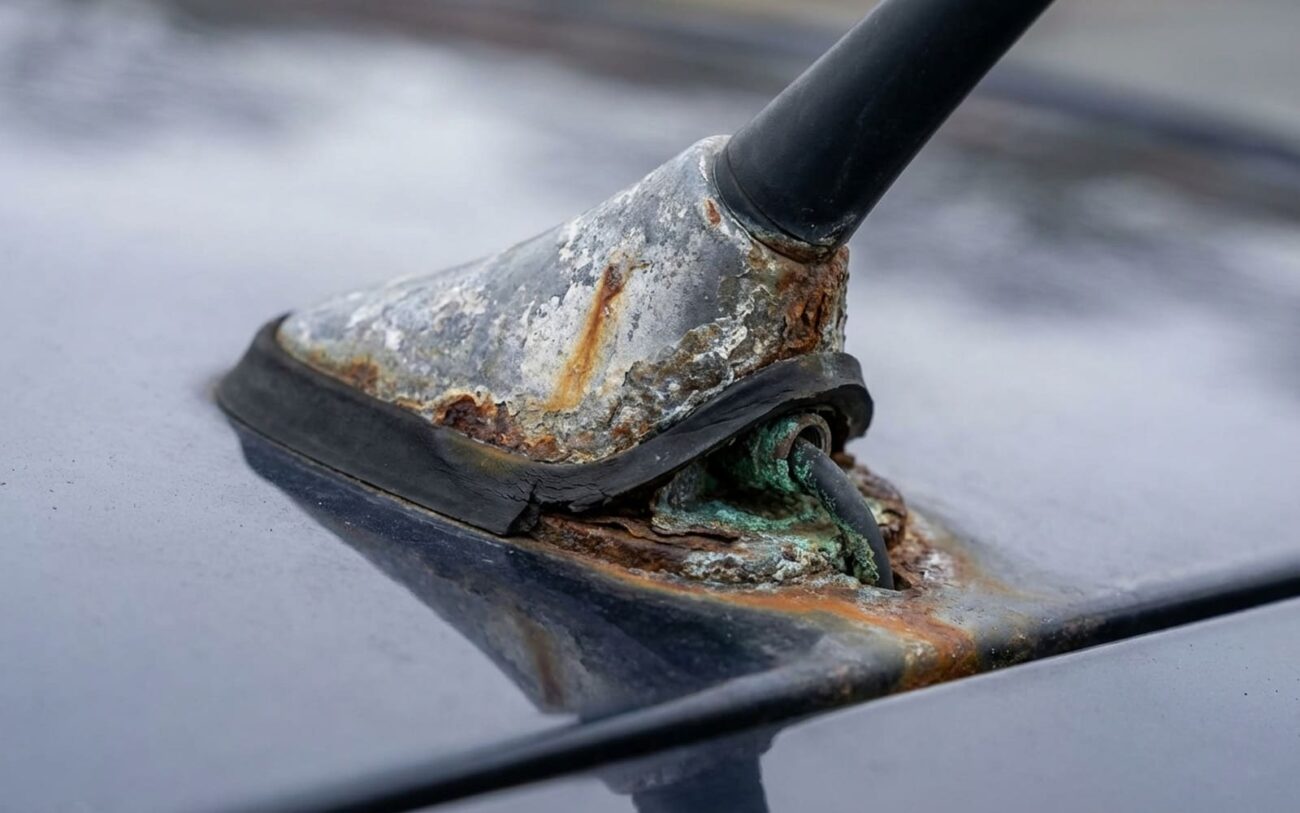
You’re driving down the highway and your radio starts filling with a steady hiss—like the sound of wind, but it doesn’t go away when you roll up the windows. It gets louder as you speed up. Stations fade in and out, even the strong local ones. That’s not “normal radio noise.” That’s your antenna system failing, and more often than not, it starts at the base where the mast meets the roof. I’ve torn down hundreds of these—on Camrys, Accords, Explorers, you name it—and what I find 90% of the time isn’t a bad head unit or a fried amp. It’s corrosion and water where they shouldn’t be.
Symptoms That Point to the Antenna Base
If you’re hearing broadband static across all speakers—especially on AM—and it worsens with speed or humidity, your antenna is picking up electrical noise instead of radio signals. That’s not a fluke. The outer shield of the coaxial cable is supposed to block interference, but when corrosion eats into the ground path at the base, that shield becomes useless. Suddenly, your antenna isn’t rejecting noise—it’s amplifying it.
Pair that with poor reception: stations cutting out, weak signal indicators, or audio that sounds “muffled” even when tuned in. That’s your center conductor losing continuity. The same corrosion that’s killing the ground is also degrading the signal path. And if you can make the static crackle or cut out by wiggling the mast? That’s not a loose wire. That’s a dead giveaway you’ve got a failing connection at the base.
How to Confirm It’s the Antenna Base (Not Something Else)
Static can come from a lot of places—bad grounds, alternator ripple, a failing amplifier. So before you start pulling trim, you need to isolate the antenna system. This is how I do it in the shop, every time.
Step one: disconnect the coaxial cable at the back of the head unit. Turn the radio on. If the static disappears, the problem is upstream—antenna, cable, or base. If it’s still there, you’re dealing with a power or ground issue in the audio system itself. That’s a different job.
If the noise goes away when the antenna is unplugged, reconnect it and go to the antenna base. Disconnect the cable there. Now go back and check the head unit again. If the static comes back, the fault is downstream—damaged cable, bad splice, or a module picking up noise. But if the static only returns when the base is connected? You’ve just pinned it to the mast or base assembly.
| Symptom | Likely in Antenna Base | Common External Mimics | Definitive Test to Confirm Source |
|---|---|---|---|
| Broadband static from all speakers | Corrosion creating high resistance in the shield-to-ground path, turning the antenna into a noise receiver. | Faulty head unit ground, alternator whine, defective amplifier or signal processor. |
Disconnect antenna coaxial cable at head unit. If static disappears, fault is in antenna system. Reconnect and disconnect at antenna base. If static disappears only when base is disconnected, fault is at base or mast. |
| Poor AM/FM reception | Corrosion interrupting the RF signal path between mast and coaxial center conductor. | Faulty antenna amplifier (if equipped), broken coaxial cable, or failed tuner in head unit. |
Measure resistance between antenna mast and center pin of disconnected coaxial cable at base. Expected: <5 ohms. >10 ohms indicates signal path degradation. Also, measure resistance between base plate and cable shield—should be <1 ohm. |
| Noise changes when mast is touched or wiggled | Intermittent connection due to corrosion at the mast-to-base interface. | Loose mechanical fit, broken internal mast element, or cracked coaxial connector. |
Perform resistance tests while wiggling the mast. Fluctuating readings confirm an unstable connection at the base. |
Why the Base Fails: It’s Not Just Rust
The roof is one of the worst places on the car for electronics. Rain, snow, salt, UV, temperature swings—this thing gets hammered. But the real killer? Galvanic corrosion. The mast is usually aluminum or chrome-plated brass. The base is often steel or zinc die-cast. When moisture bridges them, you’ve got a tiny battery forming at the joint. It eats the contact surfaces, especially the center pin and ground flange.
Then there’s crevice corrosion. Water gets trapped under the gasket, where oxygen is low. That environment accelerates pitting on the flange—the very part that grounds the shield. Once that ground degrades, you lose both signal quality and noise rejection.
And don’t forget the dielectric insulator—the plastic piece that keeps the center conductor isolated. UV and heat cycling make it brittle. When it cracks, moisture can create a leakage path to ground. That kills signal strength and can introduce noise. I’ve seen this on Toyota Siennas, Honda Pilots, even some Fords with combo GPS/FM bases. It’s a known issue, especially in coastal or northern climates.
What You Can Actually Do About It
[DIY-FEASIBLE] Contact Cleaning & Re-greasing
Full Antenna Base Replacement Professional Only
Base Replacement + Roof Repair Professional Only
[TEMPORARY] External Sealant Application
Did It Work? Here’s How to Know
Don’t just turn the radio on and call it good. Test it. For a cleaning job, use your multimeter. Measure resistance between the base plate and a known good chassis ground—should be less than 1 ohm. Measure between the mast and the center pin—should be under 5 ohms. Then power up. Static should be gone. Strong stations should be clear. Try a weak one—if it comes in, you’ve restored signal integrity.
For a base replacement
-
Repeat the electrical tests, then perform a water test.
-
Use a garden hose or take the car through a car wash.
-
Afterward, check inside—look at the headliner, sunroof rails, and overhead console. There should be no dampness, drips, or fogging.
-
Any sign of moisture means the seal failed, and you’re back to troubleshooting. A proper seal should last for years, not weeks.
Cost, Risk, and When to Walk Away
| Repair Type | DIY Cost | Shop Cost | Success Rate | Secondary Risk if Failed |
|---|---|---|---|---|
| Contact Cleaning & Re-grease | $15–$25 (cleaner, grease) | $150–$300 | High (>85%) if corrosion is superficial | Continued water ingress leading to roof corrosion or headliner damage |
| Antenna Base Replacement | $60–$200 (OEM or quality aftermarket) | $400–$800 (parts and labor) | Very High (>95%) with proper sealant and installation | Water leak due to improper sealant application or uneven torque |
| Base Replacement + Roof Repair | N/A (requires body shop) | $1,000+ | Depends on repair quality; can be near 100% if done correctly | Unaddressed corrosion leading to structural weakening or perforation |
Here’s the truth: if the repair costs more than 25% of your car’s value, and you don’t rely on AM/FM, you’ve got another option. Disconnect the coax at the head unit, seal the connector with dielectric grease, and plug the roof hole with a new gasket and sealant. It stops water and kills the static. You lose factory radio, but Bluetooth still works. It’s not ideal, but it’s honest. On a 15-year-old sedan with 200k miles? Sometimes that’s the smart move.
How to Keep It Fixed
Prevention is simple: inspect the base every time you wash the car, or at least twice a year. Look for cracks, shrinking seals, or water stains on the headliner. The earliest warning sign? Static after rain or a car wash. That’s your seal failing. Fix it now, not later.
Apply a UV-resistant plastic protectant to the housing—avoid silicone sprays; they attract dirt and degrade rubber. And remember: clean contacts and dielectric grease are your best defense. It’s not just about fixing it once. It’s about making sure it stays fixed.
