When Your Timing Belt Snaps: The Immediate Aftermath
Alright, let’s get real. When a timing belt lets go, it’s rarely a quiet affair. In my 25+ years turning wrenches, I’ve seen it happen countless times, and the experience is pretty consistent. Your engine will just cut out, dead stop, like someone yanked the plug. And usually, right before that, you’ll hear a sharp, metallic clatter or a grinding noise coming from the front of the engine.
That noise? That’s the sound of pistons hitting valves. Most modern engines are what we call “interference engines.” That means the valves and pistons actually share the same space in the combustion chamber, just at different times. The timing belt is what keeps that dance perfectly choreographed. When it breaks, that coordination vanishes, and those expensive metal parts start smashing into each other. It’s not pretty, and it’s definitely not cheap.
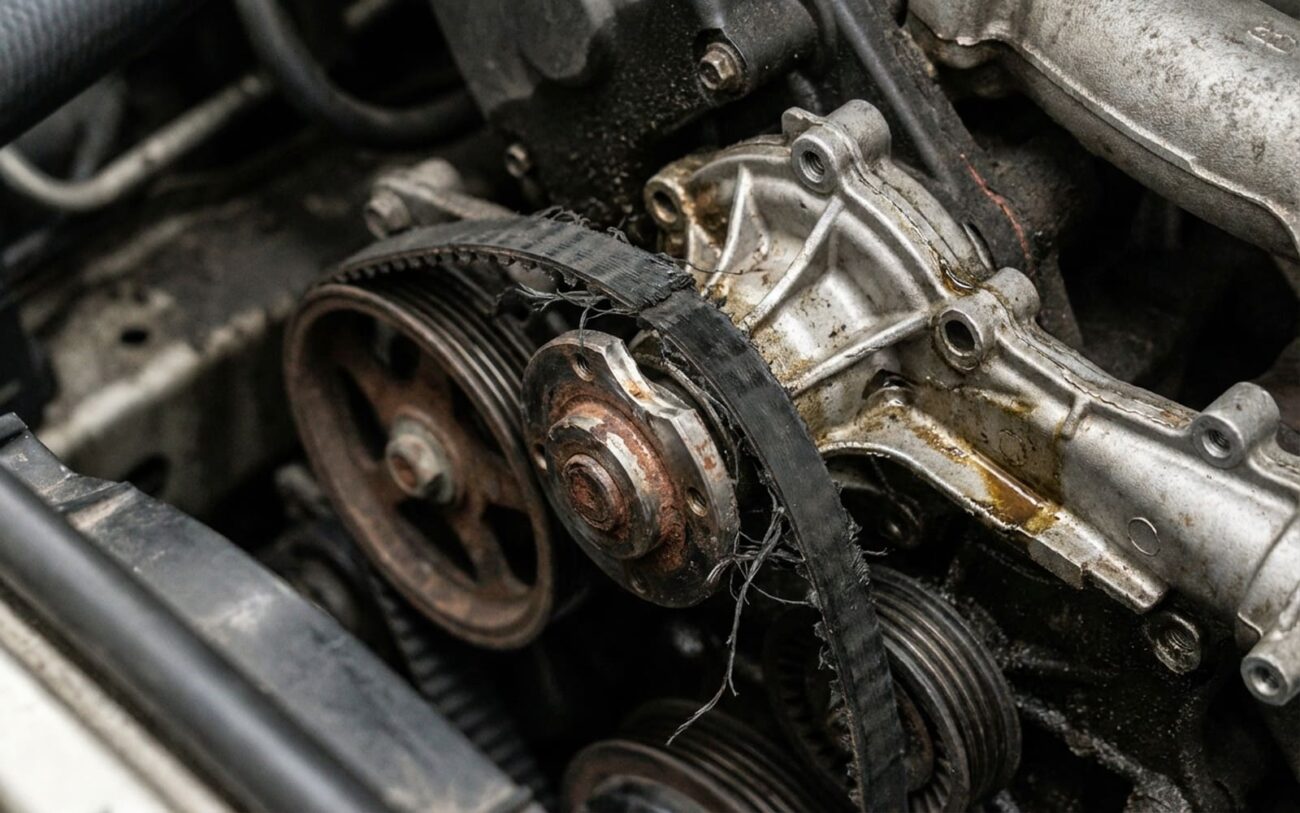
Shortly after the bang and the stall, you might see a thick cloud of steam rolling out from under the hood, and you’ll probably smell that distinct sweet scent of antifreeze. Often, coolant will be pooling right under the front of the engine. Now, this isn’t usually a separate cooling system failure. What happens is, when the engine locks up from valve-piston contact, a massive shock load travels through the entire timing system. That force can completely destroy the water pump’s internals – snapping the drive shaft, shattering the impeller (especially if it’s plastic, which many are), or cracking the mounting flange. So, the pump fails because the engine seized, not the other way around. It’s a consequence, not the initial cause.
Critical Warning: Do NOT Try to Restart!
The absolute first thing you need to do when you hear that bang and the engine dies is get the car safely off the road and stop. Do not, under any circumstances, try to restart the engine. Cranking it over will only force any already bent valves deeper into the cylinder. This can cause even more damage to your pistons, cylinder walls, or even crack the cylinder head. At that point, you’re not saving money; you’re making a bad situation exponentially worse. You’ve essentially got a very heavy, very expensive paperweight until a proper diagnosis can be made.
Diagnosing the Real Problem: Is It Really the Timing Belt?
It’s easy to jump to the worst conclusion when you hear a loud bang and see coolant everywhere, but not every sudden engine stop means a broken timing belt. Some other failures can mimic these symptoms pretty closely. The key here is methodical diagnosis – don’t guess, test.
Step 1: Rule Out External Failures
First thing I do is check the serpentine belt. If that’s broken or shredded, it can cause a sudden stop (no alternator, no power steering, sometimes no water pump if it’s external). Even if the serpentine belt is intact, I’ll remove it and try to manually spin each accessory: the A/C compressor, power steering pump, and alternator. If any of these are seized, they can lock up the engine and cause a similar sudden stop and noise. A seized idler pulley on the serpentine system can also do it. If you find a seized accessory, you might have dodged a bullet – but you’ll still need to fix that component.
Step 2: Check for Coolant Leaks
If you’re seeing coolant, we need to figure out where it’s coming from. I’ll perform a cooling system pressure test, usually around 16–20 psi, matching the cap rating. Watch for external sprays from hoses, the radiator, or the thermostat housing. If it’s just a split hose, that’s a much easier fix. But if the pressure drops quickly and you don’t see an external leak, that points to an internal failure, or a severely damaged water pump. To check the water pump, I’ll drain the coolant and use a flashlight or borescope to look into the pump’s inlet. Missing or shattered impeller blades are a dead giveaway of severe damage.
Important distinction: A water pump failing on its own usually won’t snap a timing belt unless its bearing seizes completely. In most timing belt break scenarios, the water pump is a victim of the engine seizing, not the cause of the belt breaking.
Step 3: Confirming the Timing Belt Itself
This is the big one. If the external checks don’t reveal anything obvious, the next step is to get eyes on the timing belt. If it’s accessible, I’ll remove the upper timing cover. You’re looking for a belt that’s clearly broken, shredded, or has jumped teeth severely. If the belt looks intact, that’s a good sign, but not a guarantee. Sometimes a belt can jump just enough teeth to cause issues without looking obviously broken.
If the belt appears fine, or if you suspect internal damage regardless, I’ll use a borescope. Pull a spark plug from each cylinder and snake the borescope in. Look at the piston crowns for any dents, nicks, or cracks – clear signs of valve-to-piston contact. You might also see valve fragments or other debris in the cylinder. This confirms catastrophic internal mechanical failure, whether it was the timing belt or something else entirely (like a connecting rod failure, though those are usually louder and more destructive).
Why Timing Belts Fail: The Root Causes I See
Understanding why these belts break is key, not just for prevention, but also for making sure your expensive repair doesn’t happen again. Most timing belt failures aren’t random; they’re the result of age, wear, or something entirely avoidable.
In my experience, the number one killer of timing belts is oil contamination. If you’ve got a leaking front crankshaft seal, camshaft seal, or even a valve cover gasket that’s weeping, and that oil drips onto the belt, it’s a death sentence. Oil degrades the rubber, causing it to swell, crack, and lose its tensile strength. Over time, you’ll see fraying, the internal cords delaminate, and then, boom – failure. I’ve seen this happen more times than I can count, especially on engines like the Chrysler 2.4L where the valve cover area can seep oil right down onto the belt. There are even documented service alerts for this. Oil and rubber just don’t mix, and it’s a silent killer.
The second major cause is wear in the supporting components: the tensioner and idler pulleys. These parts are critical for keeping the belt properly tensioned and aligned. When their bearings wear out, they can seize, start to wobble, or generate excessive heat. A seized idler can stop the belt mid-rotation, or a loose tensioner allows the belt to skip teeth. Either scenario leads to the timing jumping, or worse, complete belt failure. Often, the belt itself isn’t worn out; it’s the system around it that failed first.
And let me reiterate a point that often gets confused: a seized water pump bearing can absolutely snap a timing belt. This is different from the pump being destroyed after the belt breaks, which we talked about earlier. In this case, the pump is the cause, not the victim. The bearing seizes, locks up the pump, and the belt, unable to move, snaps. Both situations lead to the same major repair, but knowing the root cause is critical, especially if you’re troubleshooting a recent belt replacement or dealing with a warranty claim.
Your Repair Options: What Happens Next
This is Professional Territory. No Half-Measures.
What happens next depends entirely on your engine type and the extent of the internal damage. There are no shortcuts here. This is full-system work, and it’s not for the faint of heart or the inexperienced DIYer.
Path A: Broken Belt, No Internal Damage (Non-Interference Engine) Advanced DIY Possible
Path B: Broken Belt with Valve-Piston Interference (Interference Engine) Professional Only
Path C: Catastrophic Engine Damage Professional Only
Let me be absolutely clear here: there is no temporary fix for a broken timing belt. No zip-ties, no epoxy, no “limp mode” that’s going to save you. Any attempt to crank or start the engine with bent valves risks turning a repairable head job into a complete engine replacement. If that belt’s broken, the engine is done until it’s properly repaired. Period.
Verifying the Repair: How I Know It’s Done Right
After all that work, and often thousands of dollars, verifying the repair is absolutely critical. You can’t just button it up and hope for the best.
For Path A and B repairs, the first sign of success is a smooth start. The engine should fire quickly and run quietly, with no knocking or ticking from the timing cover area. I always use a scan tool to confirm camshaft and crankshaft position sensor synchronization. If you see a P0016 (cam/crank correlation) or P0017 code, your timing is off, and you’ve got to go back in. We also perform a cooling system pressure test to ensure the new water pump and all seals hold pressure without any leaks.
For Path B, where the cylinder head was removed, validation goes even further. A compression test on all cylinders should show readings within 10% of each other. I’ll also do a combustion leak test (using a block tester with a dye fluid) to check for exhaust gases in the coolant, which would indicate a head gasket leak or a cracked head. After a thorough test drive, I’ll monitor for any misfire codes or rough running. Now, if a check engine light comes back on for something like an oxygen sensor, that’s usually a separate issue – we cover those kinds of common frustrations in other articles. But for the timing belt job, we’re looking for clean running.
The Hard Numbers: Cost and the “Is It Worth It?” Decision
Let’s talk dollars and sense, because this is where most people make their decision. Repair cost versus the car’s value is almost always the deciding factor.
| Repair Type | DIY Cost (Parts Only) | Shop Cost (Est. Parts & Labor) | Success Rate (If Done Right) | Risk if Something’s Wrong |
|---|---|---|---|---|
| Path A (Non-Interference) | $300 – $600 | $800 – $1,500 | 98% | Incorrect timing alignment can create interference conditions, leading to valve damage even in a non-interference design if the cam is misindexed. |
| Path B (Interference, Head Repair) | $1,000 – $2,500 | $2,500 – $4,500 | 90–95% | Undetected warpage, cracked valve guides, or debris left in the cylinder can cause ongoing oil consumption, coolant loss, or premature failure. |
| Path C (Engine Replace) | $3,000 – $7,000+ | $4,500 – $9,000+ | 99% (with quality reman or low-mileage used core) | Used engines may have hidden wear; reman units can have quality variances depending on the supplier. |
Here’s the reality check I give my customers: if the estimated repair cost is going to exceed, say, 75% of your car’s private-party value in “Fair” condition (check Kelley Blue Book or similar), the math rarely works out in your favor. At that point, putting the repair money toward a different, more reliable vehicle often makes more financial sense than pouring funds into what could become a money pit. I’ve seen too many owners try to “save” a car this way, only to face another major failure just months down the road.
Prevention: How to Avoid This Nightmare Entirely
This kind of catastrophic failure is almost always preventable. It comes down to one thing: proper, timely maintenance. You stick to it, and you’ll likely never have to deal with a broken timing belt.
Early Warning Signs to Watch For
-
During your regular oil changes, take a flashlight and shine it into any access points in the timing cover. Look for cracks in the belt, frayed ribs, or a glazed, shiny surface. Those are all signs of heat damage or slippage, and they mean trouble is brewing.
-
Even more importantly, check for any oil leaks around that timing cover. Even a small seep can contaminate the belt over time, and as I said, oil is the number one killer of these belts.
-
Listen carefully on cold starts. A brief whirring, chirping, or slapping noise from the front of the engine could indicate a failing tensioner or idler pulley. Don’t ignore those sounds.
-
If you get a P0016 or P0017 code (cam/crank correlation), or you notice hard starting and a rough idle, don’t just dismiss it as a sensor issue. It could be the timing belt starting to jump time. While some symptoms overlap with other sensor problems, it’s always worth ruling out mechanical causes first, especially if you’re due for a belt replacement. Diagnose wisely – don’t just throw parts at it.
My strongest advice? Replace the timing belt, the tensioner, and all idler pulleys as a complete kit at the manufacturer’s recommended interval. That interval – usually somewhere between 60,000 and 100,000 miles, but check your owner’s manual – isn’t a suggestion. It’s an expiration date. Rubber degrades over time, even if you don’t put many miles on the car. And if your water pump is driven by the timing belt, replace it every single time you do the belt. The pump itself costs a fraction of the labor involved, and skipping it risks having to do the entire job again in another 30,000 miles because the old pump gave out. It’s not cheap to do it right, but it’s smart. It saves you a lot of money and headache in the long run.