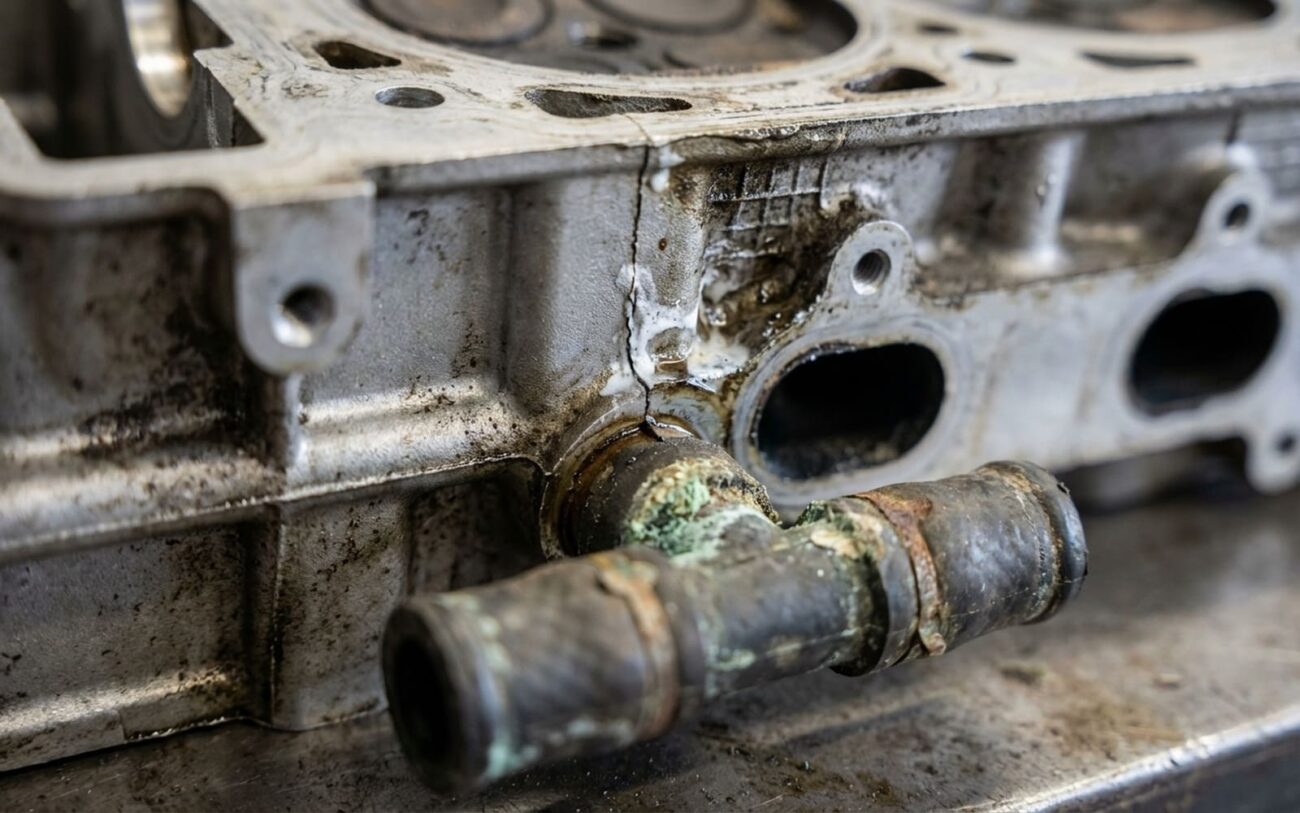
Alright, let’s talk about that bubbling coolant reservoir. If you’re seeing your overflow tank acting like a witch’s cauldron, especially when the engine’s running but not necessarily pegged on the temperature gauge, you’ve got a problem. I’m talking violent bubbling, coolant getting pushed out the overflow hose, or even just a constant stream of bubbles. That’s not normal expansion or a little gurgle; that’s combustion gases getting into your cooling system. And when exhaust gas shows up where it absolutely doesn’t belong, like under your radiator cap or in the reservoir, your head gasket is almost always the prime suspect.
See, the head gasket is a critical seal. It sits right between the cylinder head and the engine block, keeping three separate systems from mixing: the combustion chambers, the coolant passages, and the oil galleries. When that gasket fails, particularly where a cylinder meets a coolant passage, those high-pressure exhaust gases from combustion find a path of least resistance right into your cooling system. These gases supercharge the pressure in the system, and they can cause localized boiling even if your thermostat and radiator are otherwise doing their job. Sure, a cracked block or cylinder head can do the same thing, but in my 25+ years, I’ve found those are far less common. Most of the time, this symptom screams “head gasket issue,” not structural engine damage.
Beyond the Bubbles: Other Warning Signs I Look For
The bubbling coolant is often the first thing a customer notices, but it’s rarely the only symptom. Usually, it’s part of a bigger pattern. Here’s what else I typically see come into the shop:
- Overheating: Even if the coolant level looks full, those combustion gases create air pockets. Air doesn’t transfer heat like coolant does, so the engine starts running hot.
- Constant Bubbling on a Cold Start: This is a dead giveaway. With the engine cold and the radiator cap safely removed, start the engine. If you see immediate churning or spurting in the radiator neck, that’s pressurized exhaust gas forcing coolant upward.
- Mysterious Coolant Loss: You’re losing coolant, but there’s no visible drip on the ground. Where’s it going? It’s either being burned off in the combustion chamber and going out the exhaust, or it’s getting pushed into the overflow tank and evaporating from there.
- White, Sweet-Smelling Exhaust: If you’re seeing white smoke that smells sweet coming from the tailpipe, especially on a warm engine, that’s vaporized coolant. This happens when the leak is directly into the combustion chamber.
- Milky Oil: Pop the oil cap or check the dipstick. If you see a milky, frothy residue, that’s coolant mixing with your engine oil. This is bad news, as coolant destroys oil’s lubricating properties and can quickly lead to bearing damage.
Look, you need to act fast if you see these signs. Letting a blown head gasket go is a recipe for disaster. Repeated overheating can warp an aluminum cylinder head beyond repair. Once that head is warped, even a brand-new gasket won’t seal properly. I’ve seen plenty of engines that started with a repairable gasket issue end up needing a full rebuild or replacement because someone delayed the diagnosis. Plus, that extra heat degrades your engine oil, reducing lubrication and seriously increasing the risk of spun rod bearings or camshaft failure.
Diagnosing the Real Culprit: Is It a Head Gasket or Something Else?
It’s easy to jump to the worst-case scenario, but don’t. Other issues can cause overheating and boiling—a failed thermostat, a clogged radiator, or a faulty water pump, for instance. But those external cooling system failures don’t typically produce that rapid pressurization and bubbling in a cold system. The trick is figuring out if it’s an external cooling problem or an internal combustion leak.
Here’s how I approach the diagnosis, and the tests that really tell the tale:
| Symptom | Points to Head Gasket / Internal Leak | Could Be External Cooling Issue | My Go-To Test to Confirm |
|---|---|---|---|
| Combustion gases in coolant (bubbling) | Leak from cylinder into coolant passage (gasket, head, or block) | Very rarely a cracked cylinder head or engine block, but those are less common than gasket failure. |
Combustion Leak Detector (Block Tester): This is my first step. It uses a chemical fluid that changes color (usually from blue to yellow or green) in the presence of hydrocarbons (exhaust gases). A positive result confirms exhaust gas in the coolant, period. |
| Coolant disappearing without visible external leak | Internal leak into combustion chamber or oil system | Minor evaporation from the overflow, tiny hose seepage that dries before dripping, or sometimes an intake manifold gasket leak (on engines where coolant runs through the intake). |
Cooling System Pressure Test: I pressurize the cold system to the radiator cap’s rating (typically 13–18 psi) and let it sit. A steady pressure drop with no external leaks visible means that coolant is going somewhere internal. While it’s pressurized, I’ll also check the oil for milky contamination. |
| Overheating with bubbling on a cold start | Exhaust gas pressurizing coolant, disrupting flow | Stuck thermostat, severely clogged radiator, failed water pump, or simply very low coolant. |
Infrared Temperature Gun & Visual Inspection: I’ll use a temp gun to compare temperatures at the thermostat housing, upper and lower radiator hoses, and heater core lines. If temperatures are inconsistent, it points to a flow issue. But if flow seems fine (radiator is hot top to bottom) and the bubbling persists, then I go straight for the combustion leak test. |
Another excellent diagnostic tool is a cylinder leak-down test. This is where you pressurize each cylinder individually at top dead center with compressed air. You listen for where that air escapes. If you hear bubbling or air rushing into the coolant reservoir, or even into an adjacent cylinder, you’ve pinpointed the leak. It’s a bit more involved, but it’s incredibly precise.
And just to clear something up: while a faulty coolant temperature sensor can definitely cause weird readings and affect how the engine runs, it won’t cause actual boiling or pressure spikes in the cooling system. It might make your ECU think the engine is cold and mess with fuel trim, but the physical signs of combustion gases in the coolant are unmistakable and point to a mechanical failure, not a sensor issue.
Why Head Gaskets Give Up the Ghost: It’s More Than Just Age
Sure, head gaskets wear out over time, but an outright failure is usually triggered by something specific. The gasket itself is a precision component—especially modern multi-layer steel (MLS) designs. It relies on consistent clamping force from the head bolts, perfectly flat sealing surfaces on the block and head, and stable operating temperatures. When one of those factors goes out of whack, that’s when you get a leak.
Here are the common culprits I’ve seen over the years:
- Overheating Events: This is probably the biggest one. Even a single severe overheat can distort or warp the cylinder head, especially if it’s aluminum. Once that happens, the gasket seal is compromised.
- Pre-ignition or Detonation: These are abnormal combustion events that create extreme pressure spikes within the cylinder. They can literally crush the gasket’s fire rings, which are designed to seal the combustion chamber. This is more common in turbocharged or high-compression engines.
- Coolant Incompatibility: Mixing different types of coolant or using a non-OEM spec coolant can cause problems. You might get silicate drop-out, which forms abrasive particles, or corrosion that slowly erodes the gasket’s protective coatings, leading to leaks.
- Improper Torque or Reused Bolts: Many modern engines use torque-to-yield (TTY) head bolts. These bolts are designed to stretch during installation to provide a very specific clamping force. Reusing them or skipping the manufacturer’s exact torque sequence and angle specs means you won’t get the proper clamping force, and gasket failure is almost guaranteed.
I also want to point out that some engines just have known weak points. For example, certain four-cylinder models might have narrow sealing surfaces between cylinders and coolant passages, making them more prone to gasket failure. I’ve seen service bulletins for specific model years where the factory-assembled gaskets had inadequate sealer application, leading to early external weeping. So sometimes, it’s just a design flaw.
And remember this: cylinder head warping isn’t a symptom of a blown head gasket; it’s often a cause. A warped head will prevent a new gasket from sealing properly, so resurfacing or outright replacement of the head is absolutely essential during the repair.
The Fix: Your Repair Options and What I Recommend
When it comes to fixing a blown head gasket, there’s really only one truly reliable path, and a couple of less-than-ideal alternatives. This isn’t a job for the faint of heart or the inexperienced DIYer. It demands specialized tools, attention to detail, and often, professional machining.
Full Head Gasket Replacement Professional Recommended / Advanced DIY
This is the only long-term, reliable fix for a true internal combustion leak. It’s a big job, and if you’re attempting it yourself, you need advanced mechanical skills, a full set of specialized tools, and access to a machine shop. Here’s the general process:
- Disassembly: You’ll be removing the intake manifold, valve cover, and eventually the cylinder head itself. This often means draining fluids, disconnecting fuel lines, wiring harnesses, and exhaust components.
- Inspection and Machining: Once the head is off, you absolutely must inspect it for cracks. Then, check its flatness with a precision straightedge and a feeler gauge. Most manufacturers specify a maximum allowable warp of about 0.002–0.004 inches over 6 inches. If it’s warped, it goes to a machine shop for resurfacing. Don’t skip this; a warped head will just blow the new gasket again.
- New Parts: Always use a high-quality OEM or equivalent aftermarket head gasket set. And this is critical: you must install new torque-to-yield (TTY) head bolts. Never reuse old TTY bolts; they’ve stretched and won’t provide proper clamping force.
- Reassembly with Precision: Follow the manufacturer’s exact torque sequence and angle specs for the head bolts. This might be something like “30 ft-lbs + 90° + 90°.” Get it wrong, and you’re doing the job again.
- Coolant Fill and Bleed: Refill the system with the correct type of coolant. Then, thoroughly bleed all the air out using a vacuum fill tool or the manufacturer’s specific bleed procedure. Air pockets cause hot spots and can lead to another failure.
I’ve seen countless DIYers try to cut corners on this job—skipping resurfacing, reusing bolts, or not following torque specs. They almost always end up back in my shop a few months later with the gasket failed again. This is not the place to save a buck by doing it halfway.
Chemical Sealants Temporary / Last-Resort / External Leaks Only
If your diagnostic tests show only a tiny external coolant leak at the very edge of the head gasket—meaning no combustion gases in the coolant, no coolant in the oil, and no overheating—then some people consider a chemical sealant like Bar’s Leaks Liquid Aluminum. But let me be blunt: these products carry real risks. They can, and often do, clog up your heater core, radiator tubes, or even your thermostat, leading to new overheating issues. I’ve also seen them interfere with water pump seals. They are absolutely not effective for internal combustion leaks, and even for external weeping, they rarely provide more than a few months of relief, if that. I generally tell my customers to avoid them unless they’re trying to limp a car a very short distance to the junkyard.
Engine Replacement When Damage is Too Severe
Sometimes, during teardown, you find damage that’s just too far gone. If the cylinder head is cracked beyond repair (which a machine shop will tell you) or if the engine block itself has a crack between a cylinder and a coolant passage, then replacing the entire engine is usually the only practical option. In most cases, a used or remanufactured long-block assembly makes more economic sense than trying to custom machine a severely damaged block. Aluminum blocks, especially in transverse-mounted engines, are often not economically repairable once they develop a crack.
Verifying the Repair: Don’t Just Assume It’s Fixed
You’ve done the hard work, but don’t just assume the bubbling stopped and everything’s fine. You need to validate that repair. I always perform these three key tests before I tell a customer their car is ready:
- Cooling System Pressure Test: With the engine cold, I pressurize the system to the radiator cap’s rated pressure (say, 15 psi). It needs to hold that pressure steady for at least 30 minutes with no drop and no leaks around the head gasket area.
- Combustion Leak Test (Block Test): Get the engine up to operating temperature. Then, use the block tester to draw air from the coolant reservoir through the test fluid. If the fluid stays blue, you’re good—no exhaust gases are present. If it changes to yellow or green, you’ve still got a leak.
- Cylinder Leak-Down Test: This is my final check. I pressurize each cylinder individually at top dead center. I’m listening for any air escaping into the coolant reservoir (bubbling) or into an adjacent cylinder. If I hear anything, the repair isn’t complete.
These tools—the pressure tester, the block tester, and the leak-down gauge—aren’t optional. They’re essential for having confidence in your work. Skipping them is like rebuilding a brake system and driving off without ever testing the brakes. You just don’t do it.
Cost, Value, and Making the Hard Decision
Let’s talk about the elephant in the room: the cost. A head gasket repair is a major job, and the bill can be a real shock if you’re not prepared. Here’s a general breakdown of what you’re looking at:
| Repair Type | DIY Cost (Parts, Tools, Machining) | Shop Cost (Parts & Labor) | Success Rate (When Done Right) | Risks of Failure / Ignoring |
|---|---|---|---|---|
| Professional Head Gasket Replacement | $300–$600+ (for parts, required special tools, and head machining) | $1,500 – $3,500+ (can be higher for complex engines like V6/V8 or turbos) | >95% when done correctly with proper machining and new bolts | Repeated overheating, warped head, bearing damage, or complete engine failure leading to engine replacement. |
| Temporary Sealant (for minor external seepage only) | $15–$30 | $80–$120 (labor to add product and bleed) | <30% for a true combustion leak (virtually 0% for long-term fix) | Clogged radiator, heater core, or thermostat; new overheating issues; eventual and often worse gasket failure. |
Here’s a rule of thumb I use with my customers: if the estimated repair cost for a head gasket exceeds about 60% of the vehicle’s private-party market value in good condition, you really need to consider a used engine or even replacing the vehicle entirely. Pouring $3,000 into a car that’s only worth $4,000 isn’t always the smartest financial move, especially if other major systems (like the transmission or suspension) are also showing their age. Use resources like Kelley Blue Book or Edmunds to get a realistic value estimate for your vehicle.
How to Keep Your Head Gasket from Blowing Again
My Top Prevention Tips
-
Stick to the Coolant Service Schedule: Replace your coolant every 5 years or according to your owner’s manual. And this is huge: only use the type specified. Mixing different coolant types can cause gel formation, corrosion, and ultimately, gasket failure.
-
Address Overheating Immediately: If your temperature gauge starts climbing into the red, pull over safely and shut the engine off. Don’t try to “make it home.” A stuck thermostat, failing water pump, or clogged radiator can warp an aluminum head in minutes.
-
Monitor for Early Signs: Make it a habit to check your coolant reservoir monthly for proper level, color, and any signs of oil contamination. Every oil change, take a look under the oil cap—milky residue means coolant is getting into your oil.
-
Use a Scan Tool for Early Warnings: A basic OBD2 scanner isn’t just for check engine lights. You can use it to view live engine coolant temperature (ECT) data. Sometimes, the dashboard gauge is buffered and won’t react as quickly as the raw data. Sudden spikes or inconsistent readings can help you catch issues before they become critical.
I tell all my customers: the absolute best way to avoid a head gasket repair is to never, ever let your engine overheat. It sounds simple, but it’s true. Most of the cars I see come in with head gasket issues have a history of ignored temperature warnings. Stay vigilant, keep an eye on your fluids, and you’ll keep your engine sealed up tight and running clean for years to come.
