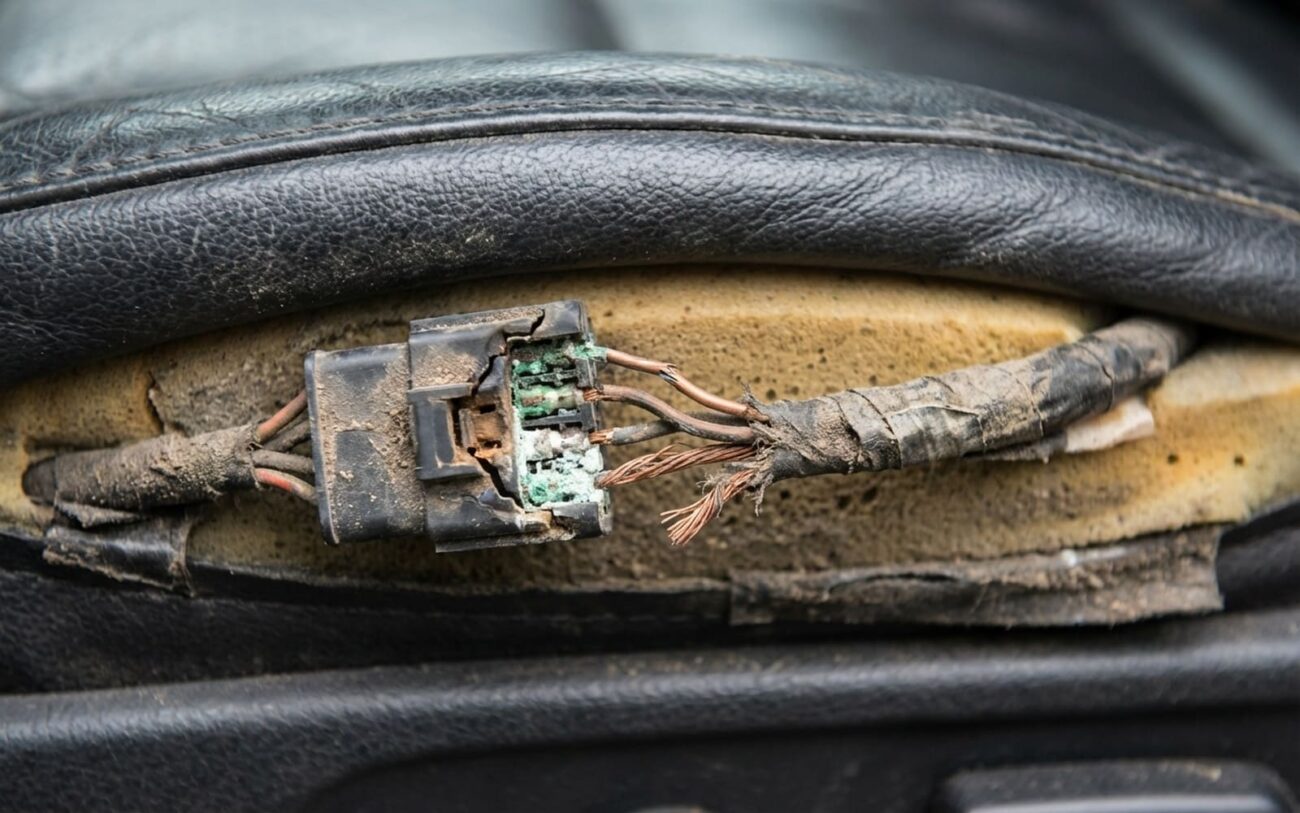
Heated seats fail. It happens. But before you start ripping apart upholstery or throwing parts at it, let’s talk about what’s actually going wrong—and how to prove it. I’ve been doing this for over 25 years, and I can tell you: most DIYers and even some shops get this wrong. They replace switches, control modules, even entire seats—when the real issue was a $3 fuse or a broken wire buried in the foam.
First: What’s Really Broken?
When a customer says “my heated seat isn’t working,” the first thing I ask is: which part? Because that answer tells me 80% of what I need to know.
If only the cushion heats up but the back doesn’t—or vice versa—it’s almost certainly a failed heating element in the cold zone. These systems are split: cushion and back have separate circuits. One dies, the other keeps running. Intermittent heat when you shift? That’s a classic sign of a cracked wire inside the element—moves just enough to make contact when you sit a certain way.
And yes, the switch light can still come on. That doesn’t mean power is getting to the heater. It just means the control module thinks it is. Seen that too many times.
Now, if both seats are dead—no lights, no heat, nothing—that’s a system-wide failure. Start thinking power supply. Usually, it’s a shared fuse. But don’t assume. Check the wiring under the driver’s seat while you’re at it—those harnesses get pinched by seat tracks all the time, especially on Fords and Rams. I see it weekly.
Diagnosis: Stop Guessing, Start Testing
You want answers? Get your multimeter out. No exceptions. This isn’t a “maybe” situation. You need hard data.
| Symptom | Likely Fault | Common Mistakes | How to Test |
|---|---|---|---|
| Driver’s seat cushion cold, back works fine. | Cushion heater element | Replacing switch, blaming control module, ignoring wiring under seat |
Disconnect the harness at the seat base. Measure resistance across the cushion terminals. Should be 1–5 ohms (check service manual for exact spec). “OL” = open circuit = dead wire. Near 0 ohms? That’s a short. Also check continuity to ground—should be infinite. If it’s not, you’ve got a grounded element. |
| Both seats dead, no switch lights. | Main fuse or power feed | Assuming control module failure, skipping voltage checks |
With ignition ON, check for 12V at the switch input. No power? Test the fuse: measure voltage on both ends. Power on one side only = blown fuse. Replace it. If it blows again immediately, you’ve got a short downstream—don’t keep throwing fuses at it. |
This table isn’t theory. It’s what I use in my shop every day. And I’ll tell you: 70% of the time, the problem is either a blown fuse or a failed element. The rest? Wiring damage under the seat or a tripped thermal cutoff.
Why It Failed: The Real Causes
Heater elements fail from stress. Every time someone sits down, that wire flexes. Over time—especially on the front edge of the cushion—it fatigues and breaks. I’ve cut open dozens of these. The break is almost always right where the thigh meets the seat crease.
Moisture makes it worse. Spills, humid climates, even sweat over years can degrade the insulation. Once the wires touch, you get a short. And that’s when things get dangerous—overheating, melted wiring, damaged control modules.
And don’t forget the thermal cutoff. Many seats have a one-time fuse or PTC sensor built into the element. If the seat overheats—say, from a stuck relay or blocked airflow—it trips and kills the circuit. Replace the element, but if the cutoff is still open? You’ve wasted your time. Test it: it should show continuity when cool.
Fuses blow for a reason. Usually, it’s a shorted element or pinched wire. But sometimes, it’s inrush current. Cold elements have low resistance. When you hit the switch on a winter morning, there’s a surge. If the fuse is old or undersized, it can’t handle it. Some manufacturers (looking at you, GM) issued TSBs recommending a 25A fuse instead of 20A. Only do that if it’s OEM-approved.
And check the fuse holder. Corrosion or loose terminals create resistance, which creates heat, which melts the plastic. That’s not a fuse problem—that’s a connection problem. I’ve seen melted holders on 2018 Silverados. Replacing the fuse won’t fix it. You need to clean or replace the block.
Fix It Right: What You Should (and Shouldn’t) Do
Professional Territory Only
Heater element replacement is not a DIY job. It demands specialized tools, safety training, and proper PPE. Disassembling seats with airbags and sensors requires expertise to avoid triggering SRS faults or structural failure. There’s no safe shortcut.
Heater Element Replacement Professional Only
Fuse Replacement DIY-Feasible
Did It Work? Test Like a Pro
Replacing the part isn’t the end. You need to verify it works—and safely.
For a new element: turn it on, wait 3–5 minutes. Surface temp should hit 95–105°F (35–40°C). Use an infrared thermometer. Don’t trust your hand. Then scan the BCM or seat module. Some systems store “open circuit” or “overtemperature” codes even after repair. Clear them. Cycle the heater three times. No codes? Good.
For a fuse: same thing. Cycle it. Also measure voltage drop across the fuse while the heater’s running. Should be less than 0.5V. Higher? That means poor contact in the holder—clean it or replace it.
Is It Worth Fixing?
| Repair Type | DIY Cost | Shop Cost | Success Rate | Risks |
|---|---|---|---|---|
| Heater Element Replacement (One Zone) | $50–$150 (element only) | $300–$600 | 95% if diagnosed right |
Airbag or sensor damage during disassembly. SRS faults can cost $500+ to clear. |
| Fuse & Short Diagnosis | <$10 | $100–$250 | 100% for fuse; 70–90% for short |
Misdiagnosed short leads to repeated fuse failure, potential module damage. |
Cost-Saving Alternative
If the repair costs more than 40% of your car’s value, reconsider. For older vehicles, a professional seat heater fix might not pencil out. Instead, try a high-quality aftermarket heater pad. Plug-in models are safe, effective, and avoid the risks of seat disassembly. They’re not invisible, but they work. I’ve recommended them for 20-year-old Camrys—and they’re still going strong.
Prevention: Make It Last
To Prevent Recurrence
-
Avoid sharp objects—keys, tools, pet claws. They can pierce the element.
-
Don’t let kids jump on the seats. The repeated impact fatigues the wires fast.
-
Skip thick seat covers that trap heat. They can cause the thermal cutoff to trip.
-
Test resistance early if heat feels weak. A 10-minute multimeter check can catch a failing element before it dies.
-
Check the fuse block during routine maintenance. Look for corrosion, loose fuses, melted housing.
