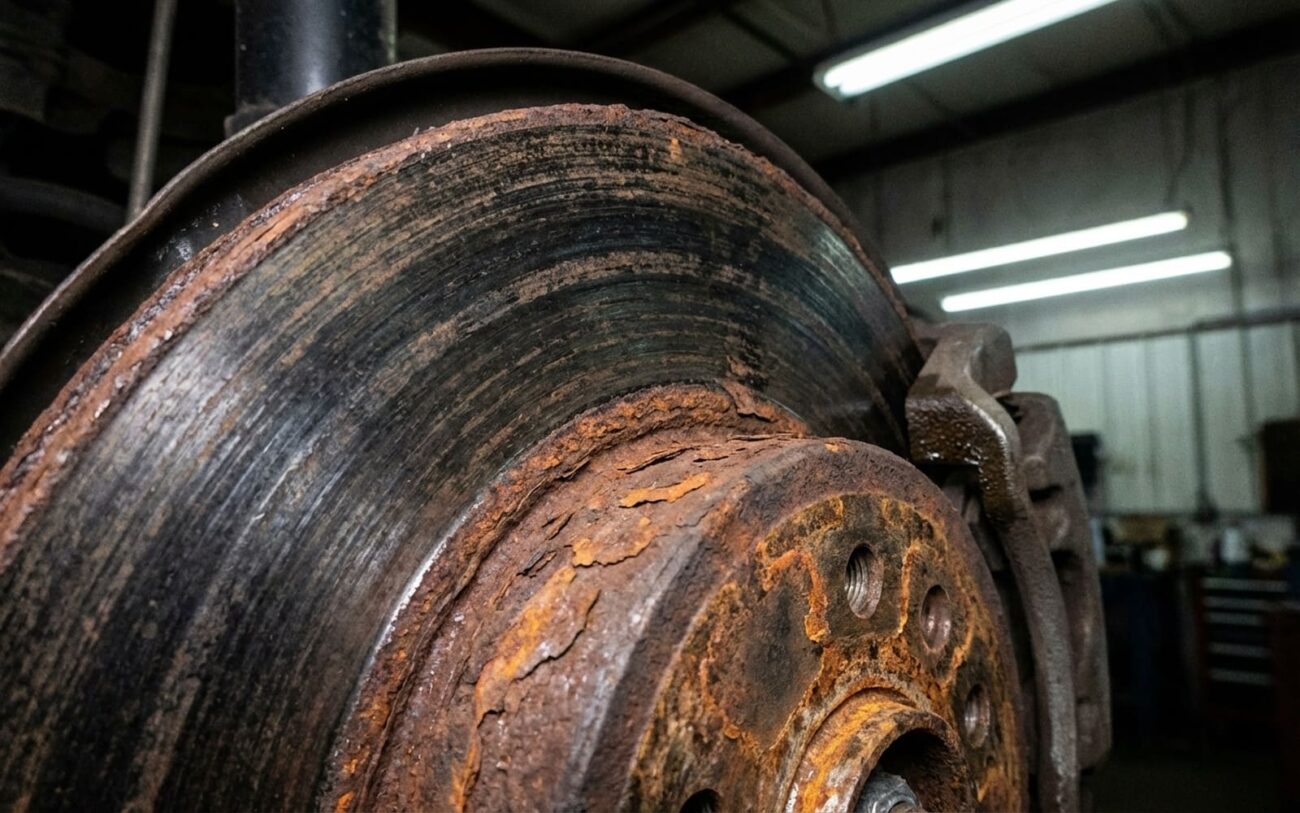
You’ve jacked up your car, maybe for a tire rotation, and there it is: your rear brake rotors look like they’ve been sitting at the bottom of a lake, all rusty and pitted. But then you look at the front rotors, and they’re clean, worn evenly, just like they should be. You’re not imagining things, and no, your rear rotors aren’t necessarily “bad” or “cheap.” This is a super common sight in my shop, and after 25 years turning wrenches, I can tell you it’s usually a symptom of something specific, not a manufacturing defect. Let’s dig into what you’re really seeing and what to do about it.
Why Your Rear Brakes Don’t Work as Hard (and Why That Matters)
First off, let’s get one thing straight: the cast iron used for your rear rotors is pretty much the same stuff as the front. It’s not a material defect. The difference comes down to basic physics, vehicle design, and how you drive. When you hit the brakes, the weight of the car shifts forward. This means your front brakes end up doing the lion’s share of the work—we’re talking 60% to 80% of the stopping force. They heat up fast, which burns off moisture and keeps the friction surface clean and active.
But the rears? They operate much cooler and see far less action, especially if you’re mostly doing light city driving. That lack of heat and friction means moisture hangs around longer, and that’s exactly what causes surface rust. It’s just simple chemistry: iron, oxygen, and water. No big mystery there.
A Word from the Engineers:
Automakers actually design rear brake systems to be less aggressive. They use smaller calipers and pads with less bite to prevent the rear wheels from locking up, which would cause instability. Modern Electronic Stability Control (ESC) and Electronic Parking Brake (EPB) systems might only activate the rears intermittently, too. That’s why many manufacturers, like Ford and Honda, have issued guidance saying that light surface rust on rear rotors is normal and not a warranty issue. It’s just how these systems are designed to work.
Is It Just Surface Rust, or Something Worse? My Diagnostic Approach
So, you’ve got rust. The trick is figuring out if it’s just that normal surface rust from underuse, or if it’s a sign of a deeper mechanical problem. Because if a caliper is seized, or a slide pin is stuck, that rust is going to lead to bigger, more expensive issues down the road. Here’s how I typically diagnose it in the shop:
First Look: Normal Rust vs. Problematic Rust
Take a good look at the rotor. If the rust is mainly on the “hat” (the center part where the wheel bolts on) or inside the cooling vanes, that’s usually normal. Those areas don’t get scrubbed by the pads, so they’ll corrode. The real concern is persistent rust on the friction surface—the shiny part where the brake pads are supposed to make contact.
If you’ve driven the car, especially with a few firm stops, and that reddish-brown layer is still clearly visible on the friction surface, that’s a red flag. It tells me the pads aren’t making consistent, full contact with the rotor. That lack of contact can be from simple underuse, or it can be a mechanical binding issue.
The “Brake Test” I Use
To really confirm if your rear brakes are doing their job, I perform a simple test. Find a safe, open stretch of road. From about 40 mph, make 5-6 moderate, firm stops—not emergency stops, but enough to feel the brakes working. Then, immediately and safely pull over. Carefully touch the front and rear rotors (or use an infrared thermometer, which is much safer and more accurate). If your front rotors are hot, say over 200°F, and the rears are still cool to the touch, maybe under 100°F, that confirms they’re not engaging properly. They’re just not doing enough work.
Checking for Mechanical Issues Beyond Underuse
If that brake test shows cold rear rotors, or if you’re experiencing other symptoms, it’s time to dig deeper. This is where you look for binding components:
-
Brake Pedal Pulsation During Stops: If you feel a shudder or pulsation through the pedal, most people jump to “warped rotors.” But in my experience, especially with rusty rears, it’s almost always “Disc Thickness Variation” (DTV) caused by uneven rust buildup. That rust acts like sandpaper, wearing the rotor unevenly. To confirm, you’d need a dial indicator to measure lateral runout (should be less than 0.003 inches) and thickness variation (less than 0.0005 inches). If those specs are off, it’s DTV.
-
Uneven Inner/Outer Pad Wear: This is a dead giveaway for caliper problems. If one pad is significantly more worn than the other, it means the caliper isn’t moving freely. It could be a seized caliper piston, or more commonly, seized or binding slide pins. With the wheel off, you should be able to pry the pads away from the rotor, and they should self-center relatively easily. If there’s a lot of resistance, you’ve found your binding issue.
-
Other Culprits: Don’t forget about collapsed brake hoses. Sometimes the inner lining of a hose can fail, acting like a one-way valve, preventing the caliper from releasing fully. This can cause a pad to drag, overheat, and contribute to uneven wear and rust. It’s less common on rears, but I’ve seen it.
Fixing It Right: From Simple Clean-Up to Full Replacement
Scenario 1: Just Light Surface Rust (and no other symptoms)
DIY Maintenance: Clean & Bed
Scenario 2: Pulsation from Rust (DTV)
DIY Repair: Replace Rotors & Pads
Scenario 3: Mechanical Binding or Structural Corrosion
Replacement: Calipers, Rotors, Pads Critical
Don’t Skip This: Verifying Your Work
After any brake job, big or small, verification is absolutely critical. I always tell my guys: you’re not done until you’ve checked your work. The brake pedal should feel firm and smooth during normal stops—no sponginess, no pulsation. If you replaced or resurfaced rotors, repeat that highway-speed brake test. The rear rotors should now be within about 30% of the front temperatures. If they’re still stone cold, something’s still not engaging right, and you missed something.
If you replaced calipers or any hardware, go a step further. Inspect for any leaks at the caliper bleeder screws, the banjo bolts, and the hose connections. Give each rear wheel a good spin by hand; the rotor should turn freely with only a very light, consistent pad drag. Any binding or excessive resistance suggests a stuck piston or a problem with those slide pins. And for Pete’s sake, proper bleeding is essential. If your vehicle has ABS, ESC, or an EPB, a pressure bleeder is usually the most effective tool for purging all the air out of the system.
The Bottom Line: Costs and When to Walk Away
Here’s a quick look at typical costs for these repairs, both DIY and if you bring it to a shop like mine. Remember, these are rough estimates, and prices vary wildly by vehicle and region.
| Repair Type | DIY Cost (Parts Only) | Shop Cost (Parts & Labor) | Key Risks of a Bad Job |
|---|---|---|---|
| Clean Rotor Surfaces | $15–$25 | $120–$180 | Rust returns quickly; underlying mechanical issues remain undiagnosed. |
| Replace Rotors & Pads | $200–$400 | $400–$700 | Improper lug nut torque causes new DTV/pulsation; components wear prematurely. |
| Replace Rear Calipers | $300–$600 | $600–$1,000 | Improper bleeding leads to a soft or spongy pedal; dangerous leaks at banjo bolts or bleeder. |
Keeping Those Rear Brakes Healthy: My Maintenance Tips
-
Every time you rotate your tires, take a few extra minutes to lubricate your caliper slide pins. Use a high-quality silicone-based brake grease. This simple step prevents 90% of those binding issues I see.
-
Flush your brake fluid every three years, or according to your manufacturer’s schedule. Brake fluid absorbs moisture, and that moisture can cause internal corrosion in your caliper piston bores, leading to sticking.
-
After washing your car, or driving in heavy rain, apply your brakes a few times while driving slowly. This generates a little heat and friction to dry off the rotors, preventing overnight moisture buildup and that initial flash rust.
-
Keep an eye on your rotors. You want to see a uniform gray surface. If one side is consistently rusty while the other is clean, or if you see uneven wear, that’s your cue to investigate further.
