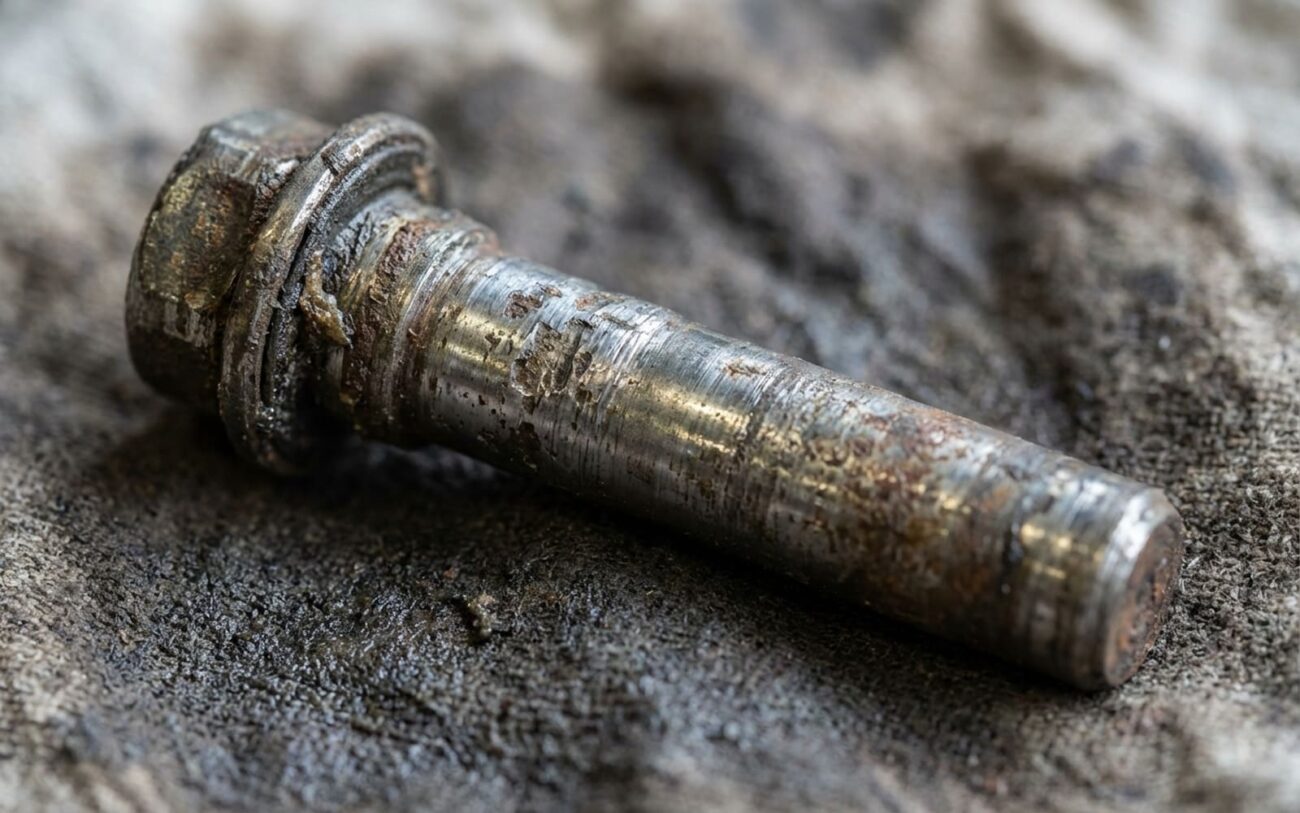
Alright, let’s talk about uneven brake pad wear. You pull a wheel, and one pad’s practically down to the backing plate while the other still looks brand new. Sound familiar? That’s a classic, textbook sign that your caliper isn’t doing its job right, and in my 25+ years turning wrenches, the first thing I’m checking are those guide pins.
The Symptoms: What You’ll See and Feel
When a floating caliper can’t float, it gets stuck. Imagine trying to clap with one hand tied behind your back; one side does all the work. That’s what happens when a guide pin seizes up or binds. The piston pushes on one pad, but the caliper itself can’t slide to apply even pressure to the other. So, you end up with one pad chewed down to nothing, while its partner still has plenty of meat on it. I’ve seen inner pads at 1mm and outer pads at 6mm on the same caliper – a dead giveaway for a guide pin issue.
But it’s not just visual. You’ll often feel it too. Ever hit the brakes, especially after backing up, and hear a distinct clunk or knock? That’s usually excessive play in worn guide pins or their bushings. The caliper shifts suddenly as it takes up that slack. And then there’s brake drag. Your car might pull slightly to one side even without your foot on the pedal. You’ll smell hot brakes after a short drive, or notice your fuel economy taking a hit. All because that caliper isn’t fully releasing.
Diagnosing It Right: Don’t Chase the Wrong Problem
Now, while uneven wear and drag scream “guide pin,” you can’t just assume. I’ve seen plenty of good techs replace entire calipers, only for the new one to act the exact same way. Why? Because the real culprit was something else entirely. A seized caliper piston, a collapsed brake hose acting like a check valve, or even a corroded caliper bracket can all mimic guide pin issues. You’ve got to be methodical.
My Go-To Checks:
For Uneven Inner/Outer Pad Wear: This is the most common one. First thing I do is remove the caliper from its bracket. Then, I try to slide the caliper body by hand on those guide pins. It should move freely, smooth as butter, with just light pressure. If it binds, feels gritty, or doesn’t move at all, you’ve found your problem: those pins are seized or the bores are corroded.
For Persistent Brake Drag (especially side-to-side): If a wheel is dragging, and I’ve ruled out the guide pins, my next suspect is the brake hose. A collapsed inner lining can trap fluid pressure, keeping the caliper applied. To test this, with the wheel dragging, simply crack open the bleeder screw on that caliper. If the wheel immediately frees up, you’ve got a restricted hose or line. If it doesn’t free up, then you’re likely looking at a seized piston inside the caliper itself.
For Brake Knock/Clunk: If you’re hearing that clunk when you first apply the brakes, especially after changing direction, it points to excessive play. With the caliper mounted, grab a pry bar and gently try to move the caliper body vertically on its guide pins. Any significant movement or clunking indicates worn pins, worn bushings, or a damaged caliper bracket bore. Don’t forget to check for loose caliper bolts too, though that’s usually a much louder, more consistent clunk.
Why Guide Pins Go Bad: The Root Causes
Guide pins aren’t complicated parts, but they live in a harsh environment. They fail for three main reasons, and it almost always comes back to maintenance (or lack thereof).
The Corrosion Factor:
This is a big one, especially in areas with road salt. Most caliper carriers are aluminum, and the guide pins are steel. When moisture and salt get past a torn boot, those dissimilar metals react, creating galvanic corrosion. It literally welds the pin to the bore. I see this more often than cracked calipers, and it’s frequently misdiagnosed as a piston issue.
First, and most commonly, it’s a lack of proper lubrication. The grease dries out, hardens, or gets contaminated with road grit. This turns smooth sliding into abrasive grinding, wearing down both the pin and its bore or bushing. Once that clearance gets too big, the caliper starts to wobble, leading to uneven pad contact and that dreaded clunk.
Second, damaged rubber boots are a death sentence for guide pins. These boots are your first line of defense against moisture, salt, and dirt. If they’re torn, cracked, or missing, all that corrosive crud gets right into the guide pin bore, leading to rapid seizure.
Third, improper service can ruin even good components. Using the wrong type of grease (petroleum-based greases will swell rubber boots, I’ve seen it a hundred times), or over-greasing the bore (which can create a hydraulic lock, preventing the pin from moving) are common mistakes. And for goodness sake, don’t use an impact wrench on guide pin bolts! You can distort the pin or compress the rubber bushing, creating a permanent bind.
Getting It Fixed: Your Options
Once you’ve confirmed it’s a guide pin problem, you’ve got a few ways to tackle it, depending on the severity.
A Word on Seized Pins:
If that pin is truly seized solid, getting it out can be a real battle. Penetrating oil, careful application of heat, sometimes even vice grips and a hammer. But be warned: aggressive drilling or forcing it out can easily damage the caliper bore or housing threads. Once that happens, you’re not just replacing pins; you’re buying a whole new caliper assembly. And if your vehicle uses pressed-in bushings for the pins, replacing those is definitely a professional-only repair.
Clean & Relubricate DIY Friendly
Component Replacement
Post-Repair Validation: Prove It’s Fixed
Never, ever assume the job is done just because the caliper is bolted back on. You need to validate your work. This step is non-negotiable in my shop.
With the wheel still off, manually push and pull the caliper body side to side on the guide pins. It should slide smoothly with light hand pressure – no binding, no gritty feel, no excessive play. If it sticks, take it apart and recheck. Maybe you missed some debris, or perhaps you over-greased it (too much grease can create a hydraulic lock in the bore, believe it or not).
The Temperature Test:
After a short road test (a few miles, a few brake applications), pull over safely and use an infrared thermometer on your rotors. On the same axle, the rotor temperatures should be within 20–30°F of each other. If you see a difference of 100°F or more, you still have residual drag on the hotter side. That caliper isn’t fully releasing, and you need to go back and figure out why.
Cost, Risk, and Making the Right Call
Here’s a quick breakdown of what you’re looking at, both in terms of cost and the likelihood of fixing the problem right the first time. Sometimes, spending a little more upfront saves you a lot more down the road.
| Repair Type | DIY Cost (Parts Only) | Shop Cost (Parts & Labor) | Success Rate | Secondary Risk |
|---|---|---|---|---|
| Clean & Re-lube Pins | ~$10 (for grease) | $100–$150 | 90% (if pins are healthy) | Rapid re-seizure if pins have hidden pitting or if boots are compromised. |
| Replace Pins & Boots | $30–$80 | $200–$300 | 95% | Low, assuming proper installation and torque. |
| Replace Caliper Assembly | $150–$300 | $400–$600 | 100% (if root cause is caliper/bracket) | Air in the system if not bled properly; potential for new issues if the problem was actually a hose. |
Prevention: Keep Those Pins Happy
My Maintenance Rules for Caliper Pins:
-
Lubricate Every Brake Job: This is non-negotiable. Anytime a wheel is off for a pad replacement or even a tire rotation, I’m pulling those pins, cleaning them, and applying fresh grease. It takes five minutes and saves you a headache.
-
Use Silicone Grease, Period: I can’t stress this enough. Petroleum-based greases will swell and degrade those crucial rubber boots. Always use a high-temperature, silicone-based brake lubricant.
-
Inspect Those Boots: Every time you’re in there, check the rubber boots for tears, cracks, or swelling. If they’re compromised, replace them immediately. They’re cheap insurance.
-
Listen for Early Warnings: A faint, rhythmic squeal or a slight pull at low speeds can be the first sign of a binding pin. Don’t wait for the pads to be metal-on-metal.
