Stuck Brake Caliper? Here’s What You’ll Actually Notice (and Why)
After 25 years turning wrenches, I can tell you a stuck brake caliper isn’t exactly subtle. When a customer rolls in complaining about a weird pull or a burning smell, this is often the first thing I check. The core problem is simple: the caliper piston or slide pins seize up, preventing the brake pads from fully releasing the rotor. That means one wheel is constantly dragging, creating friction and heat where it shouldn’t be.
The Obvious Signs: What You’ll Feel, Hear, and See
You’ll feel it, no doubt. The most common complaint is a persistent pull to one side while you’re driving, even on a perfectly straight, flat road. It’s not a gentle drift; it feels like you’re driving with a light brake applied on that one wheel. Think of it like trying to run a marathon while someone’s constantly pulling back on your shirt. It’s a drag, literally.
The Concept
“It’s like trying to run a marathon while someone is constantly pulling back on your jersey.”
That constant friction generates serious heat. After even a short drive, I’ll check the wheel temperatures. I always use an infrared (IR) thermometer for this; it takes the guesswork out of it. A dragging caliper can easily run 100°F or more hotter than the other wheels. You might even smell a burning odor, like hot metal or rubber, coming from that corner.
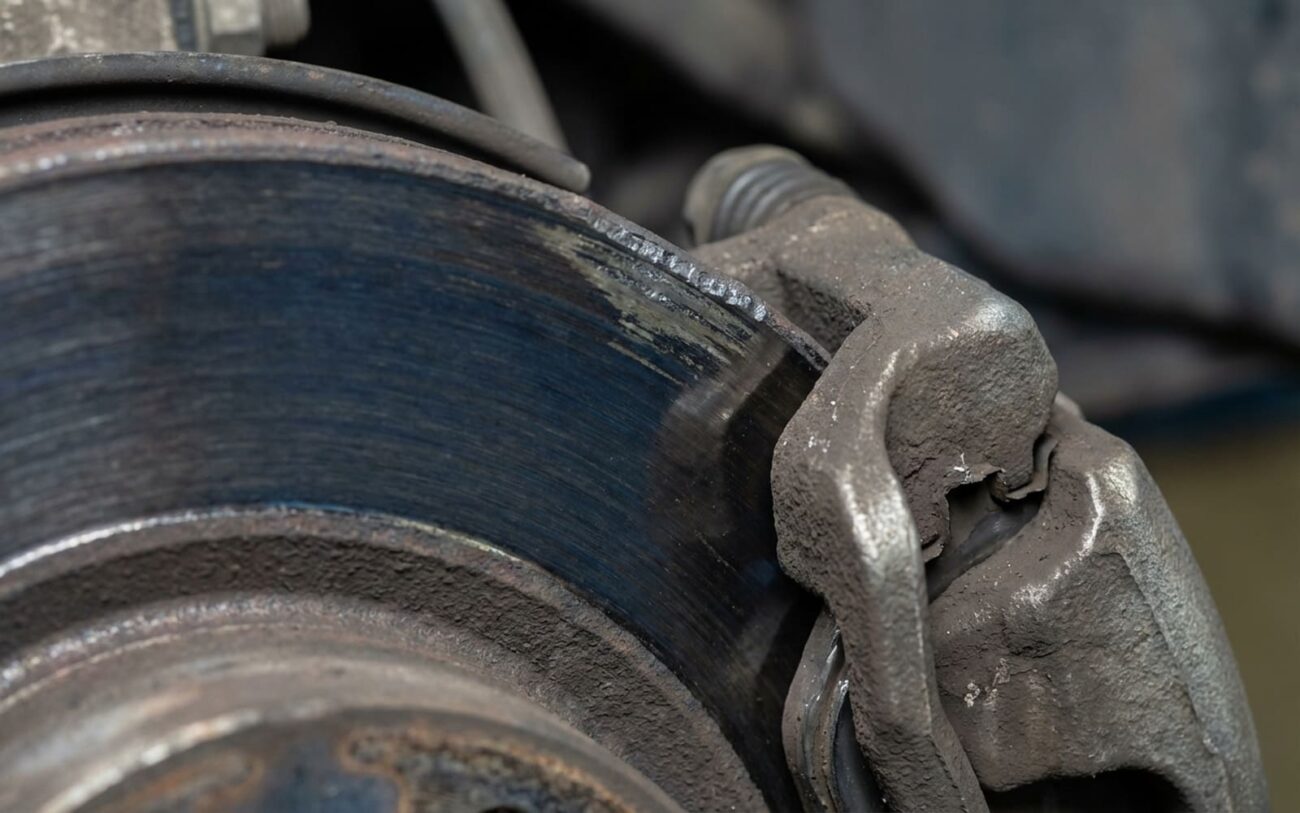
You might also hear a steady metallic rubbing or grinding sound from that wheel, even when you’re just coasting, not touching the brake pedal. And when I pull the wheel off, the brake pads tell the story. In almost every case, the inboard pad on the affected side will be worn down much faster – sometimes right to the metal – while the outboard pad and the pads on the other wheels look normal. That’s because the stuck caliper piston keeps constant pressure on that inboard pad.
This constant drag isn’t just annoying; it increases brake fluid pressure in that circuit, which can lead to a spongy pedal feel and, of course, reduced fuel economy. If you ignore it, you’re looking at a chain reaction of failures: boiling brake fluid, warped rotors, and eventually, damaged wheel bearings. I’ve had customers come in with melted wheel bearing grease, completely cooked from brake drag. That’s not a simple repair anymore; that’s preventable failure that gets expensive fast.
Diagnosing the Drag: Is It Really the Caliper?
Just because a wheel is dragging doesn’t automatically mean the caliper is toast. Plenty of other issues can mimic the exact same symptoms. Misdiagnosing here will just waste your time and money. Before you start tearing into the caliper, make sure you’ve ruled out these common culprits.
| Symptom | Likely Caliper Cause | Common Mimics | My Definitive Test |
|---|---|---|---|
| Constant pull or drag to one side | Seized caliper piston or stuck slide pins | Collapsed brake hose, binding pad in bracket, seized wheel bearing |
First, try to compress the piston with a C-clamp. If it won’t budge, the piston is seized. If it does compress, then open the bleeder screw. If pressure releases and the piston retracts easily, the hose is restricted internally. |
| Excessive heat at one wheel | Brake drag from incomplete release | Seized wheel bearing, dragging emergency brake (rear wheels) |
Use an IR thermometer. If the rotor hat (where the pads contact) is scorching hot but the hub center is relatively cool, it’s a brake issue. If the hub center is also blazing hot, you’re likely looking at a wheel bearing failure. |
| Uneven brake pad wear (inboard vs. outboard) | Piston not retracting due to seal failure | Binding pad ears in the mounting bracket, worn mounting bracket itself |
Remove the pads. If they slide freely in the bracket but the piston still won’t compress or retract properly, the issue is internal to the caliper. |
Why Calipers Fail: The Root Causes I See Every Day
So, what actually gives out inside these things? From years of tearing down calipers, it almost always boils down to corrosion, contamination, or plain old seal degradation.
First, brake fluid. Most cars use DOT 3 or DOT 4, and both are hygroscopic – meaning they absorb moisture over time. When that water content gets above 3%, it starts causing internal rust. That rust builds up in the caliper bore, eventually binding the piston. I’ve pulled pistons that were rusted solid, requiring a hammer to get them out. It’s not pretty.
Quick Tech Tip: Piston Retraction
The square-cut piston seal isn’t just there to prevent leaks; it’s engineered to retract the piston slightly when you release the brakes. This tiny retraction is what creates the necessary clearance between the pads and rotor. If that seal hardens from age or skips maintenance, it loses its elasticity and can’t retract the piston. No retraction means constant pad contact. This is a mechanical failure at the caliper, not an ABS or master cylinder problem.
Then there are the caliper slide pins. These pins are what allow the caliper to “float” and apply even pressure to both sides of the rotor. But once road salt, water, and grime get in through cracked rubber boots, those pins corrode in their bores. Even a slight bind here prevents the caliper from releasing fully. I see this constantly on vehicles driven in winter climates – those slide pins seize up tighter than a drum.
Fixing a Stuck Caliper: Your Options and What I Recommend
Safety Warning: Read This First
Brake repairs are absolutely critical to vehicle safety. If you’re not comfortable bleeding hydraulic systems, using a torque wrench, or dealing with brake fluid, please seek professional help. A mistake here can lead to total brake failure on the road. Don’t take chances.
Slide Pin Service DIY Feasible
Caliper Replacement DIY Feasible
Caliper Rebuild Advanced DIY / Pro
Verifying the Repair: How I Know It’s Done Right
Never assume the job’s done just because the caliper’s bolted back on. You’ve got to validate it. For any caliper service – whether it’s just the slide pins or a full replacement – I always run through this checklist.
My Post-Repair Checklist
-
Free-Spin Test: With the wheel installed, give it a good spin by hand. It should rotate freely and complete at least two full revolutions without much effort. If it drags, something’s still wrong.
-
Thermal Check: Take the car for a 15-minute drive, using the brakes normally. When you get back, use your IR thermometer on all four rotors. They should all be within 20°F of each other. If one is still significantly hotter, you haven’t fixed the drag.
-
Pressure Test (for rebuilds): If you rebuilt the caliper, I recommend a pressure test. Hold 1200 psi for two minutes. Any pressure drop over 50 psi indicates a seal leak, and that caliper needs to come back off.
Cost, Risk, and When to Walk Away
Here’s a breakdown of what these repairs typically cost, both DIY and if you bring it to a shop like mine. Keep in mind, these are averages.
Slide Pin Service
DIY parts cost for grease and boots. Shop price: $150–$300. Low risk, often a good first step if the piston isn’t seized.
Caliper Replacement
Per caliper (DIY parts). Shop price: $300–$500 per axle. This has the highest success rate and is my go-to for a seized piston.
Caliper Rebuild
DIY kit cost. High labor risk; success depends entirely on the condition of the bore. If the bore isn’t perfect, you’re just wasting time.
Preventing Stuck Calipers: Maintenance That Actually Works
My #1 Prevention Tip
Perform a brake fluid flush every 2 to 3 years. Seriously, this is huge. Brake fluid absorbs water, and that water is what causes the internal rust that seizes pistons. It’s cheap insurance. Also, catch those cracked slide pin boots early during tire rotations. A few minutes of inspection can save you from a seized caliper down the road.
