Symptoms Don’t Lie — But They Do Mislead
I’ve spent over two decades knee-deep in luxury audio systems — BMW’s Harman Kardon, Mercedes’ Burmester, Audi’s Bang & Olufsen — and let me tell you: silence doesn’t mean dead amplifier. Distortion doesn’t mean blown speaker. And “no ANC” doesn’t mean you need a new head unit.
When a customer says “everything’s quiet,” my first thought isn’t the amp. It’s the power supply. I’ve seen six-figure cars towed in because a $6 fuse blew under the hood. Same with fiber optic rings — if the MOST network drops, the amp never wakes up. No communication, no sound. But the amp itself? Probably fine.
Now, if you’ve got crackling from one speaker, that’s different. Torn surround, shorted voice coil — those usually stay local. But if both front doors buzz, or the sub cuts in and out with bass-heavy tracks? That’s pointing toward the amp. Or worse — a grounding issue in the chassis harness.
And don’t get me started on “ANC not working.” I had a 2021 5 Series come in last month — owner thought the system was broken. Scanned it, found a dead microphone behind the rearview mirror. One sensor out of four, and the whole system disables. That’s by design. These aren’t standalone features — they’re integrated systems. Fail one piece, and the computer shuts it all down.
How I Diagnose — Step by Step
Forget swapping parts. That’s how shops bill $2,000 for a problem a multimeter could’ve solved in 10 minutes. Here’s what I do — every time.
Step 1: Power and Ground Check
No sound from any speaker? First thing I do: check the amplifier’s main power feed. I use a multimeter at the harness — not the fuse box, not downstream. Right at the connector. You need to see 12V with the ignition on, and solid ground (less than 0.2 ohms to chassis).
If voltage is missing, trace back to the fuse — usually in the trunk or under the seat. On BMWs, it’s often a 40-amp in the E-box. On Audis, check the amplifier relay in the central junction box. But don’t stop there — check for corrosion. I’ve seen green gunk on connectors from road salt kill the supply even when the fuse tests good.
Step 2: Communication Test
Power’s good? Now check if the car even knows the amp is there. I plug in a factory-level scan tool — ISTA, VCDS, or GDS2 depending on brand — and look for module recognition. If the amp isn’t showing up in the CAN or MOST network, it’s not a hardware failure. It’s a communication break.
On fiber optic systems (MOST bus), I check for ring continuity. Break one link — maybe during a rear seat removal — and the whole loop goes dark. I’ve fixed “dead amps” just by reseating a connector behind a C-pillar trim.
Step 3: Speaker Isolation
Sound cutting out in one zone? Disconnect the suspect speaker and hook up a known-good 4-ohm test speaker directly to the amp output wires. If the distortion vanishes, the original speaker is done. I then measure voice coil resistance — should be within 10% of rated impedance. 2Ω on a 4Ω speaker? That’s a shorted coil.
But if the test speaker still crackles? Now you’re looking at the amp. Either a failing output transistor or DC offset on that channel. That’s when I break out the oscilloscope — check for clean sine waves at 1kHz. Distorted waveform? Amplifier’s internal.
Step 4: ANC and Processing Faults
ANC failure? Don’t replace the amp yet. Use the scan tool to activate the microphones in real time. Most systems let you view noise input levels from each mic. If they’re all reading background noise but no anti-phase signal is being generated, then yeah — the amp’s processor is down.
But if one mic shows zero input? Check the wiring. These mics run through headliner harnesses — fragile stuff. And on some Mercedes models, the front mic is built into the overhead console. Remove that for any reason (like sunroof repair), and if it’s not reinstalled perfectly, the seal breaks, moisture gets in, and the mic fails.
Why It Actually Failed — Not Just What
I’ll say it again: a blown fuse isn’t an amplifier defect. Neither is rodent-chewed wiring. True failure means something inside the module gave up — and that usually comes down to heat, moisture, or bad design.
Heat kills. Especially in trunk-mounted amps. I’ve pulled apart Audi B&O units with cracked solder joints on the output transistors — classic thermal cycling damage. These things run hot, and if the heatsink is undersized or the thermal paste dried out, the board flexes. Solder cracks. Connection fails. It’s not instant — it starts with intermittent dropouts, then full failure.
Moisture’s worse. I had a Porsche Cayenne come in with a dead Burmester amp — green corrosion all over the power supply section. Turns out the owner hosed out the trunk after a spill. Water got under the carpet, up the harness, into the amp housing. These units aren’t sealed. They’re “splash resistant” — until they’re not.
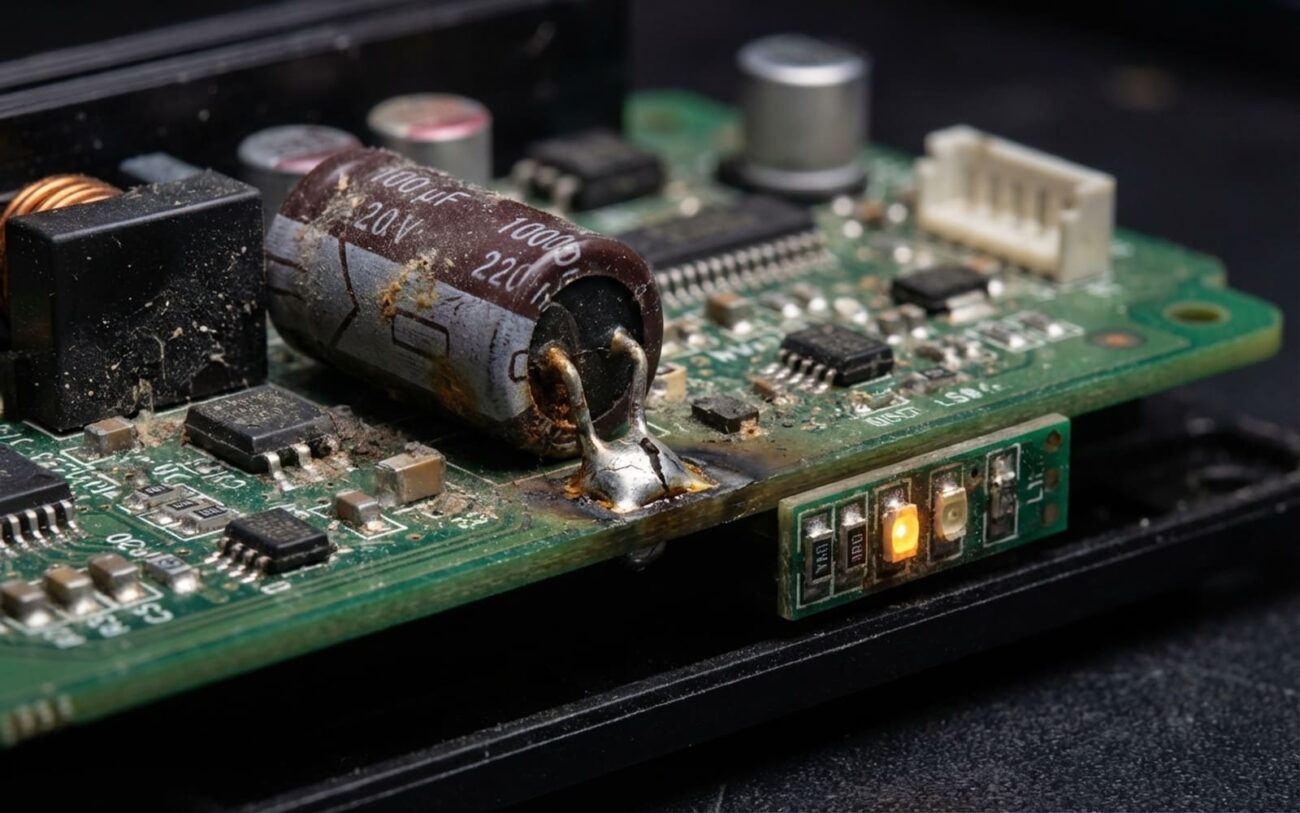
And yeah, some amps are just poorly built. Early 2010s BMW DSP amps? Known issue with failing electrolytic capacitors. They dry out, lose capacitance, and the power supply collapses under load. There’s a TSB for that — dealer replaces under warranty if caught early. But most people don’t know, so they keep driving until the amp dies completely.
Here’s what most techs miss:
A failing speaker can kill an amplifier. If the voice coil shorts, it pulls excessive current from the amp’s output stage. Do that long enough, and you fry the MOSFETs. So when I see a dead amp, I always check the speakers first. Prevents a repeat failure.
How We Fix It — Realistically
No DIY Fixes Here
These aren’t aftermarket systems. You can’t just plug in a new amp and go.
Speaker Replacement Professional Only
Pro tip: if you’re waiting on an OEM speaker, install a bass blocker capacitor ([TEMPORARY]) to protect the amp. But don’t leave it in — alters crossover behavior, hurts midrange clarity.
Amplifier Replacement Professional Only
And don’t reuse the old mounting hardware. These amps use specific isolation bolts to prevent chassis vibration from transferring into the signal path. Use generic hardware, and you’ll hear a low hum at idle.
Circuit-Level Repair Specialist Only
I send these to specialists. Success rate is 70–85%. But if the board’s corroded or the ground plane’s damaged? [NON-REPAIRABLE → REPLACE]. No shame in that.
Did It Actually Work? Test Like a Pro
Swapping a part isn’t the fix. Validation is.
For speakers: play pink noise through each channel individually using the factory diagnostic mode. Listen at the driver’s seat, 75 dB on a sound meter. No buzzing, no phase issues. If the system has fader/balance, test full sweep — no dropouts.
For amplifiers: scan tool check first. Module present? No DTCs? Communication status “normal”? Then test every feature — ANC, surround modes, Bluetooth, USB. I once had a customer complain about “no bass” — turned out the subwoofer channel was disabled in software after a failed update. Re-enabled it, fixed the issue. No hardware touched.
Is It Worth Fixing? My Cost Rule
Single Speaker
DIY: $250–$600 (OEM only). Shop: $450–$900. 95% success with correct part and torque. Risk: rattles, trim damage, airbag warning if wiring pinched.
Coded Amplifier
DIY: $800–$2,500 (part + scan tool rental). Shop: $1,200–$3,500. 99% success when coded right. Risk: CAN bus faults, no sound, battery drain if botched.
Amplifier Repair
Not DIY. 70–85% success. Risk: board destroyed, no refund, still need replacement.
Check your EV battery warranty before authorizing repairs. Some manufacturers tie audio module coding to high-voltage system calibration.
My Real Advice
After 25 years: if the repair costs more than 40% of the car’s value, cut your losses. Put in a quality aftermarket system — Focal, Alpine, JL Audio. Yeah, you lose ANC, OEM integration, and that fancy badge. But you get reliable sound, no coding headaches, and you’ll probably spend less than half the OEM repair quote. And honestly? Most people can’t tell the difference once it’s tuned right.
How to Not Be Here Next Year
Heat kills. Don’t crank bass at full volume in 90°F weather with the car parked. That heat builds up under the seat — no airflow, no cooling. I’ve measured amps hitting 180°F internally. That’s solder-melting territory.
And if you hear a faint buzz at low volume? Don’t ignore it. That’s a failing speaker starting to short. Replace it now, save the amp. I’d rather replace a $300 speaker than a $2,500 amplifier.
Finally: keep firmware updated. I’ve seen ANC come back to life after a simple reflash at the dealer. Some bugs only show up after a battery disconnect or software conflict. Don’t assume it’s hardware until you’ve ruled out software.
