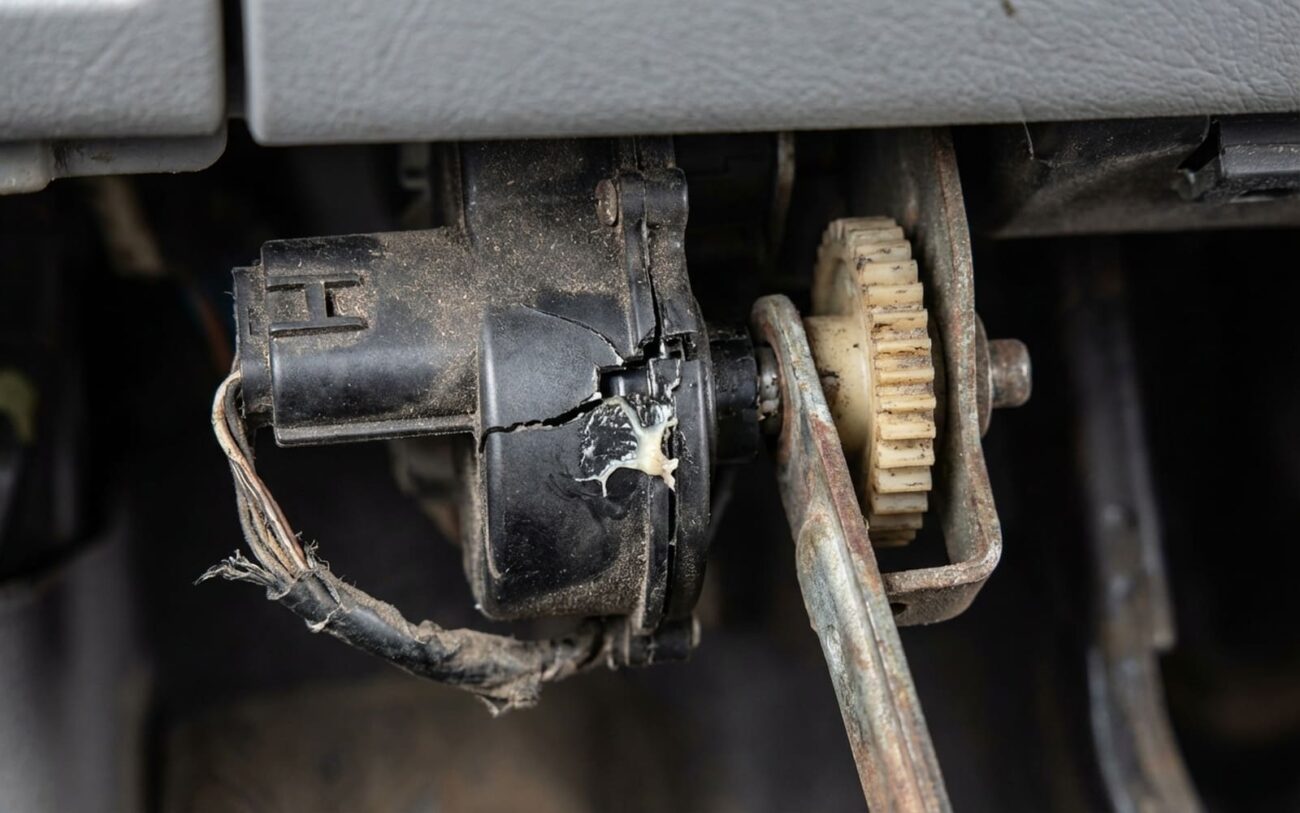
You turn the dial, nothing happens. Air’s stuck blasting at the windshield—or maybe it’s locked to the floor, roasting your shoes while your face freezes. I’ve seen this a thousand times. It’s not the control head. It’s not the A/C compressor. It’s the blend door actuator. And no, it won’t leave you stranded, but try clearing fogged glass in a Minnesota January without defrost mode. That’s not a comfort issue—that’s safety.
What’s Actually Failing
Forget “climate control” jargon. There’s a plastic door inside your HVAC box that moves to redirect air. The actuator is a small motor that turns gears to swing that door. When it fails, the door freezes. Most of the time, it’s not the motor—it’s the plastic gears inside the actuator stripping out. Nylon teeth, under constant load, eventually give up. I’ve pulled actuators apart where half the gear teeth are gone, just chewed off. And yeah, the motor can burn out, or the internal Hall-effect sensor can fail, but worn gears? That’s 80% of what I see in the shop.
Here’s the trap: people hear clicking and assume the actuator is dead. But that noise? It’s the gear slipping. Which means something’s fighting it. Could be the door is binding. Could be debris in the housing. Could be a dried-out shaft. Replace the actuator without checking that, and you’ll be doing it again in six months.
Symptoms That Matter
If you twist the knob and the airflow doesn’t change—game over. That’s the core symptom. But listen closely. If you hear a rapid ticking or grinding behind the dash for 15–45 seconds after startup or mode change, that’s the actuator trying to move and failing. It’s not “thinking.” It’s slipping.
Partial failure is common. Say you can switch from defrost to floor, but face vents never come online. That usually means only part of the gear train is damaged. Or maybe the door is binding at a certain point. I’ve seen this on 2017–2019 Chrysler minivans—known issue, even has a TSB. The mode door actuator clicks, gears strip, and dealers kept replacing them until someone figured out the door shaft was binding due to poor lubrication from the factory.
And no—this won’t hurt your engine. But if you can’t clear condensation, you’re driving blind. That’s not theoretical. I’ve had customers come in after near-misses because their defrost wouldn’t engage.
Diagnosis: Don’t Guess, Test
Here’s where most DIYers and even some shops go wrong. They hear the click, swap the actuator, and call it a day. But the real work starts before you touch a screwdriver.
First—get a bi-directional scan tool. A basic OBD2 reader won’t cut it. You need to talk to the HVAC module. Command the actuator to move. Watch the position sensor data (PID). If it doesn’t respond, or the value jumps around, you’ve got a problem. But if it moves smoothly and hits the expected range, the actuator might not be the issue at all.
Then check power. Use a multimeter. At the actuator connector, you should see 12V, a solid ground, and a reference voltage (usually 5V). No power? Could be a blown fuse, bad relay, or wiring issue. I once chased a “bad actuator” for two hours only to find a chafed wire behind the glovebox.
And if the actuator’s getting power but not moving? Unplug it, remove it, and try turning the door shaft by hand. If it’s stiff or binds at a certain point—there’s your root cause. That’s not an actuator failure. That’s a mechanical bind. Clean the shaft, lubricate it with dielectric grease (not WD-40—use the right stuff), and you might save yourself a repair.
| Symptom | Likely Cause | What to Check First | Definitive Test |
|---|---|---|---|
| No mode change, clicking noise | Stripped gears or binding door | Door shaft resistance, gear condition |
Command actuator via scan tool. If no movement, remove and test door shaft manually. Inspect gears for wear. |
| Intermittent or partial function | Failing position sensor or partial gear damage | PID data stability, connector corrosion |
Monitor position sensor PID while cycling modes. Erratic values indicate sensor or gear issues. |
Why They Fail (And How to Avoid It)
Cheap plastic gears are the main culprit. But they don’t fail in a vacuum. Usually, something made them work harder. Most common? A clogged cabin air filter. I can’t tell you how many times I’ve pulled out a filter that looked like a hockey puck—full of leaves, dust, bugs. That debris gets sucked into the HVAC case, coats the blend door shaft, and increases resistance. The actuator fights it every time you change modes. Over time, gears wear out.
Replace your cabin filter every 12,000–15,000 miles. Yes, even if your car doesn’t “require” it. It’s $25 and 10 minutes. Do it.
Also, if you start hearing a faint click or a slight delay in airflow direction, don’t ignore it. That’s early warning. Pull the actuator, check the shaft, clean and lubricate it. I use a little dielectric grease on the pivot—just a thin film. Too much attracts dirt. This one step has saved more than a few actuators in my shop.
Repair: What You’re Really Getting Into
Not all actuators are created equal. Some are easy. Some are nightmares. It all comes down to location.
Front-of-Dash Actuators DIY-Feasible
Buried Actuators Professional Job
Can You Repair It?
No. Don’t waste your time gluing gears or swapping motors. I’ve seen videos—people epoxying gears back together. It won’t last. The load is too high. The environment is too hot. Replacement is the only real fix.
Temporary Fix? Maybe
Did It Work? Here’s How to Know
Don’t just turn the knob and walk away. Verify it.
-
Cycle through all modes—defrost, floor, face. Each should engage in 3–5 seconds. No grinding. No hesitation.
-
Run the calibration routine with a bi-directional scan tool. This teaches the HVAC module the new actuator’s range. Skip this, and you’ll get weird behavior or codes.
-
Clear codes, then re-scan. If HVAC-related DTCs come back, something’s still wrong—either installation, calibration, or a mechanical bind you didn’t fix.
Is It Worth Fixing?
Let’s talk money.
Accessible Front Actuator
DIY cost: $40–$120 for the part. Labor is minimal. Success rate? 95% if you diagnosed it right.
Buried Actuator (Dash-Out)
Part is still $40–$120. The rest is labor, refrigerant recovery, seals, and time. Success rate high, but risk of rattles or leaks if not reassembled perfectly.
Rule of thumb: if the repair costs more than 40% of your car’s value, think hard. Spending $2,000 to fix a $4,500 car? Only makes sense if you’re keeping it long-term or depend on it daily. Otherwise, a temporary fix or seasonal use might be smarter.
