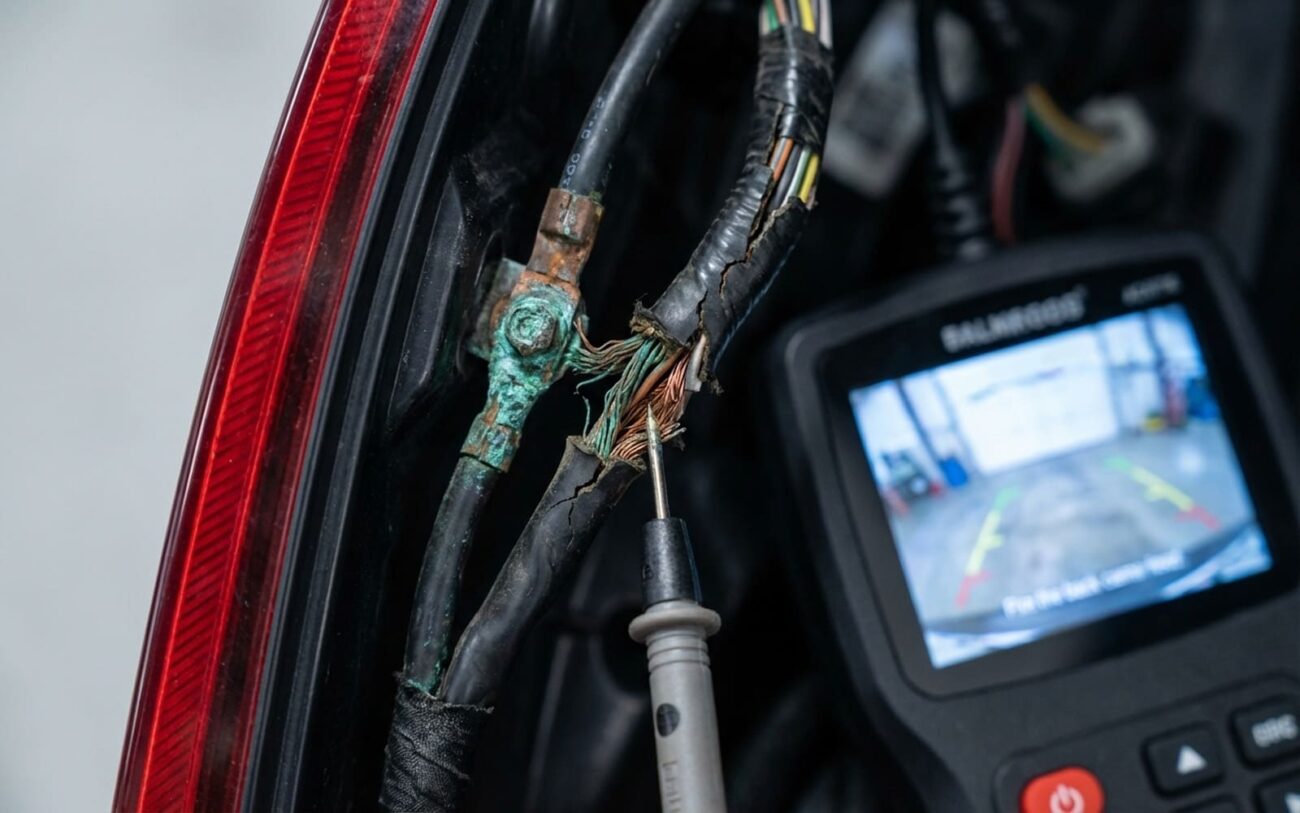
That Flickering Backup Camera in Your Taillight
I’ve pulled apart hundreds of these assemblies—Fords, Chevys, Rams, even some Toyotas with the camera tucked in the liftgate handle. And when the backup camera starts flickering, most people assume the whole unit is junk. Not always. A lot of the time, it’s not the camera. It’s the ground. Or noise. Or moisture sneaking in where it shouldn’t. The camera’s buried in one of the worst spots on the vehicle: hot, wet, vibrating, and sharing power with brake lights that pull amps like a welder. No wonder it fails.
But here’s the thing—before you spend $800 on a new taillight, let’s figure out what’s actually broken. Because more than half the time, it’s something you can fix with a wire, a multimeter, and 30 minutes.
Symptom First, Tools Second
I don’t touch a wrench until I’ve watched the problem happen. The flicker pattern tells you everything.
If the image stutters the second you hit the brake pedal? That’s not a bad camera. That’s a shared ground going south. Brake lights pull 5–10 amps. If the ground path is weak, that current surge pulls the reference voltage up, and the camera sees noise. You’ll get flicker, roll bars, or even total dropout—every time the brakes come on.
Same thing if it syncs with the turn signals. I see this on 2015–2018 F-150s all the time. The flasher circuit induces voltage spikes on a poorly filtered power feed. The camera’s power rail isn’t isolated, so the ripple shows up in the video. Horizontal lines. Jitter. Sometimes the whole screen goes black for a split second.
Constant flicker—no matter what—points to a failing camera module or damaged coax. And if it only happens after rain? Water’s in. I’ve pulled apart assemblies where the camera lens seal failed, and there’s literally a puddle inside. Corrosion sets in fast on those tiny PCB traces.
| Symptom | Root Cause (Taillight Zone) | Mimics From Elsewhere | How I Confirm It |
|---|---|---|---|
| Flickers when brakes are applied | Shared ground failure in taillight housing—camera and brake light fighting for return path. | Bad brake light switch, BCM output issue (rare). |
Back-probe camera ground at connector. Measure voltage drop to chassis during brake application. Over 0.1V? Ground’s toast. |
| Syncs with turn signals or hazards | EMI on shared 12V feed—no filtering, so noise couples into video signal. | Faulty flasher module, BCM interference (check with scan tool). |
O-scope the camera’s power pin. Look for ripple that matches flasher timing. If you see it, EMI’s the culprit. |
| Constant flicker, snow, or colored lines | Camera PCB failure or coax shield compromised—signal integrity gone. | Head unit processor issue, screen driver fault. |
Swap in a known-good camera. If problem stays, test coax with TDR or video cable tester—look for shorts, opens, or shield breaks. |
| Only acts up when wet | Moisture in housing—seal failure or cracked lens letting water in. | Corroded body harness junction in trunk. |
Spray test, then inspect for water inside. Check ground pin to chassis resistance—below 1 ohm? Moisture’s bridging circuits. |
Why the Taillight Itself Kills the Camera
The taillight is a death trap for electronics. You’ve got halogen bulbs running at 250°F, constant vibration from potholes, and condensation building up every time the temp swings. The camera’s usually mounted right in the middle of it—on a PCB that shares traces with brake lights, turn signals, and reverse lamps.
Thermal cycling is a silent killer. On a 2017 Pacifica, the camera’s built into the liftgate emblem. Park it in the sun, it heats up. Night falls, it cools. Do that every day for three years, and the solder joints on the camera’s board start cracking. I’ve seen it under a scope—hairline fractures on the ground pad, intermittent connection. The camera works fine when cold, flickers when hot.
And the ground traces? They’re often just a thin copper path on the taillight’s internal circuit board. Not a dedicated wire. Not robust. One corroded pin or cracked trace, and the camera’s reference point floats. Suddenly, when the brake lights come on, the camera sees 0.5V on ground instead of 0V—and the signal goes haywire.
Then there’s the capacitor. Most cameras have a tiny filter cap on the 12V input. It’s supposed to smooth out noise. But cheap caps dry out or fail open. No filtering? Every time the turn signal blinks, you get a voltage spike on the power rail. That spike couples into the video signal. Result: horizontal bars scrolling up the screen.
How I Fix It—And When to Walk Away
External Ground Clean/Repair
Internal Ground Trace Bypass Pro Move
Camera PCB or Water Damage Replace It
Did It Actually Work? Test Like a Pro
Don’t just reverse and say “looks good.” You need to stress-test it.
After a ground repair, cycle the brakes 20 times while watching the display. Do the same with turn signals. If it flickers once, the fix isn’t solid. Also, take it for a drive over bumpy roads—vibration can expose a weak connection.
And if you replaced the assembly, check the seal. Run a bead of black RTV around the lens edge where it meets the housing—just a light coat. Not structural, but it blocks moisture. I’ve done this on customer trucks with recurring condensation issues. No leaks in two years.
What’s This Gonna Cost?
| Repair Type | DIY Cost | Shop Cost | Success Rate | Watch Out For |
|---|---|---|---|---|
| External Ground Clean/Repair | < $20 (brush, grease, socket) | $100 – $200 | High (>90%) | Torque matters—under-tighten and it loosens, over-tighten and you crack the housing. |
| Internal Bypass Wire Repair | $50 (wire, solder, heat shrink) | $200 – $400 | Moderate (70%) | Seal the new ground point—dielectric grease or it’ll corrode in two years. |
| Taillight/Camera Assembly Replacement | $300 – $1000 | $500 – $1500 | Very High (>95%) | Moisture if seals aren’t seated—press evenly, don’t force. |
Real talk: if the repair’s pushing $1,000 and the truck’s worth $4,000, think hard. Is it worth it? For safety, yes—but only if you’re keeping it. Otherwise, live with the flicker or park with caution.
Keep It From Coming Back
Every time you pull the taillight—bulb change, cleaning, whatever—spend 30 seconds on the connector. Apply dielectric grease to every pin. Not silicone. Not WD-40. Dielectric grease. It seals out moisture and stops corrosion cold. I’ve got trucks from 2012 still running original connectors because the previous tech did this.
And check for condensation. A little fog after rain? Normal. Water pooling? Bad seal. Fix it now—don’t wait for the camera to die. Replace cracked lenses, re-bed housings with butyl tape, and make sure the gasket isn’t pinched. A dry, clean taillight lasts longer than the rest of the car.
