When Lights Go Haywire — It’s Not the Bulbs
I’ve seen this a hundred times: headlights pulsing, turn signals dead, dash lights out while the dome stays on. Customer thinks it’s a fuse. Sometimes they’ve already swapped bulbs, relays, even the switch. But the real problem? The CAN bus.
Modern cars don’t run power straight from the switch to the light. That ended in the ‘90s. Now, when you flip the headlight switch, it sends a digital message over the CAN network. The Body Control Module (BCM), lighting module, or gateway receives it and powers the circuit. If the network’s down, the message never gets through — and you get chaos.
And I mean chaos. Brake lights coming on with the license plate light. Left turn signal triggering the right-side fog light. That’s not a wiring mix-up — that’s corrupted data. The message is garbled, so the module misinterprets it. I’ve pulled U-codes from half a dozen modules on the same car, all because of one bad splice or a chewed harness.
How to Tell It’s the CAN Bus (And Not Just a Bad Ground)
Not every lighting issue is a network problem. Shared ground failure? Common. Power feed to the BCM cut? Happens. But those usually don’t throw communication codes — and they don’t cause cross-system weirdness.
The real test is in the scan tool and the meter. I start with the OBD2 port. With the battery disconnected, I check resistance between CAN-H (pin 6) and CAN-L (pin 14). If it’s ~60 ohms, the termination resistors are intact. If it’s 120, one’s dead. If it’s near zero? You’ve got a short.
But resistance alone won’t catch everything. Intermittent faults — the kind that come and go — need an oscilloscope. I hook up to the OBD2 port, turn the key on, and watch the waveforms. Clean, mirror-image signals? Good. Noise, distortion, or one line flatlined? That’s your smoking gun.
And here’s a trick I use: if there are no stored DTCs but the lights act up, I monitor CAN voltage with a DVOM. Ignition on, CAN-H should sit around 2.6V, CAN-L at 2.4V. If either is way off — say, both reading 0V or 12V — something’s dragging the bus down.
| Symptom | Likely CAN Bus Cause | Common External Mimics | Definitive Test to Confirm Source |
|---|---|---|---|
| Multiple lighting DTCs (e.g., “Lost Communication with…” or “Bus Off”) | Short to ground or power on CAN-H/CAN-L, failed termination resistor | Failed power or ground supply to a key module (like BCM or gateway), internal module failure not affecting bus directly |
With battery disconnected, measure resistance between CAN-H (pin 6) and CAN-L (pin 14) at the OBD-II port. A reading of ~60 ohms is normal (two 120-ohm resistors in parallel). 120 ohms means one resistor is open. Less than 60 ohms indicates a short or faulty module pulling resistance down. 0 ohms means direct short between wires. |
| Erratic lighting behavior without stored DTCs | Intermittent open, high resistance, or EMI (electromagnetic interference) on the bus | Loose bulkhead connector, water intrusion in a junction block, corroded ground for lighting circuits |
Monitor CAN-H and CAN-L signals with an oscilloscope at the OBD-II port during fault occurrence. Healthy signals are clean, mirror-image waveforms. Use DVOM to check voltage: with ignition on, CAN-H should read ~2.6V and CAN-L ~2.4V relative to ground. Significant deviation indicates bus corruption. |
One headlight out? Check the fuse. Both out? Maybe the relay. But if the dash lights flicker when you hit a bump, or the turn signal makes the radio reboot — that’s CAN. Don’t waste time on bulbs.
Root Causes — And How I Find Them
Once I know it’s the CAN bus, I narrow it down to three things: wiring, termination, or a bad module.
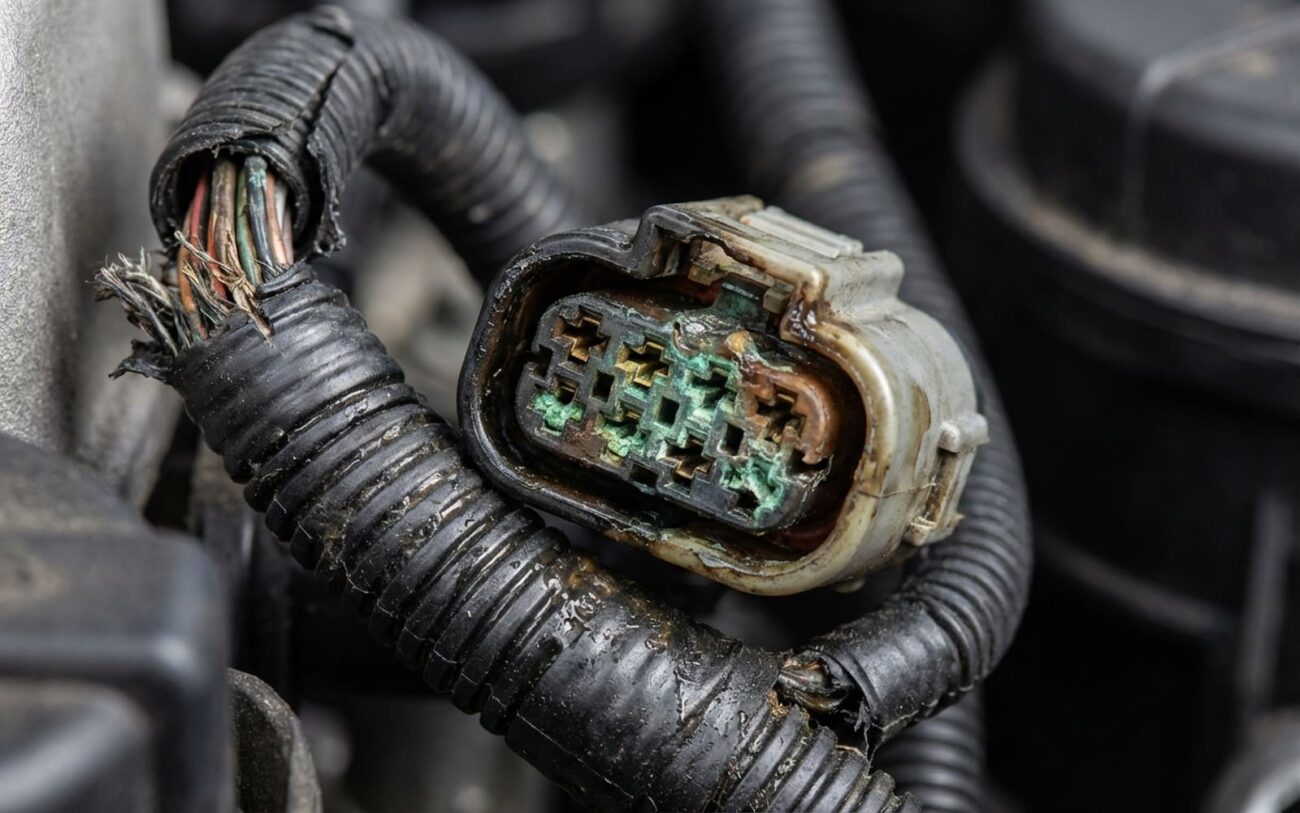
Wiring damage is the most common. Rodents love chewing those twisted pairs. So do sharp metal edges behind kick panels. I’ve seen DIY splices where someone used a standard butt connector and unraveled the twist — that kills signal integrity. CAN bus isn’t regular wire. It’s precision. Break the twist, and you get reflection, noise, intermittent faults.
Termination resistors fail more often than you’d think. Most networks have two 120-ohm resistors — one at each end, usually in the BCM and instrument cluster. Together, they make 60 ohms across the bus. If one burns out, the whole network can go dark. I’ve had clusters fail on 2014–2017 Rams that took out the entire lighting network. Resistance check shows 120 ohms? One’s gone. Time to trace which module has the working resistor.
Faulty modules are the sneaky ones. A dead module just goes silent. But a shorted one? It drags the whole bus down. I’ve seen a failed roof control module pull CAN-H to 0V, killing communication with the BCM, cluster, even the radio. To find it, I disconnect modules one by one with the battery off. When resistance jumps back to 60 ohms, I’ve got my culprit.
How I Fix It — No Shortcuts
Wiring Repairs (Accessible Sections) Professional Only
Module Isolation (Hard-to-Reach or Internal Faults) Professional Only
Module Replacement (Failed Internal Components) Professional Only
Emergency Workaround Professional Only
Did It Work? Here’s How I Know
I don’t clear codes and call it done. I verify.
After a wiring fix, I recheck resistance at the OBD2 port — 60 ohms, ±2. Then I scope the bus while cycling lights via scan tool. Waveforms clean? Good. Any noise or asymmetry, and I’m pulling the harness again.
For module replacements, I confirm programming first. Does the network recognize the VIN? Are there calibration mismatches? Then I test every light — brake, turn, headlights, interior — through multiple ignition cycles. If one flickers or delays, I’m not done.
And I leave the codes cleared for at least 10 minutes of operation. If they come back, I missed something.
Is It Worth Fixing?
Let’s be real: CAN bus repairs get expensive. Labor alone can hit $800 if you’re digging into the dash harness. Here’s how I break it down:
| Repair Type | DIY Cost (Parts) | Shop Cost (Est. Labor + Parts) | Success Rate (When Correctly Diagnosed) | Secondary Risk if Failed |
|---|---|---|---|---|
| Harness Section Repair | $50–$100 (wire, connectors, tools) | $300–$800 | 95%+ | Poor repair technique can lead to intermittent faults, signal degradation, or future corrosion. May require full harness section replacement if done incorrectly. |
| Lighting Control Module Replacement | $200–$600 (module) + programming cost | $500–$1,200 | 98%+ | Incorrect programming can disable features, cause network conflicts, or prevent other modules from communicating. |
If the repair bill hits 40% of the car’s value? I tell the customer to think hard. I’ve seen people drop $1,200 on a 12-year-old sedan. Sometimes, the smarter move is to walk away.
How to Avoid This Mess
Most CAN bus failures start small. A pinched harness. A connector left unsealed after radio install. Water gets in, corrosion builds, and six months later, the lights go nuts.
After any dash or under-carpet work, I double-check grommets and seals. And I use OEM fuses — cheap ones can’t handle load dumps and fry sensitive modules.
For early warning, I run a quick scan every oil change. U-codes don’t always light the check engine light, but they’re in the modules. Catch a U0100 early, and you might save the whole network.
Key Prevention Tips
-
Use a reliable OBD2 scan tool regularly to check for U-codes (network communication faults). These don’t always trigger the check engine light, but they show up in the module memory. Catching a U0100 (Lost Communication with ECM) early can save you from a full network breakdown later.
-
During routine maintenance—oil changes, tire rotations—take 30 seconds to inspect visible harness runs. Look for chafing near fender liners, pinch points at door apertures, or rodent signs around the firewall. A little vigilance goes a long way in avoiding a major CAN bus failure down the road.
