That Sweet Smell in Your Car? It’s Trouble.
If you’re smelling something sweet, almost syrupy, coming from your car’s vents—especially when the heater’s on—you’re not imagining things. That’s ethylene glycol, the main ingredient in most antifreeze. And when it’s inside the cabin, it’s almost always a sign of a coolant leak in or around your HVAC system. In my 25+ years turning wrenches, the heater core or one of its hoses is the usual suspect.
Now, a little whiff might seem harmless, but trust me, it’s not. This isn’t just about losing heat or fogging up your windshield. A persistent coolant leak means your engine is slowly losing fluid, and that puts it at serious risk of overheating. I’ve seen engines completely grenaded from what started as a small heater core seep. We need to get this sorted out, and we’ll approach it like I do in the shop: methodically, honestly, and without cutting corners.
Symptoms I Look For (and You Should Too)
That distinct sweet smell is the primary giveaway, no doubt about it. It’s strongest when the blower motor is running or when you crank up the heat. Why? Because the fan pulls air across a damp or leaking heater core, vaporizing the coolant and blowing it right into your face. If the leak’s bad enough, you might even see a faint mist or fog coming from the vents. That’s not just condensation; that’s actual coolant vapor.
Another dead giveaway is moisture on the front passenger floor. We’re talking wet carpet, a puddle, or just a general dampness that never seems to dry. The heater core lives inside the HVAC case, behind the dash. When it leaks, the coolant either drains down through the case’s designed path (if it has one) or just soaks into the insulation and carpet. Over time, that leads to mold and a nasty, musty smell on top of the sweet coolant odor.
And here’s one many folks miss: a greasy film on the inside of your windshield that’s a real pain to clean. Wipers just smear it around, and it comes back fast. That’s not oil; it’s evaporated coolant residue, full of glycols and other additives. Mix that with the humidity from the leak, and you’ve got perfect conditions for constant fogging. Plus, if your car is losing coolant but you can’t find any drips under the hood, an internal leak like a heater core is almost certainly the culprit.
Heads Up: Don’t Ignore It.
Every time you drive with a leaking core, you’re slowly draining your cooling system. Eventually, you run low, and the engine overheats. I’ve seen warped heads and blown head gaskets from small leaks that were ignored. Worse, a sudden rupture can flood the footwell with scalding hot coolant and steam. That’s a major distraction and a burn hazard. Don’t wait for that.
My Diagnostic Process: Pinpointing the Leak
Before you even think about tearing into the dashboard, we need to rule out other things that can fool you. A leaking water pump, a cracked hose near the firewall, or even a bad radiator cap can allow coolant to spray or pool under the hood. Engine heat turns it into vapor, which then gets sucked into the fresh air intake and blown through your vents, making you think it’s a core leak.
And don’t forget the floor. A clogged A/C evaporator drain will flood the passenger floor, but it’s just water. A leaking windshield seal can also drip rainwater in the same spot. So, how do we tell the difference?
The Go-To Tests
- Cooling System Pressure Test: This is my first step. With the engine cold, I remove the radiator cap (or access the surge tank) and pressurize the system to its rated pressure—usually around 15 psi, matching what’s on the cap. Then I watch the gauge. If the pressure drops and I don’t see any external leaks under the hood, the leak is almost certainly internal. At that point, the heater core becomes the prime suspect.
- Heater Core Bypass Test: To confirm a core leak, I’ll sometimes do a bypass. I disconnect both heater hoses at the firewall (engine side) and connect them directly using a short length of compatible hose and good clamps. This completely takes the heater core out of the coolant loop. Refill and bleed the system, then drive it. If the sweet smell, damp floor, and fog disappear, you’ve isolated the problem to the heater core or its immediate connections.
- Fluid Analysis: If you have a wet floor, test the fluid. Coolant has that characteristic sweetness (but don’t taste it, seriously). It’ll also register on a coolant test strip or refractometer. Water from an A/C drain won’t. Also, check the A/C drain tube itself—is it clogged or disconnected?
- UV Dye Inspection: This is one of my favorite tricks for finding small, sneaky leaks. I’ll add fluorescent dye to the coolant, run the engine for a bit, then shine a UV (black) light around. Even tiny seeps inside the HVAC box or at hose connections will glow brightly.
Why These Things Fail (The Nitty-Gritty)
Heater cores fail for a few key reasons, usually a mix of time, chemistry, and plain old wear and tear. Most are built with thin aluminum or brass tubes and delicate fins—great for heat transfer, not so much for durability. Here’s what I typically see:
- Internal Corrosion: This is the big one. If coolant isn’t changed on schedule, or if the wrong type is used (like mixing silicate-based with OAT coolants), it can become chemically imbalanced. This leads to electrolysis—tiny electrical currents in the coolant that slowly eat away at metal joints, especially where different metals meet. Over time, this weakens the solder or brazed joints where the tubes connect to the end tanks. Engine vibration just makes it worse, eventually causing cracks. I’ve pulled out cores that looked fine on the outside but were riddled with pinhole leaks internally.
- Debris: Bits of rust from an old radiator, a failing water pump impeller, or even casting sand from a previous repair can circulate through the system. These particles get trapped in the narrow passages of the heater core, causing erosion or blockages. Restricted flow means less heat and can increase localized pressure or heat, speeding up failure.
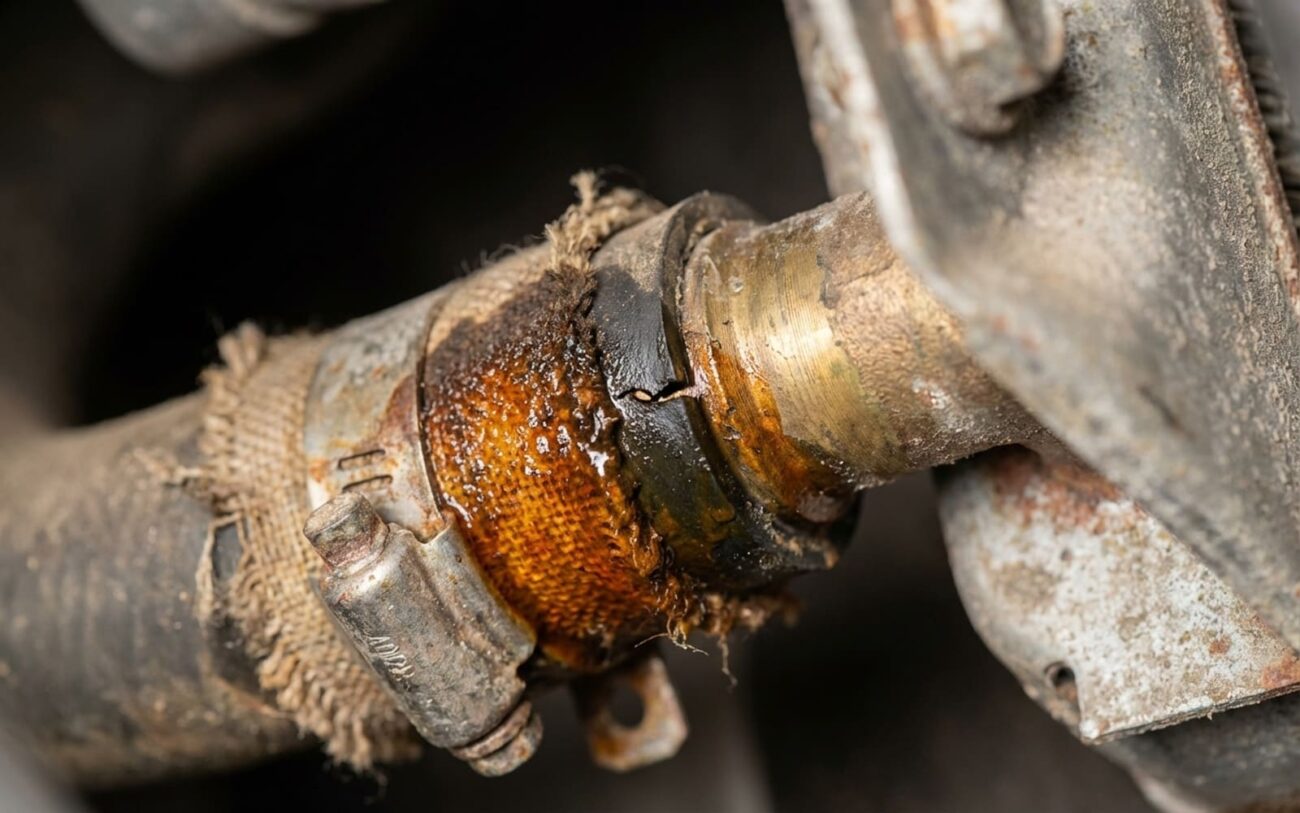
- Hose Degradation: Heater hoses live a tough life. They’re constantly exposed to hot coolant (over 180°F is common) and chemical attack. The inner liner breaks down first, leading to bulging, soft spots, or cracking. Sometimes, they rub against brackets or sharp edges during installation, causing external damage. And while hose clamp failure is rare, a loose or corroded clamp can cause a slow seep at the connection point—often mistaken for a core leak.
Not Always the Core:
Just a quick note: not every coolant smell means your heater core is shot. Some models—especially certain European and Asian vehicles—have known issues with quick-connect fittings near the firewall or EGR coolers leaking coolant into the intake. Others have HVAC drain tubes positioned too close to fresh air intakes, allowing spilled coolant to be pulled into the cabin. That’s why thorough diagnosis is key before you commit to a dashboard teardown.
Your Repair Options: From Quick Fixes to Major Surgery
The right fix depends entirely on where and how bad the leak is. A minor seep at a hose connection in the engine bay? That’s often a straightforward DIY job. But if the core itself is leaking inside the dash, you’re looking at one of the most labor-intensive repairs outside of an engine rebuild.
WARNING Coolant System Sealants: Use with Extreme Caution
For very minor internal leaks—say, a slight pressure drop with no visible cabin symptoms—some folks reach for cooling system sealants. There are products designed for this, like pellet-style sealers that dissolve and target small leaks. But I’ll be honest: TEMPORARY / LAST-RESORT. The risk is real. Those sealants can clog the heater core’s fine tubes, restrict radiator flow, or even mess with your thermostat. I’ve seen them cause worse overheating than the original leak. Use them only to get a car mobile for towing or very short-term operation—never as a permanent solution. This is a “get home safe” measure, not a repair.
Heater Hose Replacement
If the problem is just a heater hose in the engine compartment, that’s DIY-FEASIBLE for most home mechanics. You’ll need the correct OEM-specified hose, quality clamps (I prefer spring or constant-tension types), and a pan to catch the drained coolant. Refill with the proper 50/50 coolant mix and bleed the system thoroughly. Air pockets in the heater circuit are common and can cause poor heat or even false overheating warnings. Run the engine with the heater on high and the radiator cap off (once it’s safe to do so) to help purge that air.
Now, a word of caution: if that hose leak is at the firewall where it connects to the core, access is usually still behind the dash. That means even a “simple” hose repair can require partial interior removal. So don’t assume it’s easy just because it’s “only a hose.”
Heater Core Replacement: The Big Job
A confirmed heater core failure almost always requires replacement—and that’s a PROFESSIONAL-ONLY job for most people. Access involves removing the glove box, center console, lower dash panels, and often the entire HVAC case. Once you get it open, the core comes out, and new foam seals must be installed to prevent air leaks and whistling noises. The HVAC housing screws are typically torque-sensitive—many require only 3–5 Nm—and over-tightening will crack the plastic. Use a calibrated torque screwdriver, or you’ll be buying a new HVAC case.
Reassembly demands extreme care. Blend door actuators can be damaged if misaligned, and improper sealing leads to poor airflow or noise. Always replace the core with an OEM or high-quality aftermarket unit (I trust brands like UAC, Denso, or Four Seasons). And never, ever reuse old seals or gaskets—moisture and heat destroy their integrity.
The Heater Core Bypass: A Last Resort
Given the labor cost of a heater core, sometimes you’re forced to make a tough decision. One option is a professional heater core bypass. This involves connecting the two heater hoses at the firewall with a straight adapter, permanently removing the core from the system. It stops coolant loss and protects the engine—but you lose cabin heat and defrost capability.
In cold climates, that’s a safety and legal issue—many states require functioning defrosters. But for a warm-weather daily driver or a secondary vehicle, it’s a viable stopgap. Just make sure to document the modification and inform any future buyers.
Verifying the Fix: Don’t Skip This Step!
Never assume a repair is complete just because the system is full and the engine runs. Validation is critical, especially after a major job like heater core replacement. Here’s my checklist:
- Cold System Pressure Test: Pressurize the system to the cap’s rating (typically 15 psi) and monitor it for at least 30 minutes. No drop means no leaks.
- Heat Cycle Test: Start the engine and let it reach full operating temperature. Run the heater on max fan and highest heat setting for 20–30 minutes. Check for any odor, fog, or dampness. If your car has a cabin air quality sensor, keep an eye on it for VOC spikes during this cycle.
- Multiple Heat Soaks: For hose repairs or if you dared to use sealant, perform multiple heat-soak cycles. Drive the vehicle until hot, let it cool overnight, then repeat. This expands and contracts materials, revealing any latent leaks.
- UV Dye Re-inspection: If you added UV dye before, now’s the time to re-inspect all connections—including under the dash—with a black light. Even tiny seeps will glow brightly.
The essential tools for proper verification: a cooling system pressure tester, UV dye injector, black light, and coolant test strips. These aren’t luxuries; they’re what separate guesswork from guaranteed repairs.
The Hard Truth: Cost vs. Value
There’s no sugarcoating it: heater core replacement is expensive. Not because the part is pricey, but because of the sheer amount of labor involved. Here’s a quick rundown:
| Repair Type | DIY Cost | Shop Cost | Success Rate | Secondary Risk if Failed |
|---|---|---|---|---|
| Heater hose (engine bay) | $50–$150 (hose, clamps, coolant) | $200–$400 (labor + parts) | 95% if done correctly | Coolant loss leading to overheating |
| Heater core replacement | $200–$500 (core, seals, tools, coolant) | $1,000–$2,500 (mostly labor) | 98% with OEM-quality part and proper seals | Need to repeat disassembly; risk of damaged blend door actuators or HVAC case |
That labor cost forces a reality check. As a general rule I’ve used for years in my shop: if the repair estimate exceeds 50% of the vehicle’s private-party value (check guides like Kelley Blue Book for “Good” condition), it’s time to seriously consider alternatives. That’s where the bypass option comes in, or perhaps even moving on to a different vehicle.
How to Prevent This Headache Next Time
Prevention starts with coolant discipline. Always use the type specified in your owner’s manual—whether it’s IAT, OAT, HOAT, or G-48. Mixing types can create sludge or gel that clogs heater cores and damages water pumps. And don’t fall for “lifetime coolant” myths. Even long-life formulas degrade. Replace coolant at the manufacturer’s severe service interval—usually every 5 years or 100,000 miles, whichever comes first.
Once a year—I usually recommend doing it during an oil change—do a quick inspection. Squeeze the heater hoses: they should feel firm, not soft or swollen. Peek under the passenger side dash for any signs of staining or damp insulation. And make it a habit to smell the vents the first few times you use the heater each season. That initial whiff of sweetness is your earliest warning sign.
If you catch a hose leak early, fix it immediately. A $50 repair now can prevent a $2,000 dashboard job later. And if you’re ever unsure, run a pressure test. It’s cheap, non-invasive, and definitive. In my two decades in the shop, I’ve seen this issue destroy more engines than people realize—all because a small smell was ignored. Stay ahead of it. Your engine, your wallet, and your visibility down the road will thank you.
