When Your Hybrid’s Brakes Feel… Off: Diagnosing a Failing Vacuum Pump
Alright, let’s talk about something I see a lot in the shop, especially with hybrids like your Toyota Prius or Honda Insight: a failing electric vacuum pump. If you’re driving along and suddenly your brake pedal feels harder than usual, like you’re really having to stand on it to stop, you’re not imagining things. That’s usually the first big clue.
See, these hybrids don’t always have an engine running to create vacuum for the brake booster, so they use an electric pump. When that pump starts to go, you lose your power assist, and that pedal gets stiff. It’s most noticeable at low speeds, like when you’re creeping in traffic or backing out of a driveway, because that’s when the booster relies heavily on that vacuum to make your life easy.
I’ve had customers describe it as “spongy” or “like the old days before power brakes.” It’s a subtle change at first, but it gets worse. And it’s not just a comfort thing; it’s a safety issue. You’re going to need more distance to stop, and in a panic situation, that’s a real problem.
Now, a hard brake pedal isn’t always the vacuum pump. A ruptured brake booster diaphragm, a cracked vacuum hose, or a bad check valve can all give you similar symptoms. But on these hybrids, especially between 60,000 and 90,000 miles, that electric vacuum pump is a known wear item. It’s usually my top suspect.
Current: 12 inHg
Beyond the pedal feel, you’ll often see the Check Engine Light (CEL) pop on. When I hook up my scanner, I’m usually looking for codes in the P055x range. P0551 (Brake Booster Pressure Sensor Performance) is a common one. This code tells me the car isn’t seeing the vacuum it expects, but it doesn’t tell me why – that’s where my diagnostic work comes in.
And then there’s sound. With the engine off and the hood open, listen closely around the firewall. A healthy vacuum pump will kick on for a few seconds to build pressure, then shut off. If you hear a continuous whirring, grinding, or a strained humming noise, especially if it runs nonstop or sounds like it’s struggling, that’s a big red flag for a failing pump. I’ve heard them sound like a dying squirrel, honestly.
My Diagnostic Approach: Pinpointing the Problem
Before I replace anything, I’ve got to be 100% sure it’s the pump and not something else. Here’s how I typically narrow it down:
-
For a Hard Brake Pedal or P0551: I always start by hooking up a vacuum gauge directly to the pump’s outlet. I’ll command the pump on with my scan tool (if possible) or just watch it during startup. A healthy pump should pull more than 22 inches of mercury (inHg) within about 10 seconds. If it struggles to get there, or never reaches it, that tells me the pump itself is weak. I’ll also monitor the booster pressure PID (Parameter ID) on my scan tool. If the pump is running but that PID isn’t showing vacuum building up, the pump’s failed mechanically.
-
If I Suspect a Booster or Hose Leak: Sometimes a hard pedal is just a big vacuum leak. I’ll use a smoke machine to test the entire vacuum system, especially around the booster check valve and any hoses leading to it. If smoke comes out anywhere it shouldn’t, I know I’ve got a leak. That’s a much cheaper fix than a pump, so it’s always worth checking.
-
For Audible Noises: If I hear that whirring or grinding, I grab my stethoscope. I’ll carefully listen to the pump itself, then the alternator, and other accessories. This helps me pinpoint if the noise is truly coming from the vacuum pump’s internal bearings or motor, or if it’s just a noisy accessory mimicking the sound.
The Concept
Think of it like this: your brake booster is a big muscle, and the vacuum pump is the energy drink that makes it strong. Without that drink, the muscle still works, but you’re going to feel it a lot more.
Why These Pumps Give Up the Ghost
So, why do these electric vacuum pumps fail so consistently around that 60,000 to 90,000-mile mark? It’s pretty straightforward: mechanical wear and tear. Unlike traditional cars where the engine’s always running and providing a steady source of vacuum, hybrids constantly shut off their gas engines. That means the electric vacuum pump has to cycle on and off all the time to maintain brake assist. This constant start-stop action just wears them out faster.
Common Failure Points:
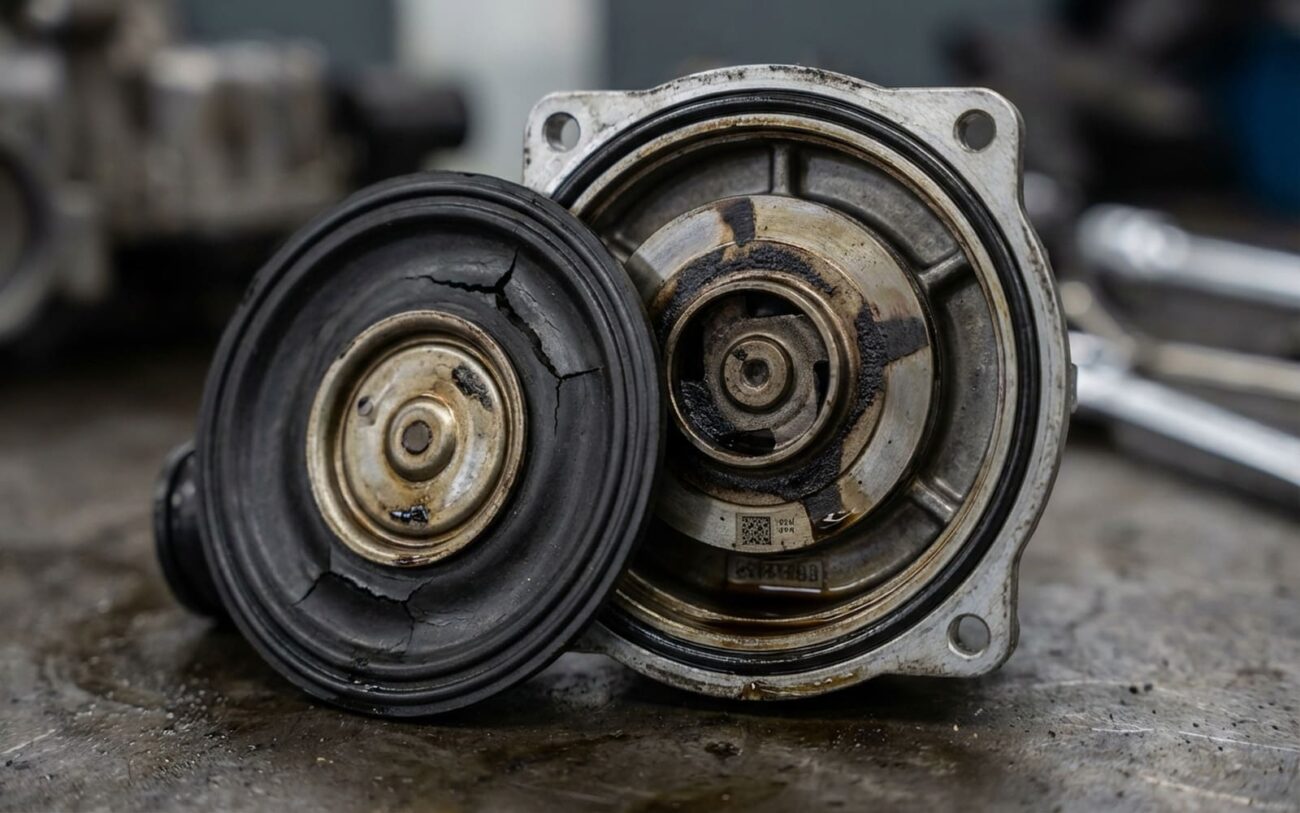
What I usually find is either vane wear or bearing failure. In some Honda designs, for example, you’ve got carbon vanes spinning inside an aluminum housing. Over time, those vanes just wear down, lose their seal, and can’t pull vacuum efficiently anymore. Or, the small sealed bearings that allow the motor to spin smoothly degrade from all the heat and thermal cycling, leading to that tell-tale grinding or whirring noise.
The Fix: What I Recommend
Safety First, Always.
Look, there’s no approved way to repair these pumps internally. Once it starts failing, it’s only going to get worse. Driving with degraded brake assist is just plain unsafe. Get this pump replaced promptly. Your ability to stop consistently and safely depends on it.
Full Assembly Replacement Advanced DIY / Pro
Filter Service DIY Feasible, but…
“Temporary Tricks” Not Recommended
Post-Repair: Double-Checking Your Work
Just because the new pump is bolted in doesn’t mean the job’s done. I always verify everything works correctly. It’s about safety and peace of mind.
-
Functional Test: With a scan tool, I’ll activate the new pump. It should quickly (within 10 seconds) pull more than 22 inHg of vacuum and then hold that vacuum once it shuts off. If it doesn’t, something’s still wrong.
-
Leak Test: A smoke test at the booster check valve is crucial. I want to see no smoke escaping from the pump body or any of its connections. A tiny leak can still cause a hard pedal over time.
-
Test Drive: This is where the rubber meets the road. I’ll take the car for a good drive, making sure the brake pedal feels nice and soft, consistent through multiple stops and start-stop cycles. I’ll also listen for any abnormal noises.
Costs and What to Expect
Here’s a quick rundown of what you’re generally looking at for this repair:
| Repair Type | DIY Cost (Parts) | Shop Cost (Est.) | Success Rate | Secondary Risk |
|---|---|---|---|---|
| Full Pump Replacement | $180–$350 | $450–$700 | 99% | Misdiagnosis wastes money; incorrect installation can cause leaks or even damage the ABS system. |
Keeping It Healthy: Prevention
My Two Cents on Maintenance:
For the older, oil-lubricated pumps (some models have them), sticking to your oil change intervals with the correct spec (like 0W-20 WS for many Toyotas) is critical. Degraded oil won’t lubricate those vanes properly, and they’ll wear out even faster. Also, just keep the area around the pump clean. Debris can block airflow and cause overheating, shortening its life.
“`html
When Your Hybrid’s Brakes Feel… Off: Diagnosing a Failing Vacuum Pump
Alright, let’s talk about something I see a lot in the shop, especially with hybrids like your Toyota Prius or Honda Insight: a failing electric vacuum pump. If you’re driving along and suddenly your brake pedal feels harder than usual, like you’re really having to stand on it to stop, you’re not imagining things. That’s usually the first big clue.
See, these hybrids don’t always have an engine running to create vacuum for the brake booster, so they use an electric pump. When that pump starts to go, you lose your power assist, and that pedal gets stiff. It’s most noticeable at low speeds, like when you’re creeping in traffic or backing out of a driveway, because that’s when the booster relies heavily on that vacuum to make your life easy.
I’ve had customers describe it as “spongy” or “like the old days before power brakes.” It’s a subtle change at first, but it gets worse. And it’s not just a comfort thing; it’s a safety issue. You’re going to need more distance to stop, and in a panic situation, that’s a real problem.
Now, a hard brake pedal isn’t always the vacuum pump. A ruptured brake booster diaphragm, a cracked vacuum hose, or a bad check valve can all give you similar symptoms. But on these hybrids, especially between 60,000 and 90,000 miles, that electric vacuum pump is a known wear item. It’s usually my top suspect.
Current: 12 inHg
Beyond the pedal feel, you’ll often see the Check Engine Light (CEL) pop on. When I hook up my scanner, I’m usually looking for codes in the P055x range. P0551 (Brake Booster Pressure Sensor Performance) is a common one. This code tells me the car isn’t seeing the vacuum it expects, but it doesn’t tell me why – that’s where my diagnostic work comes in.
And then there’s sound. With the engine off and the hood open, listen closely around the firewall. A healthy vacuum pump will kick on for a few seconds to build pressure, then shut off. If you hear a continuous whirring, grinding, or a strained humming noise, especially if it runs nonstop or sounds like it’s struggling, that’s a big red flag for a failing pump. I’ve heard them sound like a dying squirrel, honestly.
My Diagnostic Approach: Pinpointing the Problem
Before I replace anything, I’ve got to be 100% sure it’s the pump and not something else. Here’s how I typically narrow it down:
-
For a Hard Brake Pedal or P0551: I always start by hooking up a vacuum gauge directly to the pump’s outlet. I’ll command the pump on with my scan tool (if possible) or just watch it during startup. A healthy pump should pull more than 22 inches of mercury (inHg) within about 10 seconds. If it struggles to get there, or never reaches it, that tells me the pump itself is weak. I’ll also monitor the booster pressure PID (Parameter ID) on my scan tool. If the pump is running but that PID isn’t showing vacuum building up, the pump’s failed mechanically.
-
If I Suspect a Booster or Hose Leak: Sometimes a hard pedal is just a big vacuum leak. I’ll use a smoke machine to test the entire vacuum system, especially around the booster check valve and any hoses leading to it. If smoke comes out anywhere it shouldn’t, I know I’ve got a leak. That’s a much cheaper fix than a pump, so it’s always worth checking.
-
For Audible Noises: If I hear that whirring or grinding, I grab my stethoscope. I’ll carefully listen to the pump itself, then the alternator, and other accessories. This helps me pinpoint if the noise is truly coming from the vacuum pump’s internal bearings or motor, or if it’s just a noisy accessory mimicking the sound.
The Concept
Think of it like this: your brake booster is a big muscle, and the vacuum pump is the energy drink that makes it strong.
