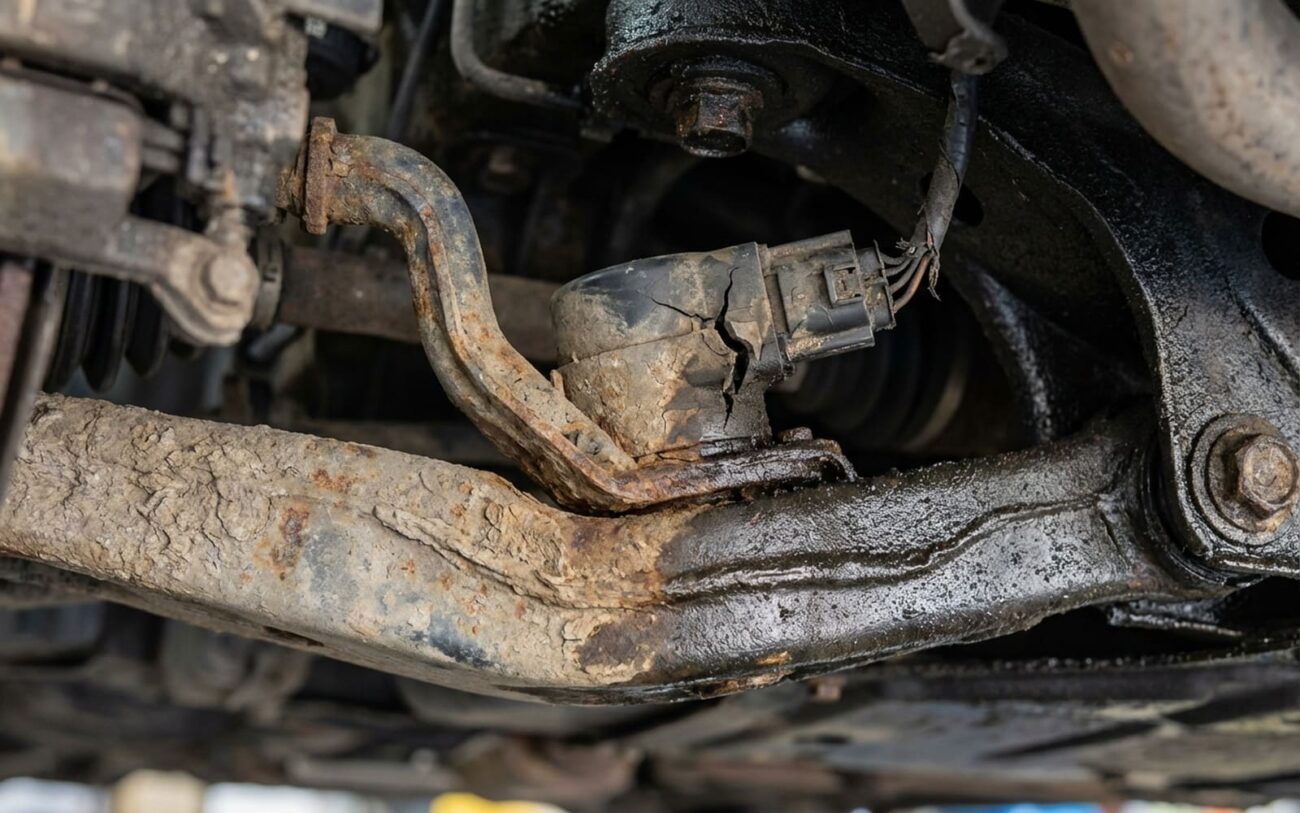
You pull up a DTC like B1241 or B1345—body height sensor fault—and suddenly the headlights won’t aim themselves. I’ve seen this on everything from a 2013 Jetta to a 2020 X5, and while the code points to the sensor, that doesn’t mean you yank it out and throw a new one in. Not if you want to get it right the first time.
What the Code Is Actually Telling You
That B1241 or B1243 isn’t saying “replace the sensor.” It’s saying the control module got garbage data—or no data—and it shut the system down. On VWs and Audis, this often kills the whole adaptive lighting system. On BMWs, it might even mess with the camera-based safety features. The module sees an impossible value—like the car being 6 inches lower than physics allows—and says, “Nope, not trusting this.”
The sensor itself? It’s a potentiometer. A rotating arm changes resistance as the suspension moves, sending a voltage signal between ~0.5V (full droop) and ~4.5V (full compression). Smooth sweep, right? But over time, the carbon track wears, the wiper arm flakes, or moisture gets in. You get dead spots, jumps, or a flatline. And the system freaks out.
Symptoms That Matter
If you’re not sure whether the system is even trying, here’s what to watch:
-
No sweep at startup – Turn the key to ON. Headlights should dip down, then rise. If they sit there like a statue, the system isn’t initializing. Could be sensor, could be motor, could be power.
-
Beams too high or too low under load – Load the trunk with 100+ lbs. Lights should aim lower. If they don’t, either the sensor isn’t seeing the change or the motor isn’t moving.
-
Intermittent faults after bumps – That’s classic. Could be a cracked housing, loose linkage, or corroded pins. Vibration breaks the signal, then it comes back.
How to Test—Before You Spend a Dime
Start with the obvious: get under the car. Look at the sensor and its linkage. On most VWs and Audis, it’s on the rear trailing arm. On BMWs, often near the front control arm. The lever should move freely when you push down on the bumper. If it’s stuck, bent, or disconnected—fix that first.
Then plug in your scan tool. You need one that can read live data from the body control module or headlight control unit. Generic OBD2 tools won’t cut it. You’re looking for the actual sensor voltage.
Have an assistant compress the suspension—jack up the rear, or push down hard on the bumper. Voltage should rise smoothly. Let it rebound—voltage should drop back to baseline. If it jumps, flatlines, or spikes, you’ve got a problem.
But if the voltage moves smoothly, the sensor’s probably fine. Then you check the motor. Use the scan tool to command the headlights up and down in bidirectional mode. If they don’t move, test power and ground at the motor connector. Could be a blown fuse, broken wire, or fried control module.
When the Sensor Is Actually Dead
When I crack open a failed sensor, here’s what I usually find:
-
Worn carbon track – The resistive path is pitted or flaking. Wiper arm can’t make clean contact.
-
Broken lever – Especially on older VWs. Plastic gets brittle, snaps at the pivot.
-
Moisture inside – Cracked housing or bad seal. Corrosion on the terminals or track.
These sensors aren’t repairable. Don’t bother trying to open them. You’ll wreck the internal alignment. And forget bypassing it with a resistor—modern modules cross-check with wheel speed, steering angle, and other inputs. It’ll fail the plausibility check every time.
Replacing It—And Getting It Right
Physical swap is simple:
-
Disconnect the battery.
-
Jack up the car, support on stands.
-
Unplug the connector, remove the TORX bolt (T25 or T30, 8–12 Nm).
-
Twist the linkage off the ball stud, swap in the new sensor.
But here’s the part most DIYers miss: calibration. The control module needs to learn the new sensor’s range. Without it, you’ll get the same code back in a few days.
You need a capable scan tool:
-
VW/Audi – VCDS, ODIS
-
BMW – ISTA
-
Mercedes – Xentry
Run the “basic setting” or “initialization” for the headlight leveling system. It takes 2 minutes. Skip it, and you’re just wasting your time.
How to Know It’s Really Fixed
- Clear the DTCs and cycle the ignition. Watch for the headlight sweep. No sweep? Back to diagnostics.
- Check live data while moving the suspension. Voltage should track smoothly. Any jumps or flat spots? Something’s still wrong.
- Load test: Park 25 feet from a wall. Mark the beam cutoff. Load the trunk with 100+ lbs. Beam should drop 2–4 inches. Unload—it should return to the mark.
- Optional but smart: Roll into a shop with a headlight aiming machine. Especially if you’re near inspection time. Better safe than failed.
Cost vs. Consequence
Here’s the reality:
| Repair Type | DIY Cost | Shop Cost | Success Rate | Secondary Risk if Failed |
|---|---|---|---|---|
| Body Height Sensor Replacement & Calibration | $80 – $200 (OEM-quality part) + $0–$500 (scan tool ownership or rental) | $250 – $450 (parts and labor, including calibration) | 95%+ when calibration is properly performed | Persistent DTCs, failed safety inspection, unsafe beam pattern leading to reduced nighttime visibility or glare complaints |
If the car’s worth less than $1500 and you can’t access a proper scan tool, some people just disable auto-leveling and set the aim manually with the adjustment screws. I get it. But remember—you’re flying blind when the car’s loaded. On a hill, in the rain, that could mean missing the edge of the road.
Keep It From Coming Back
I’ve seen more sensors killed during suspension work than from age. So:
-
Don’t let the linkage dangle when replacing shocks or control arms. Support the arm or disconnect the rod gently.
-
Don’t blast it with a pressure washer. Water gets in, corrosion follows. Clean around it, not at it.
-
Glance at it during oil changes. 30 seconds. Look for cracks, bends, or loose rods.
And if the lights seem slow to adjust, or the warning light flickers—don’t wait. A quick scan and visual check now can save you a dark highway later.
