Flickering daytime running lights? Don’t roll your eyes and ignore it. I’ve been knee-deep in vehicle electrical systems for over 25 years, and let me tell you—DRL flicker is never “just a bulb.” It’s your car talking to you, and if you don’t listen, it’ll cost you more than a headlight module. I’ve seen this on everything from economy sedans to full-size pickups. The pattern? Always starts small. A blink here, a stutter there. Then, bam—intermittent dropouts, codes, or worse, a cascade failure in the BCM.
What the Flicker Really Means
First—rule out the obvious. If your low beams, parking lights, and turn signals work fine when you turn them on, but only the DRLs act up, you’re not dealing with a fuse or a main power feed issue. That’s critical. This isn’t a global electrical failure. It’s isolated to the DRL circuit: the lamp, the control module, or the signal path from the BCM.
Now, pay attention to the pattern. That tells you everything.
If the flickering syncs with engine RPM—worse at idle, smoother when you rev—it’s voltage instability. Your alternator’s not holding steady, or the regulator’s on its way out. I’ve measured 12.3V at idle on a “working” charging system, only to see the DRLs pulse like a strobe. That’s not normal. You want 13.8–14.4V steady with the engine running. Anything outside that window? Suspect the alternator or ground straps.
But if the flicker is random—no rhyme, no rhythm—it’s likely inside the DRL assembly or the control module. And yes, I’ve torn apart dozens of these. More than half the time, it’s cracked solder joints on the LED driver board from thermal cycling. The lamp heats up in sunlight, cools in shade, expands, contracts. Do that for three years, and the PCB flexes enough to break tiny connections. You won’t see it with the naked eye. But put it under a 10x lens? Hairline cracks all over.
How to Diagnose It Right—No Guessing
You don’t fix this by throwing parts. You test. Here’s the process I use in my shop, every time.
Step 1: Check for Codes
Hook up a real scan tool—not a $30 OBD2 reader. Look for DTCs in the BCM or lighting module. Codes like U0121 (lost communication with lighting control module) or B2503 (DRL circuit open) are gold. They don’t always mean the part is bad, but they tell you where to look.
And yes, software matters. On certain Chrysler TIPM modules, a corrupted flash can make the DRLs pulse like they’re possessed. I’ve had three Dodges this year with that exact issue. Reflash the module, and the flicker vanishes. No hardware change needed.
Step 2: Voltage Drop Test—Real Time
Set your multimeter to measure DC voltage. Back-probe the DRL power and ground circuits at the connector. Start the engine. Watch the voltage while someone observes the lights.
If the voltage dips more than 0.5V when the light flickers, you’ve got a resistance problem. Could be a failing alternator, but more often, it’s a bad ground. Check the battery-to-chassis strap. Check the engine-to-frame ground. Clean them. Retorque to 8–10 Nm. I’ve saved customers $600 in parts by replacing a $12 ground cable.
Step 3: Isolate the Circuit
Disconnect the BCM. Use a multimeter to check continuity from the DRL connector back to the BCM pinout. Look for opens or shorts to ground. If the harness checks out, the issue is likely the lamp or the module.
Now, inspect the wiring. Look near the fender liner, around the headlight mounting points—anywhere the harness bends or rubs. Rodents love chewing there. I’ve found half-eaten wires on a 2018 Silverado last month. Look for chafing, pinched insulation, or melted spots near hot components.
Step 4: Oscilloscope Check (If You Have One)
For communication issues—especially LIN or CAN bus—use a scope. Probe the data line at the module. You should see a clean square wave. Noise, dropouts, or distortion? That’s your problem. Could be a failing module, a short in the bus line, or EMI from a nearby component.
Why DRLs Fail—And Where
Let’s talk failures. I’ve opened more dead DRL assemblies than I care to count. Here’s what kills them.
Thermal stress. The LED driver runs hot. In direct sun, the housing can hit 80°C. At night, it drops to ambient. That cycle repeats daily. Over time, solder joints fatigue. I’ve seen capacitors bulge, resistors crack, and traces lift from the board. It’s not repairable. The unit is sealed. No user-serviceable parts inside.
Moisture. Even a tiny breach in the gasket lets in humidity. Once inside, it condenses. Corrosion starts on the PCB. Not on the connector—that’s easy to spot. This is deep inside, under conformal coating. You won’t see it until you disassemble. And by then, it’s too late.
Software. On modern vehicles, the DRL isn’t just a circuit—it’s a node on the CAN bus. If the BCM or lighting module gets a bad flash, or loses calibration, it can misfire the DRL output. I’ve seen TSBs for this on Ram trucks and GMs. The fix? A reflash. Not a new part. But you need OEM-level tools—MDI, GDS2, or wiTECH. Your local mechanic might not have it.
How to Fix It—Based on What You Find
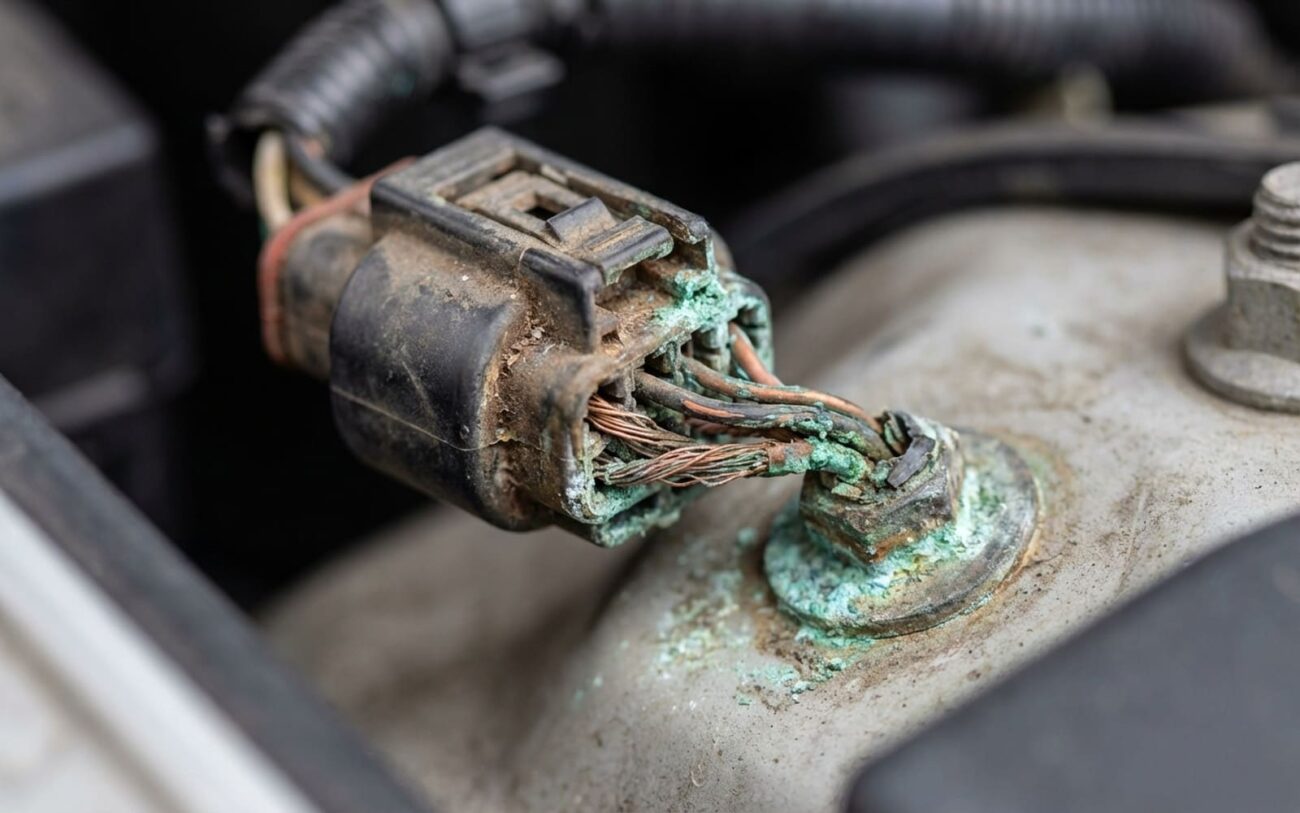
If the problem is connector corrosion—common on older vehicles—here’s what I do:
Disconnect the battery. Pull the pins with a terminal release tool. Clean with CRC 05103 or equivalent. Dry thoroughly. Apply dielectric grease—just a dab. Reassemble. This costs $20 and takes 20 minutes. Success rate? Over 85% if that’s the root cause.
If the lamp assembly is bad, replace it. No shortcuts. Modern LED DRLs are not repairable. Use OEM or a high-quality aftermarket unit—like TYC or Depo with OEM-spec drivers. Installation varies, but usually: remove 3–4 screws from the bumper or inner fender, unplug, swap, reassemble. Torque screws to 7–10 Nm. Overtighten, and you crack the housing. Undertighten, and water gets in.
For software issues: find the TSB. Check Alldata or Mitchell. If there’s a reflash procedure, take it to a shop with OEM tools. Don’t let a mechanic guess. I’ve seen flashes fail because the battery wasn’t on a tender during programming. That bricks the module. Now you’re out $1,200.
Verify the Repair—Or It’ll Come Back
Don’t hand the keys back until you’re sure it’s fixed.
For a connector repair: drive it. Idle for 5 minutes. Turn on the A/C. Hit the highway. Watch the lights. Use a multimeter at the fuse—voltage should stay within ±0.2V of 14.0V.
For a new lamp: command the DRLs on via scan tool. Check for steady output. No flicker during voltage transients.
For a reflash: confirm the module reports “pass” in self-test. No DTCs return after a drive cycle. And yes, you need a pro tool for this. A $50 code reader won’t cut it.
Cost vs. Value—When to Walk Away
Here’s the reality check:
| Repair | DIY Cost | Shop Cost | Success Rate | Risks |
|---|---|---|---|---|
| Connector clean | $20 | $150 | High | None if done right |
| Lamp replacement | $200–$600 | $350–$800 | ~98% | Water ingress if seal fails |
| Module reflash | N/A | $150–$300 | High (per TSB) | Bricked module if interrupted |
| Module replacement | $300–$1200 | $500–$2000 | Very High | VIN mismatch, failed programming |
If the fix costs more than 40% of the car’s value, reconsider. On high-mileage trucks or older imports, I’ve disabled DRLs entirely using a bypass module. Not ideal, but legal in most states if low beams are on. Keeps the car safe, avoids a $2,000 BCM job.
Prevention—What I Do on Every Car
I grease every lighting connector I touch. Dielectric grease. Just a smear. It takes five seconds. That seal keeps out moisture and stops corrosion before it starts. I’ve seen connectors last 10 years with this alone.
Check your DRLs weekly. Walk around the car during the day. Are both on? Steady? No flicker? Catch it early, and you’ll save time and money.
And maintain the charging system. Clean battery terminals. Check ground straps every oil change. A stable voltage supply protects every module in the car—not just the lights. Your PCM, your HVAC, your infotainment—they all depend on clean power. Don’t wait for symptoms.
