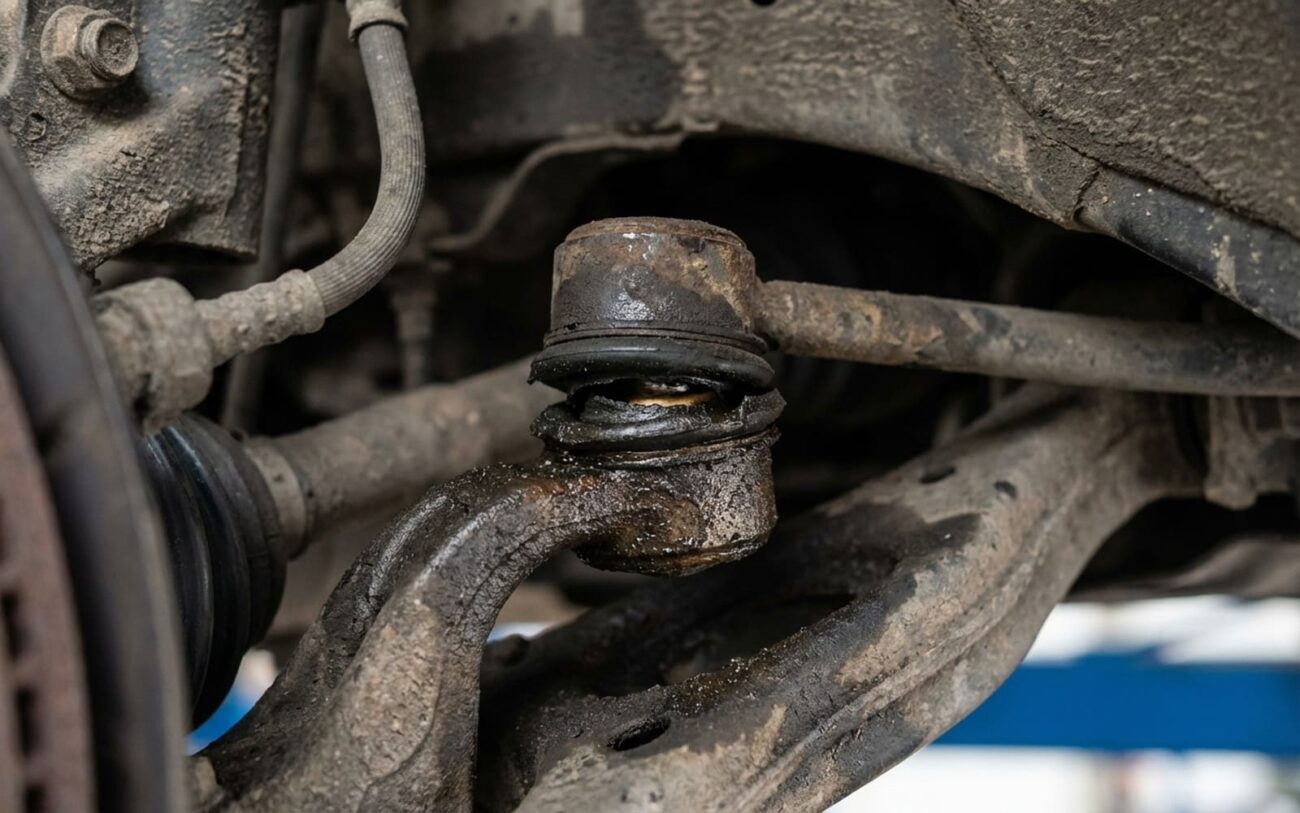
Alright, let’s talk about that unsettling “thud” you’re hearing. You know the one: a sharp, isolated clunk every time one wheel drops into a pothole or climbs over a driveway curb, especially when the other wheel stays flat. After 25+ years in the shop, I can tell you, nine times out of ten, that’s your stabilizer bar system crying for help.
This bar, often called a sway bar or anti-roll bar, connects your left and right wheels on the same axle. Its main job is to keep your car from leaning too much in turns. But when parts of it wear out, you get slack. And that slack, under the stress of a single-wheel impact, translates into that distinct thud. It’s not the bar itself breaking, usually; it’s the supporting hardware that’s failed. I see it weekly: worn links or degraded bushings.
A Mechanic’s Warning:
This isn’t just an annoying noise. I’ve pulled wheels and found brake lines, ABS sensor wires, and even CV boots gouged and sliced by a stabilizer bar that broke loose. What starts as a simple, cheap repair can quickly become a much bigger, more dangerous problem if you let it go. Get it fixed early.
Is it the sway bar, or something else entirely?
Plenty of suspension problems can mimic a bad sway bar. The trick is isolating that noise. A worn control arm bushing, a failing strut mount, or even a loose ball joint can all make a similar clunk. But the context and how you test for them are different. Here’s how I usually narrow it down.
The Single-Wheel Thud: My Primary Suspect
If you’re getting that sharp, distinct thud when only one wheel moves vertically—say, hitting a speed bump on one side or dropping into a pothole—that’s the classic stabilizer bar link or bushing noise. What’s happening is the worn component has developed play, and when the bar twists, that slack gets taken up with a solid hit.
My Go-To Test: The Sway Bar Pre-Load
Here’s how I confirm it: Jack up just one side of the vehicle. This puts the stabilizer bar under tension, mimicking the load that causes the noise. Now, grab the stabilizer bar link (the rod connecting the bar to the strut or control arm) and try to rotate it by hand. Any play, clunking, or clicking you feel or hear means that link’s ball joint is shot. For the main bar bushings, try to move the bar laterally (side-to-side) where it mounts to the frame. If you can move it more than an eighth of an inch, those bushings are worn out.
Clunking During Low-Speed Turns
Sometimes, a worn link will also clunk when you’re turning slowly, like pulling into a parking spot. This is the link reacting to the load shifts during steering input. But be careful here, as this can also be a worn outer CV joint or a failing strut bearing.
How I Differentiate:
While the car is on the ground, rock the steering wheel sharply left and right. If you hear a clunk from the links, it’s a good sign. To rule out CV joints, I’ll drive the car in tight circles in an empty lot. If it’s a CV joint, you’ll hear a rhythmic clicking or grinding, especially under acceleration, not just a single clunk. If it’s a strut bearing, you might feel a binding in the steering, or hear a groaning noise when turning the wheel at a standstill.
Excessive Body Roll in Corners
If your car suddenly feels like a boat in turns, leaning much more than it used to, that’s a red flag. This usually means a stabilizer bar link has broken completely, or the bar itself has detached from its mounting points. The bar simply isn’t doing its job anymore.
My Confirmation: Visual Inspection
Get under the car and look. You’ll often find a link dangling or completely separated. Try to move the bar by hand. If it moves freely and independently of the link, that internal ball joint is completely gone. Of course, worn shocks or a collapsed coil spring can also cause excessive body roll, but a broken sway bar link is usually pretty obvious once you look.
And just a quick note: if your noise happens during acceleration, and not over bumps, it’s probably not the sway bar. You’re likely looking at something in the drivetrain, maybe a CV joint or even an engine mount. Don’t chase the wrong problem.
Why do these parts give up the ghost?
The stabilizer bar itself is a pretty beefy piece of steel; it rarely breaks. When it does, it’s usually a manufacturing defect or severe corrosion fatigue, especially on older trucks or vehicles in rust-belt states. I’ve seen service bulletins for specific full-size trucks regarding stress cracks near the bar’s bends, but that’s definitely the exception, not the rule.
The real culprits are almost always the links and the bushings. Stabilizer bar links have small ball joints, protected by rubber boots. Over time, those boots crack, tear, or just get old and brittle. Once that happens, the grease inside escapes, and dirt, water, and road salt get in. Without lubrication, that ball joint wears out fast. Corrosion is a huge factor, too. The bar can rust where it passes through the rubber bushings, creating a rough surface that grinds away at the bushing and can even cause the bar to bind up, preventing it from rotating freely.
And don’t overlook the simple stuff: loose or corroded mounting bolts for the bar brackets. If those bolts aren’t tight, the bar can shift and make a noise that sounds exactly like worn bushings. Always check the mounting hardware first. Just remember, while a bad sway bar system makes noise and affects handling, true stabilizer bar problems are often confused with control arm bushings or ball joints. The sway bar is mainly about controlling body roll and that specific single-wheel clunk.
Okay, so how do we fix it?
Once you’ve confirmed what’s actually broken, the repair path is usually pretty clear. But the difficulty can vary quite a bit depending on the specific part.
Replacing Stabilizer Bar Links DIY-FEASIBLE
Replacing Stabilizer Bar Bushings DIY-INTERMEDIATE / PRO
Replacing the Entire Stabilizer Bar NON-REPAIRABLE → REPLACE
How do you know you fixed it right?
Validation is simple, but it’s a step too many people skip. After replacing the links, repeat that sway bar pre-load test. Jack up one side and try to twist the link by hand. There should be absolutely zero movement or noise. Then, take the car for a test drive, specifically over the same bumps or conditions that caused the original clunk. The noise has to be gone. Also, do a quick visual check to make sure the bar isn’t contacting any other lines or components.
For bushing replacements, before you fully tighten those bracket bolts, rotate the bar by hand. It should turn smoothly without any binding. Once everything is torqued down to spec, check for any lateral movement of the bar—there shouldn’t be any. A final road test will confirm quiet operation. If it’s quiet, you’ve nailed it.
What’s this going to cost you?
Here’s a realistic breakdown of costs. Keep in mind, prices always vary by region, your specific vehicle, and shop labor rates, but these ranges should give you a good idea of what to expect.
| Repair Type | DIY Parts Cost | Professional Shop Cost | Success Rate | Secondary Risk |
|---|---|---|---|---|
| Replace pair of links | $40 – $150 | $200 – $400 | 95% | Detached link can damage brake lines or ABS sensors. |
| Replace bushings (pair) | $30 – $100 | $150 – $300 | 90% | Persistent noise or premature wear if misaligned. |
| Replace full bar + hardware | $150 – $500 | $500 – $1000+ | 98% | Minimal if all new parts are installed to spec. |
Keeping it quiet for the long haul
Prevention really starts with just paying attention. When you’re doing routine maintenance, like an oil change, take an extra 30 seconds to glance at those stabilizer bar links. Look for torn rubber boots or any grease flung around the joint. That’s your early warning sign that the seal is compromised, and replacement is coming soon.
My Best Habits for a Quiet Suspension
-
If you live where they use road salt, clean off any built-up grime where the bar passes through the bushings. It prevents corrosion and extends bushing life.
-
If you’re lubricating bushings, use a silicone-based product. Petroleum-based lubes can actually degrade the rubber over time.
-
Listen to your car! The moment you hear that first thud, do the pre-load test. Catching a failing link early means a cheap part and a quick fix.
-
If you’re already doing other front-end work—like replacing struts or control arms—it’s smart to swap the links and inspect the bushings while everything’s apart. It’s cheap insurance.
