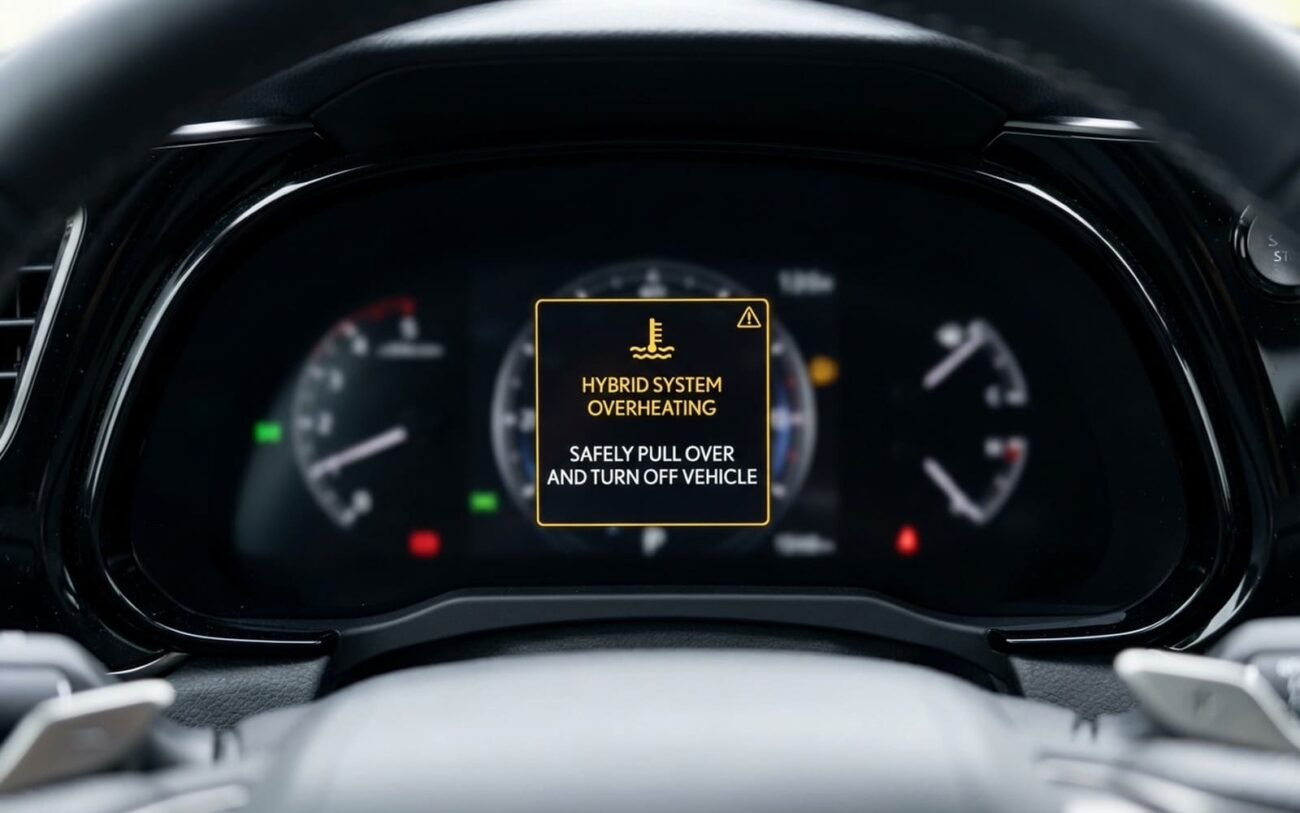
When Your Lexus RX 450h Yells “Hybrid Overheat!”: What I See in the Shop
Alright, let’s talk about that “Hybrid System Overheating” warning light on your Lexus RX 450h. When that thing lights up, usually with the master warning light right alongside it, it’s not just a suggestion. It’s a critical alert, a direct message from the car’s brain telling you the inverter cooling circuit is running way too hot.
Now, I’ve been turning wrenches on hybrids for over 25 years, and here’s the deal: this warning almost always points to an issue with the Power Control Unit (PCU) cooling system. We’re not talking about your engine’s main radiator here. The PCU, specifically the inverter within it, is the heart of your hybrid system. It’s constantly converting high-voltage power between the battery and the electric motor-generators (MG1 and MG2), and that process generates a serious amount of heat. To keep it from melting down, Lexus gave it its own dedicated, sealed cooling loop — completely separate from the engine. It’s got its own reservoir, its own electric pump, and its own heat exchanger.
If that dedicated loop can’t shed heat efficiently, the car’s computer starts protecting itself. You’ll notice things like reduced acceleration, maybe it won’t go into EV mode, or you’ll feel a sudden drop in power. That’s the system derating output to try and cool down. But if you ignore it and keep driving, that inverter can get so hot it cooks the critical IGBT transistors inside the PCU. And believe me, replacing a PCU can easily run you north of $2,500, sometimes even double that.
Diagnosing the Overheat: My Approach
One of the biggest headaches I see in the shop is misdiagnosis. Not every “overheating” warning on a hybrid means the inverter’s cooling system is the culprit. Sometimes it’s the main engine, or a blocked radiator, or even just a flaky temperature sensor. The trick is isolating that dedicated inverter loop. Here’s how I typically narrow it down:
- Overheating, but no visible coolant loss? This usually points to an internal flow restriction or a failing electric water pump in the inverter circuit. I’ll hook up my scan tool (like Lexus Techstream) and monitor the inverter coolant temperature and pump RPM. If the temperature climbs fast under load but the pump speed stays low, or if the pump’s amperage draw is out of spec, that’s a pretty clear sign the pump or a passage is failing.
- Overheating with a low coolant reservoir? If the inverter’s dedicated reservoir is low, you’ve got an external leak. Could be a hose, a pump seal, or the heat exchanger itself. Remember, this is a separate reservoir from the engine’s. My go-to here is a pressure test on the inverter circuit, usually around 3 psi. I’ll often add some dielectric-compatible UV dye to the coolant to help pinpoint those sneaky leaks.
- Intermittent warning with a whining noise? That whine is almost always your electric inverter coolant pump dying. The bearings are probably shot, or the impeller is damaged. Sometimes it’s air in the system causing cavitation, but a failing pump is far more common. I’ll command the pump to 100% duty cycle with the scan tool and listen closely for grinding. I’ll also watch the amperage draw — an old, failing pump might draw too much or too little.
Keep in mind, while things like actual inverter failure from damaged IGBTs can cause similar symptoms, those usually come with a whole host of other fault codes and serious driveability problems. If you’re just getting a standalone “hybrid system overheating” warning without a bunch of other major faults, it almost always traces back to a cooling issue within that inverter loop.
Why These Inverter Cooling Parts Fail
From what I’ve seen over the years, failures in the RX 450h’s inverter cooling system usually boil down to one of three main culprits: contamination, mechanical wear, or just plain old flow restriction.
The Coolant Contamination Factor:
This is a big one. The inverter system uses a very specific Super Long Life Coolant (SLLC) that’s designed to be dielectric — meaning it insulates high-voltage components. If someone tops it off with standard green antifreeze, or worse, tap water, you’re asking for trouble. That stuff creates galvanic corrosion in the aluminum core. I’ve pulled pumps apart and found them choked with green, sludgy corrosion that completely blocked the internal passages. It’s a mess, and it kills components fast.
Then there’s mechanical wear. That electric inverter coolant pump spins at high RPMs, day in and day out. Over time, the seals and bearings just wear out. Once a seal fails, coolant leaks out, air gets sucked in, and that air causes cavitation, which just destroys the pump even faster. Finally, you get flow restriction. This happens when mineral scale or corrosion builds up in the narrow passages of the cooler core. Unlike your main engine radiator, this inverter cooler isn’t really designed to be flushed clean. Once it’s clogged, replacement is usually the only reliable fix.
Your Repair Options: From a Simple Hose to a Major Job
HIGH VOLTAGE SAFETY WARNING
This inverter cooling system is right next to high-voltage components. Before you touch anything, you absolutely must disconnect the 12V auxiliary battery and wait at least 5 to 10 minutes for the high-voltage system to completely depower. And when you refill, use only OEM-approved SLLC coolant. Don’t cheap out here.
Hose & Connection Repair DIY Possible
Coolant Pump Replacement Professional Only
Inverter Cooler Core Replacement
Making Sure the Fix Actually Worked
After any of these repairs, validation is critical. For hose or pump replacements, I always make sure the system holds a vacuum during the refill process for at least 10 minutes. That confirms there are no leaks. Once it’s filled, I run that pump prime cycle via Techstream, and then I recheck for leaks with the system pressurized. You want to be absolutely sure.
The Load Test: My Final Check
Once everything looks good, I take the car for a proper test drive. I’m monitoring live data the whole time, especially the inverter coolant temperature, during sustained acceleration. That temperature needs to stabilize below 65°C (around 149°F). If it creeps past 70°C, or if those inverter overheating fault codes pop back up, then you still have air in the system or a flow restriction somewhere. Back to the drawing board.
What This Is Going to Cost You
So, what are we looking at for repairs? Here’s a general idea based on what I see in my shop. Keep in mind, prices can vary a bit depending on your location and the specific parts needed.
Hose/Connection
Includes parts and labor for external leak repairs, assuming no other issues.
Coolant Pump
This is the most common repair I do for this issue. Includes the OEM pump and proper system bleeding with a scan tool.
Cooler Core
If those internal passages are clogged beyond repair, this is the fix. It’s a bigger job, and the part itself isn’t cheap.
How to Stop This From Happening Again: My Advice
-
Only use Toyota/Lexus SLLC coolant. I can’t stress this enough. Never, ever use regular antifreeze or tap water. It destroys the dielectric properties and leads to corrosion.
-
Stick to the 100,000-mile or 10-year flush schedule. Coolant degrades over time. It becomes corrosive and loses its ability to protect the PCU components.
-
Listen for pump noise. If you start hearing a new grinding, buzzing, or whining sound from the front of the car, especially at startup, that’s an early warning sign of pump bearing failure. Get it checked out.
-
Watch your cabin heat. If your heater suddenly stops working, especially when you’re driving in EV mode, it can often point to low inverter coolant levels. The system uses heat from the inverter loop for the cabin, so if there’s not enough coolant, you lose heat.
