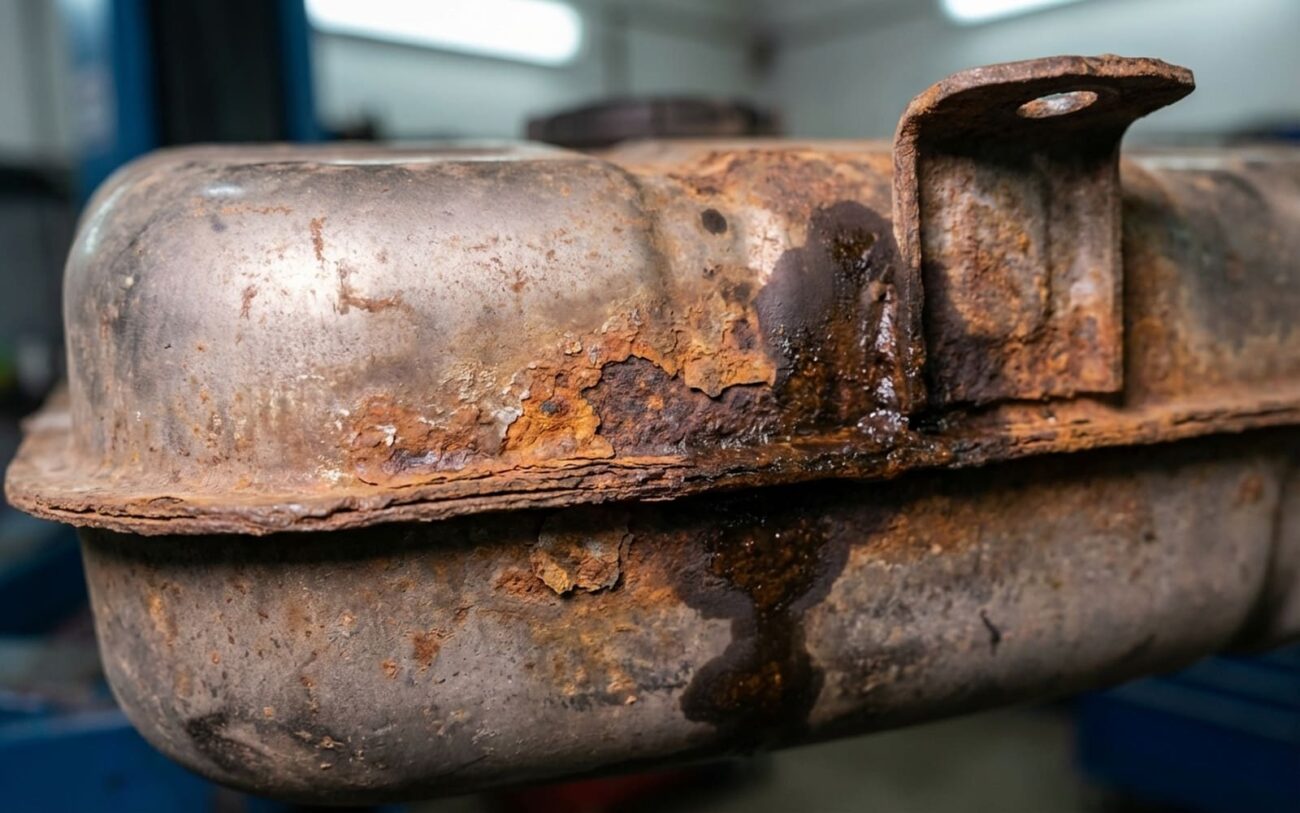
Look, after twenty-five years under the hood and under the chassis, I’ve seen more fuel system problems misdiagnosed than almost any other issue. A whiff of gas or a patch of rust near the tank can send folks straight to the worst-case scenario. But before you start pricing out a new fuel tank – a big job, by the way – let’s get real about what the signs actually mean. Most symptoms of a failing fuel tank overlap with simpler, far more common problems. The trick is knowing the difference, and that’s what I’m going to walk you through.
Is It Really the Fuel Tank? My Diagnostic Checklist
Dropping a fuel tank is a labor-intensive, risky job if you haven’t absolutely confirmed it’s the source of the problem. You’re dealing with flammable liquid, specialized tools, and a lot of potential headaches. So, before we even think about a repair, we need to rule out the usual suspects. Here’s how I approach it in my shop, symptom by symptom.
Symptom 1: Visible Rust on the Tank Exterior
You crawl under there and see rust. Your first thought is “tank’s shot.” But hold on. Is it actual metal loss on the tank body, or is it just surface rust on a skid plate, mounting strap, or heat shield? I see this misidentified all the time.
My Test: You’ve got to remove any shielding. Clean the area thoroughly with a wire brush. Then, use a pick or a small screwdriver to check for soft spots. Surface rust will flake off; true tank corrosion will show pitting or even penetrate the metal. If you can push through it, even a little, you’ve got a problem. If it’s just a rusty strap, that’s an easy fix, not a tank replacement.
Symptom 2: Sediment in the Fuel Filter
This is a big one. If you’re changing the fuel filter and you find gritty, reddish-brown sludge when you cut it open (yes, I always cut them open), that’s a strong indicator of internal tank corrosion. This debris won’t stay put; it’ll travel downstream and clog fuel injectors or damage the fuel pump. But sometimes, it’s not the tank.
My Test: First, inspect the sediment with a magnet. If it’s ferrous (sticks to the magnet), it’s rust. That confirms it’s metal corrosion. Second, if you have access, use a borescope (a small camera) through the fuel pump access hole to visually inspect the tank’s interior. You’ll see if the lining is peeling or if there’s significant rust flaking off. Contaminated fuel or rust in steel fuel lines can also cause sediment, but the magnet and borescope help pinpoint the tank.
Symptom 3: Persistent Fuel Odor
You smell gas, especially after refueling, and it just hangs around. This could mean a pinhole leak from corrosion on the tank. Unlike a cracked fuel line, these leaks can be tiny and incredibly hard to spot with the naked eye. But a fuel smell doesn’t automatically mean the tank is leaking.
My Test: The definitive way to check for a tank leak (or any EVAP system leak, for that matter) is a smoke test. Hook up a smoke machine to the EVAP system. If smoke escapes from the tank body, especially around seams or low spots, you’ve found your corrosion-induced leak. Don’t forget to check the filler neck, fuel pump O-ring, and EVAP canister for leaks too – those are common culprits that mimic a tank leak.
Symptom 4: Erratic Fuel Gauge Readings
Your fuel gauge is bouncing, stuck on empty, or just plain unreliable. This often points to the fuel sending unit, which is inside the tank. Corrosion can foul the float arm or coat the electrical contacts, preventing an accurate reading.
My Test: You’ll need to remove the fuel pump module (which usually includes the sending unit). Once it’s out, inspect the float arm for free movement and look at the contacts for corrosion. Use a multimeter to check the resistance across the sender as you manually move the float. Erratic or open readings confirm a faulty sender. While you’re in there, you’ll also get a good look at the tank’s interior condition.
Why Fuel Tanks Rust: Inside and Out
Alright, so you’ve confirmed it’s the tank. Now, let’s talk about why this happens. Understanding the root cause helps you fix it right and, more importantly, prevent it from happening again.
Internal Corrosion: The Sneaky Killer
This starts with water. Even small amounts of moisture condense inside the tank, especially when the fuel level fluctuates. Modern ethanol-blended fuels are hygroscopic, meaning they attract and hold water. When that water pools at the bottom of a steel tank, it creates a perfect environment for electrochemical corrosion. Over time, this eats away at the interior lining, creating rust that flakes off and circulates through your fuel system.
And it gets worse. In some cases, microbial growth – like bacteria or fungi – thrives in that water-fuel interface. Their metabolic byproducts are acidic and accelerate pitting. I’ve seen tanks with severe internal damage after just a few years in humid climates, even on vehicles that are driven regularly. Some manufacturers have even put out service bulletins for certain model years, noting increased internal corrosion risk with prolonged ethanol fuel use, especially if the vehicle sits for long periods. It’s a real problem.
External Corrosion: The Obvious Threat
This is mostly environmental. Road salt, hands down, is the biggest factor, especially if you’re in the rust belt. A small chip in the tank’s protective coating – maybe from a rock strike – gives saltwater direct access to the bare metal. Once it starts, rust spreads quickly. Galvanic corrosion is another issue: when dissimilar metals touch, like a steel tank clamped with aluminum straps, it creates a battery effect that eats the less noble metal (usually the steel). It’s a slow, silent killer.
Don’t overlook design quirks either. Some skid plates or underbody shields are designed in a way that traps moisture and debris against the tank, creating a hidden rust trap. I see this a lot on older trucks and SUVs where water and mud just sit there, slowly eating away at the metal.
Quick Clarification:
A leak from the fuel pump gasket or a fuel line O-ring isn’t a tank failure. Those are wear items, and they’re usually pretty straightforward to replace. When I talk about a failed fuel tank, I mean the structural integrity of the tank body itself—metal thinning, actual holes, or internal flaking. Big difference.
Your Repair Options: Patch, Coat, or Replace
Once you’ve confirmed the tank is the problem, you’ve got a few choices. Some are better than others, and some are just plain risky. Here’s my breakdown:
Minor External Surface Rust (No Leaks)
Professional Territory Only: Pinhole Leaks
If you have a small pinhole leak in an accessible area, the tank must be fully drained and purged of all fumes. This is absolutely critical for safety—you’re dealing with explosive vapors. Some shops might attempt a fix using a fuel-immersible epoxy or even soldering, but most OEM procedures today call for replacement. The success of a patch depends entirely on the location, accessibility, and the quality of the prep work. Honestly, it’s a gamble, and I rarely recommend it unless it’s a very old or specialty vehicle where a new tank isn’t available.
Confirmed Internal Corrosion
And let’s talk about “miracle cures.” Pouring a liquid tank sealer like BlueDevil into a badly rusted tank? That’s a last-ditch effort, and honestly, it’s usually a mistake. It might seal micro-leaks, but it can also clog the fuel pump’s intake sock, killing the pump. Strong fuel system cleaners might temporarily clear sender contacts, but they often loosen large rust clumps that immediately clog your new fuel filter. These aren’t fixes—they’re just expensive delays.
How to Confirm the Repair Actually Worked
Any fix needs verification. You can’t just reinstall and hope for the best. That’s a recipe for coming back to the shop, or worse, getting stranded.
For an exterior clean and coat, fill the tank about ¾ full. Drive for 30 minutes, then get under the car. Inspect thoroughly for drips, feel for fuel vapor, and smell around the tank. No signs? That’s a good sign.
If you attempted a pinhole repair (which, again, I generally advise against), the only real test is a submerged air pressure check. Submerge the repaired area in soapy water and pressurize the tank slightly (5–10 psi, never more). Bubbles mean failure. This is the gold standard, and if you can’t do this, you shouldn’t be patching.
For a full tank replacement or internal reconditioning, validation takes a bit more time. First, the fuel gauge should read smoothly and accurately. Use a scan tool to monitor sender resistance if possible. Then, after about 500 miles, change the fuel filter again. Cut it open and inspect the contents. If it’s clean, the system is clear. If you find more rust, either the new tank wasn’t properly cleaned (if it was a used part), or the internal corrosion wasn’t fully addressed.
Cost and Value: Is the Repair Worth It?
This is where reality sets in. Let’s break down the numbers based on what I see in the shop, considering parts and labor.
| Repair Type | DIY Cost | Shop Cost | Success Rate | Secondary Risk |
|---|---|---|---|---|
| External Clean & Coat | $100–$200 | $400–$800 | High (if caught early) | Ongoing corrosion leading to leaks |
| Professional Pinhole Repair | Not Recommended | $300–$600 | Moderate to Low | Sudden fuel leak, fire hazard |
| Tank Replacement | $300–$800 | $900–$1,800+ | Near 100% | Minimal installation error risk |
Here’s the hard truth, and I tell this to customers all the time: if the repair cost hits 40% of your car’s current market value—especially if you’re in the rust belt—you really need to think long-term. A rusted fuel tank is rarely an isolated issue. It usually means the frame, control arms, brake lines, or floor pans are also at risk. You could be investing a grand or two in a vehicle that’s structurally compromised elsewhere. I’ve seen too many customers replace a tank only to discover major frame rot six months later. Sometimes, it’s just time to move on.
How to Prevent Fuel Tank Rust Long-Term
Prevention starts with understanding the root causes: water inside, salt outside. Here’s what I recommend to keep your fuel tank healthy for as long as possible.
Maintenance Habits That Matter
-
To fight internal corrosion, keep your tank above half full whenever possible. Less air space means less condensation. It’s that simple.
-
In humid climates, or if your car sits a lot, use a fuel additive like ISO-HEET once or twice a year. It helps absorb and burn off any water that’s accumulated. Avoid letting the car sit with low fuel for weeks on end.
-
For external protection, make it a habit to inspect your tank once a year. Grab a flashlight and look at the seams, the bottom, and any areas where components attach. Look for bubbling paint, soft spots, or trapped debris.
-
If your car has a skid plate or underbody shields, remove them occasionally to clean underneath. Road grime and salt love to hide there, and it’s a prime spot for rust to start.
My Golden Rule for Internal Rust:
Make this one habit: at every fuel filter change—especially if you drive on salted roads—cut the old filter open. Look for rust flakes. Finding them early means you can act before they reach your injectors or the fuel pump. It’s the cheapest, most effective early warning system for internal fuel tank corrosion there is. Trust me, it’s saved a lot of my customers a lot of money.
