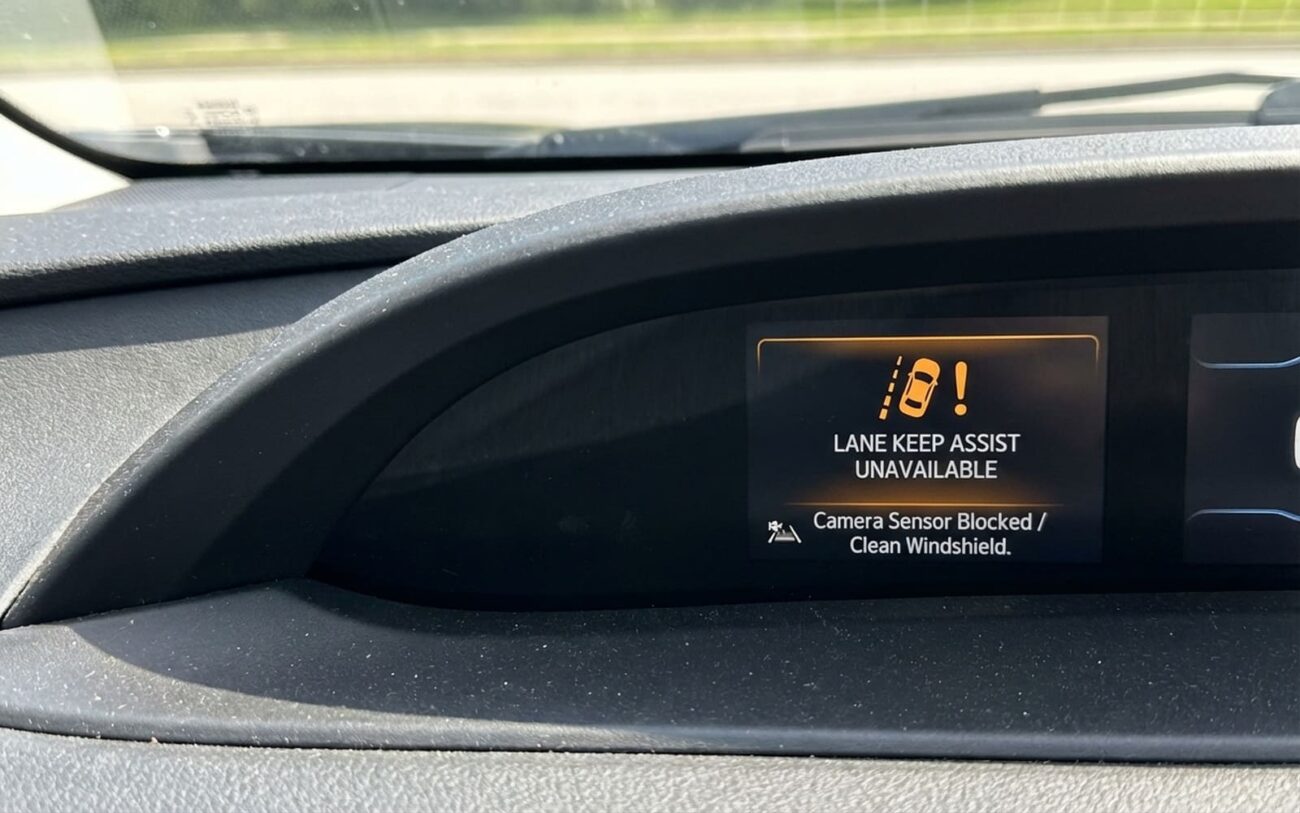
The Rainy Day Lane Keep Assist Mystery
If your lane keep assist (LKA) goes on strike every time it rains, you’re not imagining things. And trust me, you’re not alone. In my 25+ years turning wrenches, I’ve seen this issue pop up more and more as vehicles rely heavily on those front-facing cameras. The pattern is always the same: works perfectly fine when it’s dry, but the moment the road gets wet, you get that dreaded “Lane Keep Assist Temporarily Unavailable” message. No warning, no gradual fading out—just an abrupt shutdown.
This isn’t a mechanical failure, like a broken actuator or a wiring short. It’s a vision problem, plain and simple. The ADAS camera, usually tucked away behind your rearview mirror, just can’t see what it needs to see. Rain on the windshield, combined with spray from other cars, and the low contrast between wet pavement and faded lane lines, it all becomes too much for the system’s image processing. It’s like trying to read a blurry sign in the dark.
Sometimes, you’ll even get diagnostic trouble codes (DTCs) like C1001-87 or U0230. These are usually tied to camera plausibility or performance. What’s interesting is they often only show up during or right after wet driving, which really confirms that environmental trigger. But here’s the kicker: the system doesn’t always log a code. That means you could lose functionality exactly when you need it most, without any clear warning in the computer’s memory.
First Things First: Rule Out the Easy Stuff (The Windshield Check)
Before we start talking about expensive camera replacements, the very first thing I do in my shop is rule out the simple stuff. And by far, the most common culprit for this “rain blindness” is a dirty windshield. Road grime, bug guts, tree sap, or even an interior haze from off-gassing plastics can scatter light just like raindrops, completely confusing that sensitive camera.
So, here’s your first diagnostic step, and it’s a DIY one: Give your windshield the most thorough cleaning it’s ever had. Use a good quality automotive glass cleaner—make sure it’s safe for ADAS systems (meaning no ammonia-based or abrasive stuff). Clean both the outside and, critically, the inside of the windshield. Pay extra close attention to the area directly in front of where the camera sits, usually up high near the rearview mirror. Sometimes, that hazy film on the inside is the real problem.
Digging Deeper: Is It the Camera Itself?
If a good cleaning doesn’t fix it, then we’re likely looking at something more involved. This is where you really need a professional with the right tools. We’re trying to figure out if the problem is truly the camera module, or if something else is messing with its input.
| Symptom | What I Suspect (Camera or Software) | What Else Could Mimic This (External Issues) | How We Confirm It in the Shop |
|---|---|---|---|
| LKA fails only on wet roads | Could be the camera’s lens coating degrading, the internal sensor losing sensitivity, or the factory software just isn’t good enough for low-contrast rain conditions. | Dirty windshield (road film, interior haze), pitting or glazing on the glass in the camera’s view, or even a faulty rain/light sensor feeding bad data to the system. |
We hook up a professional scan tool and look at the live camera feed. On wet roads, a healthy system will show the camera actively trying to detect lane edges. A failing camera will give us a grainy, low-contrast, or even corrupted image. |
| DTCs related to camera performance (like C1001-87) | Points to an internal camera failure—the CMOS sensor, the processor, or the lens optics inside the module. | Camera misalignment (maybe after a windshield replacement), a damaged mounting bracket, or a poor electrical connection to the camera module. |
We perform a static calibration using OEM-approved targets. If the calibration fails, we check the camera’s physical alignment and mounting. If calibration passes but those codes keep coming back, then the fault is almost certainly inside the camera module itself. |
The Three Main Internal Camera Issues I See:
- Degraded Lens Coating: A lot of these ADAS cameras have a special anti-reflective or hydrophobic coating on the lens. Over time, UV light, road chemicals, or even improper cleaning can wear this layer down. When that happens, water droplets scatter light much more aggressively, making it nearly impossible for the camera to see lane lines in the rain.
- CMOS Sensor Sensitivity Loss: The actual image sensor inside the camera can degrade with age or heat exposure. On wet roads, where lane markings already have low contrast against dark, shiny asphalt, a weakened sensor just can’t gather enough data. It’s not a complete failure—it’ll still work in perfect conditions—but it struggles when things aren’t ideal.
- Software Algorithm Limitations: Believe it or not, sometimes the hardware is perfectly fine. The issue is that the factory software just wasn’t designed to handle all the visual noise from rain, spray, or glare on wet pavement. It’s not a defect, it’s a design limitation. Some manufacturers have even put out service bulletins for this, offering updated camera software to improve performance in bad weather. I’ve seen this on certain models with Toyota Safety Sense, Honda Sensing, and Volvo Pilot Assist, where an update can really help with wet-weather lane detection.
The Fix: What Can Be Done (and Who Can Do It)
Professional Territory Only
Let me be clear: fixing ADAS camera issues is NOT a DIY job. These systems are incredibly sensitive and demand specialized tools, calibration equipment, and proper safety training. There are no safe shortcuts here.
Your Repair Options:
Thorough Windshield Cleaning Start Here
Software Update Professional Only
Camera Module Replacement & Calibration Non-Repairable Component
After the Repair: Making Sure It’s Right
Never, ever assume the repair worked just because the warning light is gone. Proper validation is critical. Here’s what we do in the shop:
-
After any cleaning, replacement, or software update, we use a factory scan tool to check for any active DTCs and confirm that the camera calibration completed successfully.
-
We review the live camera feed. Does it show clear, high-contrast lane markings, even in challenging conditions?
-
Then, a real-world test drive on actual wet roads is essential. The system should detect lanes and provide gentle steering input or alerts as expected.
-
If a software update was applied, we run the manufacturer’s built-in performance verification test. This diagnostic mode often simulates various driving scenarios, including low-contrast conditions, to confirm the system responds correctly.
The Bottom Line: Costs and Choices
Here’s a realistic breakdown of what you’re looking at for repairs:
| Repair Type | DIY Cost | Shop Cost (Estimate) | Success Rate (My Experience) | Risk if It Fails |
|---|---|---|---|---|
| Windshield/Camera Cleaning | $20 (for cleaner) | $50–$100 (if done by a shop) | Low (<20%) if the problem is internal, but high if it’s just dirt. Worth trying first. | None, just wasted a little time. |
| Software Update/Recalibration | Not feasible (requires specialized tools) | $150–$300 (1–2 hours labor) | Medium (only effective if a TSB applies and the issue is software-related). | None, just back to square one. |
| Camera Module Replacement & Calibration | Not feasible (calibration required) | $800–$2,000+ (parts + labor) | High (>95%) if done correctly and calibrated properly. | Incorrect calibration can lead to erratic lane centering, false alerts, or system shutdowns. This is why it’s critical to use a reputable shop. |
My Advice
Start with that thorough cleaning—it’s cheap, and you’d be surprised how often it reveals the actual issue. If that fails, pursue a software update if one is available for your vehicle. That’s usually the most cost-effective solution if it works. Camera replacement is reliable but definitely the most expensive route. As a general rule of thumb, if the repair cost starts to creep above 30% of your car’s market value, you might want to consider whether relying on the system only in dry conditions is acceptable. A lot of drivers do, once they understand the limitations.
Keeping It Working: Prevention Tips
To avoid these headaches down the road, you need to adjust your maintenance habits a bit:
To Prevent Recurrence
-
Always use ADAS-safe glass cleaners. These are specifically formulated to leave no residue that could mess with the camera sensors.
-
Steer clear of ammonia-based or abrasive cleaners on your windshield, especially in the camera’s line of sight.
-
Make it a habit to visually check the camera lens area monthly for any haze, pitting on the glass, or condensation inside the camera housing itself.
-
After any windshield replacement, make absolutely sure the shop performs a proper ADAS calibration. Even if the camera wasn’t physically removed, its view has changed, and it needs to be recalibrated.
-
Pay attention to how your system behaves. If LKA starts failing more often in just light rain, that’s an early warning sign of degradation. Don’t ignore it.
And remember this: systems like lane keep assist, adaptive cruise control, and automatic high beams all rely on that very same front-facing camera. So, if you notice multiple ADAS features acting up, the root cause is almost certainly that camera, its view, or its calibration. It’s all connected.
