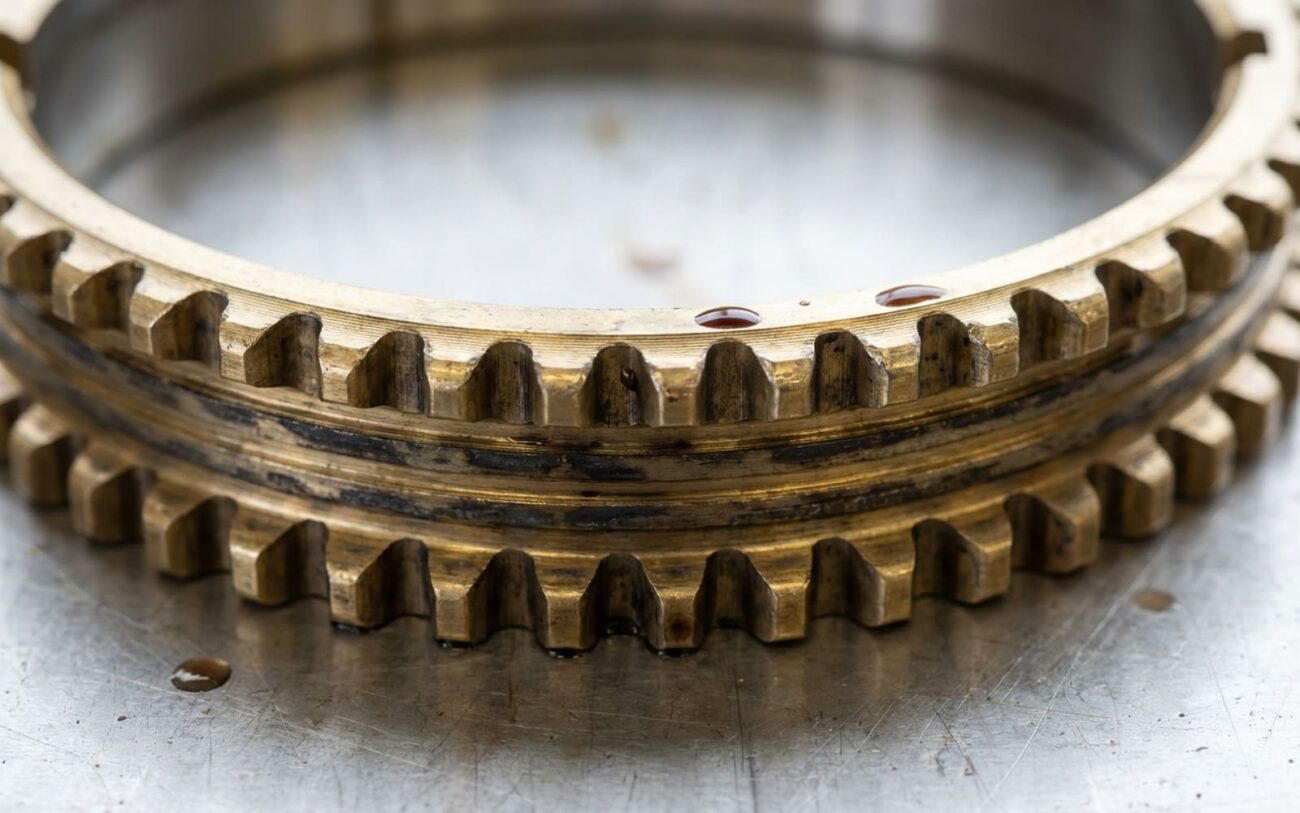
If you’re driving a stick shift and it’s suddenly feeling like you’re stirring a bucket of rocks, or worse, you’re getting that teeth-grinding crunch when you try to shift gears, chances are your transmission’s synchronizers are on their way out. I’ve been wrenching on cars for over 25 years, and I’ve seen countless manual transmissions come through my shop with this exact complaint. A good synchro makes shifting smooth as butter; a bad one makes it feel like a fight. But here’s the kicker: a lot of other problems can mimic worn synchros. The trick is knowing how to tell the difference before you start throwing parts at it.
First Things First: Rule Out the Mimics
Before you even think about tearing into that transmission, you’ve got to eliminate the usual suspects. Trust me, you don’t want to rebuild a gearbox only to find out it was a simple clutch issue. We see it happen.
The Dragging Clutch: My Number One Imposter
This is probably the most common thing that feels exactly like a worn synchro. If your clutch disc isn’t fully disengaging when you press the pedal, the transmission’s input shaft keeps spinning, even with the clutch in. That makes it nearly impossible for the synchros to do their job of matching speeds, and you get that nasty grind. This can be caused by air in the hydraulic system, a failing master or slave cylinder, or even a warped pressure plate.
The Dragging Clutch Test:
Here’s how I check it in the shop: With the engine running and the car in neutral, fully depress the clutch pedal. Hold it there for 3 to 5 seconds. Now, try to engage a gear. If the grind you were hearing before has disappeared or is significantly reduced, your clutch is dragging. If it still grinds just as bad, then we’re likely looking at a synchro problem.
Shift Linkage and Fluid Checks
Another common issue is external shift linkage problems. Worn bushings, bent cables, or binding rods can make shifting feel stiff or notchy across all gears, even when the engine is off. This is a lot easier to fix than an internal transmission problem, so always check it. Just disconnect the linkage at the transmission and try to manually shift the transmission levers by hand. If it shifts smoothly by hand, your problem is in the linkage, not the transmission itself.
And don’t overlook the obvious: transmission fluid. Low fluid levels, contaminated fluid, or using the wrong type of fluid can all make shifting difficult and mimic synchro wear. Always check the fluid level and condition. We’ll talk more about the right fluid later, but for now, just make sure it’s there and looks clean.
Confirming a True Synchro Problem: The Telltale Signs
Okay, so you’ve ruled out the easy stuff. Now, let’s talk about what really points to worn synchros.
The Dreaded Gear Clash (Grinding)
The most classic symptom of failing synchronizers is that metallic grinding noise—what we call “gear clash”—when you try to engage a gear. This happens specifically when the clutch pedal is fully depressed, and you’re trying to move the shifter into gear. The faster the engine is spinning relative to the gear you’re trying to select, the louder that grind usually is. That’s because the synchro ring, typically made of brass or a carbon composite, can no longer generate enough friction to equalize the speeds between the gear and the shaft. It’s literally trying to force two spinning objects to mesh at different speeds.
The Double-Clutch Test: Your Definitive Answer
This is my go-to test to confirm a synchro problem. If you can double-clutch and eliminate the grind, you’ve pretty much nailed it. Double-clutching, for those who don’t know, is when you depress the clutch, shift to neutral, release the clutch, blip the throttle to match engine RPMs, then depress the clutch again and shift into gear. By blipping the throttle in neutral, you’re manually matching the speeds of the gears and the input shaft—which is exactly the job the synchro should be doing for you. If doing this makes the grind disappear, your synchros are definitely struggling.
Gear Pop-Out Under Load
Another clear indicator is when a gear disengages on its own, especially under acceleration or engine braking. This usually points to more severe wear than just friction material. It typically means the dog teeth (the small locking teeth on the gear and sleeve) are worn down, or the springs inside the synchro hub are collapsed. This isn’t just annoying; it can be downright dangerous if it happens on the highway or during a critical downshift.
What’s In Your Fluid?
When we drain the transmission fluid, we always inspect it. A light metallic sheen on the drain plug magnet is normal wear. But if you see chunks of metal, steel shavings, or heavy brass-colored sludge, that’s a red flag. Brass flakes are a dead giveaway for worn synchro rings. Steel shavings might point to worn gears or bearings, which can be a whole other can of worms.
What’s Actually Breaking Inside: Root Causes of Failure
When the problem is truly inside the transmission, it usually boils down to one of three things:
- Worn Synchro Ring Friction Surface: This is the most common failure. The brass or carbon lining on the synchro ring wears smooth or develops grooves from heat and use. Without enough friction, it can’t match gear speeds, leading to grinding. This typically shows up first in the gears you use most, like second and third.
- Damaged Dog Teeth: These are the small, angled teeth on the gear and the sliding sleeve that lock together once speeds are matched. Aggressive shifting, especially forcing a gear, can round off or chip these teeth. We sometimes call this “bacon stripping” because of how they look. Once they’re damaged, they can’t hold under power, which causes gears to pop out.
- Failed Synchro Springs or Struts: Inside the synchro hub, there are small springs or struts that center the assembly and apply initial pressure to the synchro ring. If these break or collapse, the synchro can’t engage properly, leading to resistance, misalignment, or even pop-outs.
Some vehicles are just more prone to these issues. For example, certain Subaru 5-speed transmissions from the mid-2000s were notorious for 5th gear pop-out because the clutch hub wasn’t hard enough from the factory. Honda also had known issues with 2nd gear synchro wear in some early ’90s Accords. While there are service bulletins for these, the fix often means updated parts, not just routine maintenance.
And I can’t stress this enough: using the wrong gear oil can be a silent killer. Many manual gearboxes, especially older ones, require GL-4 rated oil. GL-5 oils contain sulfur-based additives that can chemically attack and corrode the brass synchros over time, accelerating wear. The failure looks internal, but the root cause was improper maintenance.
Your Options for Repair: From Fluid to Full Swap
So, you’ve diagnosed the problem. Now what? Your next move depends on how bad the damage is and what you want out of your vehicle.
The Fluid Change: Your First Shot DIY-FEASIBLE
Single Synchro Replacement: A Targeted Repair Professional Only
Full Overhaul or Replacement: The Big Decision Professional Only
After the Fix: How I Verify the Work
Anytime you do work on a transmission, proper validation is non-negotiable. For a simple fluid change, I’m looking for a noticeable improvement in shift quality, especially once the transmission is up to operating temperature. You should be able to make a high-RPM upshift without any grinding. If the problem is unchanged, then the fluid change confirmed that you’ve got mechanical wear, and it was just a diagnostic step.
After an internal repair, the bar is much higher. I’ll check the shift effort at the lever, which should be within OEM specifications—usually around 20–50 Newtons (4.5–11 lbs of force). We use a spring gauge for this. Then comes the real test: a series of aggressive shift cycles. Clutch in, quick shift, clutch out—repeated through all gears at varying RPMs. If a grind returns on a specific gear, it points to an assembly error, a bent shift fork, or sometimes, a defective replacement part. We don’t send a car out until it shifts perfectly.
Cost, Risk, and When to Walk Away
Here’s a realistic breakdown of what you’re looking at for repairs, along with the potential downsides:
| Repair Type | DIY Cost | Shop Cost | Success Rate | Secondary Risk if Failed |
|---|---|---|---|---|
| Fluid/Additive Change | $50–$150 | $100–$200 | 15% (if mechanical wear already exists) | Additive incompatibility potentially damaging components. |
| Single Synchro Repair | N/A | $800–$1,500 | 85% | Undetected bearing wear leading to future failure. |
| Full Transmission Overhaul | N/A | $2,000–$4,000 | 95% | Assembly error causing noise, leaks, or premature wear. |
| Used Unit Replacement | $500–$1,500 | $1,500–$3,000 | 70% | Unknown wear, latent defects, or short lifespan in the replacement unit. |
My personal rule of thumb with customers is this: if the estimated repair cost for the transmission exceeds 40% of what the car is worth to you in its current, running condition (not its trade-in value, but what you’d personally pay to keep it on the road), then a good quality used or remanufactured transmission is usually the smarter economic choice. Sometimes, it’s just time to cut your losses.
Keeping Your Gears Happy: Prevention and Early Warning
Preventing synchro wear is always easier—and cheaper—than fixing it. Here are the two most important things you can do:
-
Use the correct transmission fluid, always: I mentioned this before, but it’s worth repeating. Many manual gearboxes, especially those with brass synchros, absolutely require GL-4 rated oil. GL-5 oils contain extreme pressure (EP) additives that, while great for differentials, can chemically corrode brass synchros over time. Check your owner’s manual!
-
Change that fluid on schedule: Most manufacturers recommend a manual transmission fluid change every 30,000 to 60,000 miles. If you drive your car hard, do a lot of stop-and-go, or track it, I’d cut that interval in half. Fresh fluid keeps everything lubricated and cool.
For early detection, make it a habit to do a quick “shift test” once a month. When it’s safe, perform a high-RPM upshift and downshift through each gear. Pay attention to any hesitation, notchiness, or the first hint of a grind. Also, during every oil change, pull the transmission drain plug and inspect the magnet. A light metallic sheen is normal, but if you see chunks of metal, steel shavings, or heavy brass-colored sludge, that’s your early warning system telling you internal wear has definitely started.
Catching synchro wear early can literally save you thousands of dollars. A $100 fluid change at the first sign of notchiness might buy you years of trouble-free shifting. Wait until it’s grinding every single shift, and you’re almost certainly looking at a major repair or replacement.
