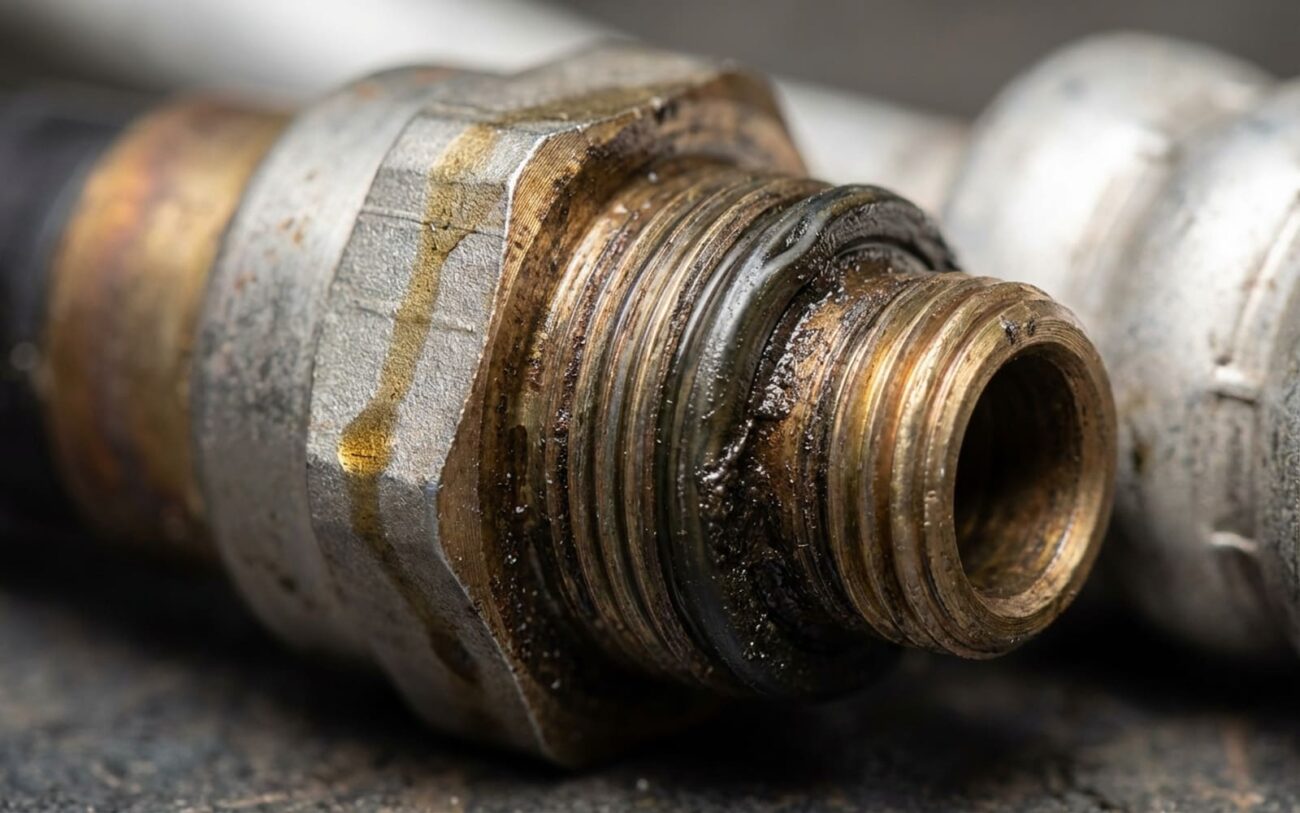
If your AC compressor is making a racket, especially right after it kicks on, listen up. After 25 years turning wrenches, I can tell you that one of the most insidious internal failures—and often overlooked—is a bad pressure relief valve, or PRV. This isn’t just a minor hiccup; it’s a small safety device that, when it fails, starts actively damaging your entire AC system. And trust me, you don’t want to ignore it.
When Your AC Compressor Starts Talking Back: The PRV Story
The number one symptom I see with a failing PRV is a distinct metallic chattering or fluttering noise. It comes right from the compressor housing, and you’ll usually hear it as soon as the clutch engages. This isn’t your typical constant whine or a grinding sound; it’s a rapid, repetitive tapping. What’s happening inside is the valve’s internal disc just can’t hold a stable seal. As pressure builds in the discharge chamber, that weak or worn valve pops open slightly, then slams shut as the pressure drops. It repeats this cycle dozens, sometimes hundreds, of times a minute. You’ll often hear it loudest when the engine’s idling and the AC is cranked up to max.
Along with that racket, you’ll notice your cooling performance takes a nosedive. The compressor might start cycling on and off really fast—engaging, cutting out after a few seconds, then re-engaging. That’s because the faulty PRV is bleeding off high-side pressure prematurely, before the system can even hit its normal operating range. The pressure switch sees this drop, thinks the cabin is cool enough, and disengages the clutch. But because there’s no real cooling happening, temperatures climb right back up, pressure builds, and the whole frustrating cycle just repeats.
Another big red flag is excessive heat. If you can safely check the compressor body (and be super careful around those moving belts and pulleys, please), you might find it’s way hotter than the surrounding components—sometimes too hot to even touch. In some cases, you might even catch a faint burnt-oil smell. That’s a serious sign that the PRV is stuck partially open, letting hot, high-pressure refrigerant gas recirculate inside the compressor instead of flowing out through the system. This internal bypass disrupts the critical oil return, starving internal parts of lubrication and leading to rapid overheating. And that’s when things start to get really expensive.
Here’s the hard truth: if you ignore this, you’re not just risking poor AC performance. A failing PRV kicks off a nasty chain reaction. That overheating breaks down the PAG oil, turning it into sludge and acid. Without proper lubrication, internal components like bearings and pistons start to score and wear out. Eventually, that compressor seizes up. And when it does, it almost always sends metal debris throughout the entire system. At that point, just replacing the compressor isn’t going to cut it. You’re looking at replacing the condenser, flushing all the lines, and quite possibly the evaporator too. That fluttering noise? It’s your last chance to act before you’re facing a much, much bigger bill.
Is It Really the PRV? How I Diagnose It.
That chattering noise and erratic cycling can fool you; they mimic other AC system issues. So, it’s absolutely critical to diagnose this properly before you just start throwing parts at it. Jumping straight to a compressor swap without testing is a surefire way to get a comeback and waste a lot of money. In my shop, the most reliable method is always a manifold gauge set connected to both the high- and low-side service ports. The pressure readings will tell you if the problem is truly internal to the compressor (a PRV failure) or if it’s an external system fault.
Here’s how I break it down:
Symptom: Chattering or Fluttering Noise from the Compressor
If you’re hearing that metallic chatter, it usually points to a worn or fatigued PRV disc or spring assembly that just can’t stabilize discharge pressure. But I’ve also seen overcharged systems, restricted condensers, or clogged orifice tubes cause similar noises because they build up excessive pressure. So, how do you know?
Connect your manifold gauges. If your high-side pressure is sitting comfortably within its normal range (that’s typically 200–275 psi, depending on ambient temperature and humidity) but the chatter persists, then your PRV is the likely culprit. If, however, that high-side pressure is screaming past 350 psi, then you’re probably looking at an overcharge or a blockage somewhere. I always check for an even temperature drop across the condenser to quickly rule out a restriction there.
Symptom: Rapid Compressor Clutch Cycling with Weak Cooling
This is often the PRV bleeding off pressure too early, which causes the low-side cut-out switch to disengage the clutch prematurely. But don’t jump to conclusions—a low refrigerant charge or a failing low-pressure cycling switch can also cause this exact symptom.
Monitor your low-side pressure during operation. If it drops quickly and the clutch cuts out below the normal cut-out threshold (which is typically 20–30 psi, but always check your vehicle’s specific specs), then you need to check your refrigerant charge level first. If the charge is spot on, then I’d be testing that low-pressure switch with a multimeter, following the manufacturer’s diagnostic procedures, to make sure it’s not the real problem.
Symptom: Compressor Overheating, Especially Compared to the Discharge Line
This is a classic sign of a PRV stuck partially open, causing internal recirculation and a loss of crucial oil flow. Of course, incorrect oil type or quantity, other internal mechanical failures, or severe system contamination can also cause a compressor to overheat. So, how do you isolate it?
Grab an infrared thermometer. After about 5 minutes of the AC running, carefully measure the temperature of the compressor case and then the discharge line right near the compressor. If the compressor case is 50°F or more hotter than the discharge line, and your system pressures are otherwise normal, that heat is being generated internally. That strongly suggests an internal bypass, like a failed PRV, is at play.
Why These Valves Give Up the Ghost
Once you’ve confirmed the PRV is the issue, the next question is always, “Why?” Most failures I see are due to internal wear or contamination, not just because the system was overloaded. The PRV is a precision-calibrated component with a spring-loaded disc that absolutely has to seal tightly until pressure hits a specific threshold—usually around 400–450 psi for R134a systems. Over time, several factors can degrade its function.
First up is plain old mechanical fatigue. The valve might never even open under normal conditions, but over 10–15 years, even occasional activation or minor pressure surges can weaken that spring or erode the sealing surfaces. I’ve seen a tiny dent or warp in the disc or its seat—maybe from a piece of debris or even just one severe overpressure event—prevent a full seal. That’s when it starts chattering at normal operating pressures.
Contamination is another huge cause. If a previous compressor failed and sent metal shavings through the system, or if the desiccant bag in the receiver-drier broke apart (which happens more than you’d think), those tiny particles can lodge right in the PRV. This doesn’t just prevent it from sealing; it can score the mating surfaces, making replacement of the entire compressor unavoidable. I’ve personally seen cases where a flush missed this kind of contamination, and the brand-new compressor failed within weeks. It’s a real headache.
And then there’s moisture, the silent killer of AC systems. When water gets into the system—whether it’s through a leak, improper evacuation, or a faulty seal—it reacts with the refrigerant and PAG oil to form nasty organic acids. These acids corrode internal metal parts, including the PRV’s housing and sealing surfaces. A sticky or pitted valve won’t respond correctly; it’ll either stick shut (which is dangerous) or fail to reseat (causing that chatter and loss of efficiency). This is exactly why replacing the receiver-drier and pulling a deep, deep vacuum are non-negotiable steps during any major AC repair. You just can’t skip them.
It’s also important to distinguish a truly worn-out PRV from one that’s simply doing its job. A clogged condenser, an overcharged system, or a failed cooling fan can all cause high pressure that forces a healthy PRV to open. In those cases, you fix the root issue, and the valve behaves normally. A failed PRV, on the other hand, malfunctions even when system pressures are perfectly within spec. The key difference is whether the problem persists under normal operating conditions.
Fixing It: Compressor Replacement, No Shortcuts
Let’s be absolutely clear: if the pressure relief valve is faulty, your repair path is straightforward, even if it hurts the wallet—you replace the compressor. On nearly every modern vehicle, that PRV isn’t a serviceable or replaceable component. It’s either pressed or threaded into the compressor housing and sealed at the factory. There are no aftermarket repair kits, and attempting to modify or block it is incredibly dangerous and defeats a critical safety function. Don’t even think about it.
The correct procedure means replacing the entire compressor assembly with a new or high-quality remanufactured unit. This job takes more than just swapping parts. You’re going to need specialized equipment and a meticulous approach. Here’s what’s involved:
- First, you need a recovery machine to safely extract and reclaim the old refrigerant. This isn’t optional; it’s required by law in most places.
- You’ll need a full set of new seals and O-rings. Never, ever reuse the old ones. They’ve been compressed and exposed to heat; they won’t seal properly again.
- Get the correct type and amount of PAG oil specified by the manufacturer. Using the wrong viscosity or overfilling can cause noise, poor lubrication, or even premature failure.
- A good vacuum pump is essential, one capable of pulling below 500 microns. This ensures all moisture is boiled out of the system.
- A manifold gauge set is critical for charging the system correctly and verifying pressures.
- And don’t forget a torque wrench for proper fastener tightening. Overtightening can crack aluminum housings, and undertightening can lead to leaks or vibrations.
Before you even think about installing that new compressor, you absolutely must flush all system components—especially the condenser and lines—if there’s any sign of contamination. And I mean ANY sign. The evaporator is tricky; it can’t be flushed effectively, so if debris is suspected, replacement is often the only reliable option. Always, always install a new receiver-drier or accumulator, because its desiccant is spent the moment it’s exposed to air.
As for “temporary fixes”—save yourself the trouble. There’s no safe way to bypass or disable a failed PRV. Doing so risks overpressure, which could rupture hoses, blow out seals, or in extreme cases, cause the compressor to explode. Seriously. The only responsible temporary measure is to disable the compressor clutch by pulling its fuse or relay. Yes, you’ll be without AC, but that’s a whole lot better than a shredded serpentine belt, a damaged radiator from flying debris, or worse.
How I Know the Job’s Done Right (Beyond Just Cold Air)
Just getting cold air isn’t enough to call it a successful repair. A proper job means the system is clean, dry, properly charged, and running within its design parameters. Here’s my checklist:
First, the vacuum test: After evacuation, the system should hold below 500 microns for at least 10 minutes. If that vacuum starts creeping up, you’ve got a leak or there’s still moisture present. Don’t proceed until it’s stable. A deep vacuum is the foundation of a reliable AC system.
Once it’s charged with the correct amount of refrigerant, connect your manifold gauges and monitor both high- and low-side pressures. They need to fall within the manufacturer’s specified range for the ambient temperature. For example, on an 85°F day, I’d typically expect 25–40 psi on the low side and 225–275 psi on the high side. But remember, exact values vary by vehicle, so always consult the service manual. The compressor itself should engage with a solid, confident clunk and then run smoothly, with no chatter or unusual vibrations.
Check the clutch cycling pattern. It should run for several minutes, then cycle off gradually as the cabin cools down—not cut out abruptly after just 10–15 seconds. Finally, measure the air temperature at the center vent. With the system running full blast, you should see 38–45°F within 5–10 minutes on a warm day. Consistently cold air, stable pressures, and quiet operation are what confirm a successful repair.
If that new compressor overheats or starts chattering immediately, stop. Something is wrong. Double-check your oil charge, refrigerant type, and system cleanliness. A mistake here could void your warranty and lead to a repeat failure, and nobody wants that.
What You’ll Pay to Get That Cold Air Back
This is a significant repair, no two ways about it, and costs can swing wildly depending on your vehicle and local labor rates. A DIY approach can save you a chunk of money on labor, but it absolutely requires specialized tools and carries a real risk—especially if contamination isn’t fully addressed. A professional shop, on the other hand, brings expertise, proper equipment, and warranty coverage, but you’ll pay for that peace of mind.
For a full compressor assembly replacement, including a thorough system flush, you’re generally looking at $300 – $800 in parts if you do it yourself. If you take it to a shop, expect to pay anywhere from $1,000 – $2,500 for parts and labor. When done right, the success rate is over 95%. But if it goes wrong due to inadequate flushing, incorrect oil, or improper refrigerant charge, you’re looking at another compressor failure, and potentially more system damage.
Keep It From Happening Again: My Best Advice
Prevention starts with some basic, routine care. I always tell my customers to run the AC for at least 10 minutes once a month, even in the dead of winter. This keeps those seals lubricated, prevents O-rings from drying out and cracking, and circulates oil to protect all those internal components. It also helps you catch small issues early, like a weak clutch engagement or reduced airflow, before they turn into big problems.
If you notice your cooling performance declining, don’t wait. Get the system checked for leaks and proper refrigerant level. Even a small leak can let in moisture, which, as we talked about, leads to acid formation and internal corrosion—exactly what kills PRVs and compressors over time. And always, always use the specified PAG oil type and amount; mixing viscosities or using generic oil can seriously impair lubrication and lead to premature wear.
Finally, and this is probably my most important piece of advice: listen to your car. A healthy compressor makes a single, solid clunk when the clutch engages, followed by a smooth, consistent hum. Any new noise—especially that metallic flutter or chatter we discussed—should prompt immediate investigation. Catching a failing PRV early can truly save you from a seized compressor and a full system overhaul. In my experience, the most reliable diagnostic tool isn’t the scan tool or the gauge set; it’s your own two ears. Learn what normal sounds like, and you’ll catch trouble before it catches you.
