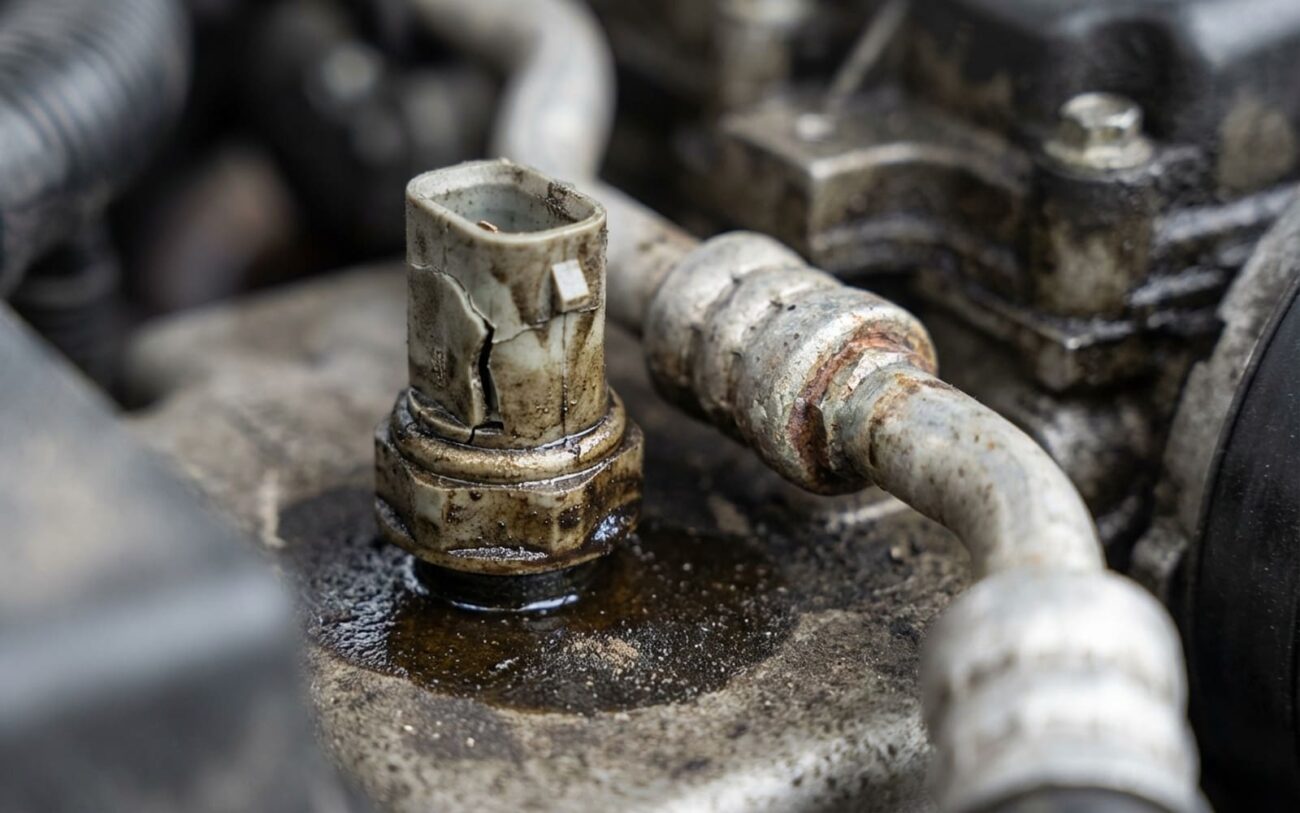
Alright, let’s talk AC. You’ve got warm air blowing, the compressor clutch isn’t kicking in, and your gut says “low on Freon.” That’s usually the first thing I check too. But hold on – if you’ve put a gauge set on it and confirmed the system pressures are actually good, yet that clutch still won’t pull in, especially with a Check Engine Light and codes like P0530, P0532, or P0533 staring back at you, then in my experience, we’re almost certainly looking at a bad refrigerant pressure sensor.
This isn’t just some simple gauge; it’s the PCM’s (Powertrain Control Module) eyes and ears for the AC system’s high-side pressure. It tells the computer what’s going on. When it goes bad, it starts sending garbage data – maybe an impossible 0 PSI, or a crazy 500 PSI, or just nothing at all. And when the PCM sees that kind of nonsense, it does what it’s programmed to do: it shuts down the compressor to protect the system. That’s a crucial distinction from a simple low-pressure lockout, which is a normal response to an undercharge. A bad sensor triggers a shutdown based on faulty information, not actual system conditions.
How I Diagnose a Bad Sensor
Before you replace anything, you’ve got to confirm that sensor is actually the culprit. A lot of other issues can mimic a bad pressure sensor, so a methodical approach is key. The gold standard for diagnosis is comparing what the PCM thinks the pressure is (via a scan tool) to what it actually is (measured with a manifold gauge set). If those values don’t align, then yeah, the sensor or its circuit is compromised.
Common Symptoms and My Diagnostic Approach:
Compressor clutch won’t engage at all: This is the classic. The sensor might have an open circuit, a short to ground, or it’s just outputting an implausible pressure like 0 psi or 500 psi. But don’t jump to conclusions. This can also be caused by a genuinely low refrigerant charge (which triggers the low-pressure switch), a faulty compressor clutch coil, a blown A/C relay, a bad control head, or even a missing signal from the ambient temperature sensor.
Definitive Test: With the key on, engine off, use a scan tool to read the refrigerant pressure sensor PID (Parameter ID). Compare that reading to the expected static pressure based on the current ambient temperature. You’ll need a pressure-temperature chart for R-134a or R-1234yf for this. If there’s a discrepancy of more than 50 psi, you’ve got a sensor or wiring issue. While you’re there, quickly check the clutch coil resistance (should be 2–5 ohms) and verify the relay clicks when you request A/C.
Compressor cycles erratically: This one’s tricky. It could be an intermittent sensor signal – fluctuating or drifting without any real change in system pressure. But often, this points to actual system issues: an overcharge, an undercharge, a clogged orifice tube, failing compressor valves, or even a faulty evaporator temperature sensor.
Definitive Test: Connect a manifold gauge set and run the engine at about 1500 RPM. Monitor both the mechanical high-side gauge and the scan tool’s live PID for refrigerant pressure. If your mechanical gauge shows a stable, normal pressure (say, 200 psi) but the scan tool is showing wild swings or implausible values, that sensor is faulty.
High-pressure DTC (e.g., P0533): This code means the PCM thinks the pressure is too high. It could be an internal short in the sensor circuit, causing an abnormally high signal voltage. But again, don’t rule out actual high-side pressure due to a clogged condenser, an overcharge, non-condensable gases in the system, or poor airflow across the condenser (like a failed cooling fan).
Definitive Test: Test system performance with your manifold gauges. If the mechanical high-side pressure is within a normal operating range (180–250 psi, depending on ambient temps) but the scan tool reads far higher (like 400+ psi), then your sensor is inaccurate. If both readings are high, then you’ve got a real system problem – start investigating airflow, condenser condition, and refrigerant charge.
Why These Sensors Fail (The Root Cause)
So, why do these sensors go bad? In my experience, it’s almost always an internal failure. Understanding this helps prevent misdiagnosis and repeated repairs.
The first common culprit is the internal pressure transducer or diaphragm. This is the heart of the sensor, converting physical pressure into an electrical signal. After years of constant thermal cycling – from scorching hot during AC operation to ambient when off – that delicate diaphragm just fatigues, cracks, or becomes unresponsive. When it does, the output signal either freezes, drifts, or just goes dead, leading to incorrect PCM decisions.
Next, you’ve got internal electrical breakdown. Even though they’re sealed, moisture or even refrigerant can eventually sneak past a compromised seal, leading to corrosion on the internal circuitry. Vibration is another killer; it can crack solder joints or damage the tiny microchips inside. And don’t forget voltage spikes – a bad jump-start or a failing alternator can fry these electronics in a blink. These are internal faults, not wiring harness problems, though a bad connector or chafed wire can certainly cause similar symptoms.
Finally, the sealing interface between the sensor body and the AC line. This thing has to hold back 400+ PSI while protecting sensitive electronics. An O-ring or bonded diaphragm typically handles this. If that seal fails, refrigerant or moisture gets inside the sensor housing, corroding the circuit board from the inside out. I’ve seen this documented in service bulletins for specific models over the years. The key takeaway here is that a true refrigerant pressure sensor failure starts inside the component. External problems like a clogged condenser or an overcharge might stress the system, but they don’t directly cause the sensor’s internal guts to fail. Don’t confuse correlation with causation; it’ll just lead you down the wrong path.
The Fix: Replacing the Sensor
Alright, you’ve diagnosed it, confirmed it’s the sensor. Now for the fix. Look, replacing this sensor can be DIY-FEASIBLE with the right tools and knowledge. But if you don’t have an EPA-certified refrigerant recovery machine and the proper charging equipment, this is absolutely a PROFESSIONAL-ONLY job. You can’t just vent refrigerant to the atmosphere – it’s illegal and bad for the environment, not to mention dangerous.
Tools You’ll Need:
- An EPA-certified refrigerant recovery machine (make sure it’s compatible with R-134a or R-1234yf, depending on your vehicle).
- A good manifold gauge set.
- The correct line wrench or crowfoot – usually 22mm or 7/8″.
- A new OEM or high-quality aftermarket sensor. It must come with a new sealing O-ring.
- The correct refrigerant oil (PAG or POE, check your vehicle’s specifications).
- An electronic leak detector.
The Process:
First, you must recover all the refrigerant from the system. Don’t skip this step. Once that’s done, disconnect the electrical connector from the sensor. Now, carefully use your line wrench to unscrew the old sensor. Be gentle; you don’t want to round off the fitting or damage the AC line.
This is critical: ALWAYS use the new O-ring that comes with the sensor. Never, ever reuse the old one. Lightly lubricate that new O-ring with the specified refrigerant oil – this prevents pinching and ensures a proper seal. Thread the new sensor in by hand first. If it doesn’t go in smoothly, stop and check for cross-threading. Once it’s finger-tight, use your wrench to torque it to spec. Torque values vary by make and model, but for a sensor in an aluminum component, you’re typically looking at 18–25 Nm (13–18 ft-lbs). Overtightening can crack the housing or crush the seal, leading to leaks; undertightening, well, that’s a leak waiting to happen too.
After installation, you need to evacuate the system for at least 30 minutes. This pulls out all the air and moisture, which are enemies of your AC system. Then, recharge the system with the exact amount of refrigerant specified for your vehicle. Finally, use your electronic leak detector to double-check your work around the new sensor. A tiny leak here can lead to another failure and compressor damage down the road. Trust me, you don’t want to do this twice.
