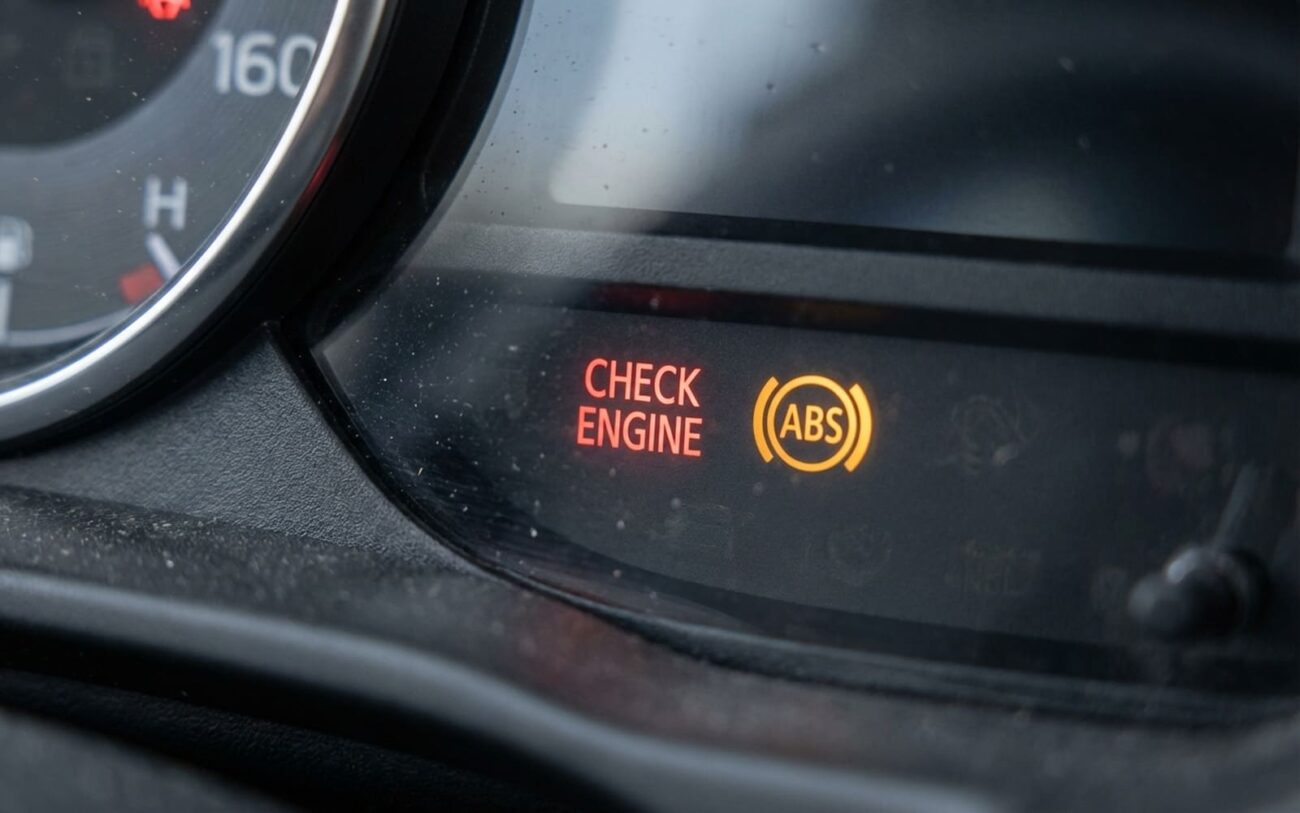
After 25 years under the hood, I can tell you this much: when a car acts up, especially with no-start or weird electrical gremlins, the Engine Control Unit (ECU)—or ECM, or PCM, depending on the manufacturer—gets blamed more often than it deserves. It’s the brains of the operation, sure, handling everything from fuel injection to timing and emissions. But here’s the kicker: a lot of symptoms that scream “bad ECU!” are actually caused by something much simpler and cheaper to fix. My job, and frankly, your job, is to figure out the real culprit before we start throwing expensive parts at it.
Spotting a Genuinely Bad ECU: My Top Three Indicators
I’ve seen countless vehicles come into the shop with “bad ECU” written on the work order, only to find a blown fuse or a corroded ground. But there are three main scenarios where my experience tells me the ECU itself is likely the problem. Even then, we’ve got to do our homework.
1. The “No Communication” Headache
This is probably the most common red flag. You plug in your scan tool, and it just won’t talk to the ECU. You get a “no response” or “no communication” message. Now, don’t jump straight to condemning the ECU. I always start with the basics:
-
Check the fuses. Seriously, I’ve seen a simple blown fuse for the ECU or the OBD2 port itself cause this more times than I can count.
-
Ignition switch. A faulty ignition switch might not be sending power to the ECU.
-
CAN bus. A shorted CAN bus line can take down communication for the whole network.
-
Check Engine Light (CEL). With the key in the “run” position, does the CEL come on? If not, and the fuel pump doesn’t prime, that strongly supports a communication issue. But again, it’s not definitive proof the ECU is toast.
That dashboard graphic shows a classic “no communication” scenario where the 5V reference is low and the CAN bus isn’t happy. If you’ve checked all the fuses and grounds, and you’re still getting nothing, it’s time to dig deeper into the ECU’s power and ground circuits, and the CAN bus itself. I’ll get into the definitive tests in a bit.
2. A Flood of Unrelated Codes
Imagine this: you scan the car, and it throws codes like P0606 (ECM/PCM Processor Fault), P2101 (Throttle Actuator Circuit), and P2127 (Throttle/Pedal Position Sensor “E” Circuit Low) all at once. Or maybe a bunch of random sensor codes that just don’t make sense together. When you see a whole host of seemingly unrelated diagnostic trouble codes (DTCs), especially ones pointing to internal ECU issues or shared circuits, that’s a strong indicator.
These systems usually don’t fail simultaneously unless something critical upstream is corrupting their signals. A common culprit here is a failing 5-volt reference circuit inside the ECU. But hold on—I’ve also seen a voltage spike from a dying alternator or a severely corroded ground mimic this exact pattern. So, again, don’t rush to judgment.
3. Crank-No-Start with No Outputs
This is a classic. The engine cranks over fine, but it just won’t fire up. You check for spark—nothing. You check for injector pulse—nothing. Fuel pump isn’t priming. But here’s the crucial part: you’ve confirmed that the crankshaft and camshaft sensor signals are present, and you’ve ruled out the immobilizer system. In this situation, the ECU is receiving all the necessary input data, but it’s not sending out any commands.
This suggests a failure in the ECU’s internal driver circuits or its core logic. The ECU is like an orchestra conductor who’s lost their baton—all the musicians are there, but no one’s playing. Still, before you condemn the unit, always, always rule out the main power relay and any associated fuses. Trust me, those are far more common failures and a heck of a lot cheaper to fix.
The Real Diagnostics: Pinpointing the Problem
Before I ever recommend an ECU replacement, I run through a systematic series of tests. This isn’t about guessing; it’s about proving the ECU is bad, not just acting like it. Here’s how I approach those three main symptoms.
When You Get “No Communication”
This is where your multimeter and wiring diagrams become your best friends.
-
Power and Ground: First, I do a voltage drop test on the ECU’s power and ground pins. You’ll need the wiring diagram to identify these. I’m looking for solid battery voltage (around 12.6V with the key on) on the power inputs and less than 0.1V on the ground circuits. Any significant voltage drop on the power side or resistance on the ground side means the ECU isn’t getting the juice it needs, and that’s usually an external wiring issue, not the ECU itself.
-
CAN Bus Integrity: If power and ground are good, the next step is the CAN bus. At the OBD-II port, measure the resistance between CAN-High and CAN-Low. On most vehicles, you should see around 60 ohms. If it’s 120 ohms, you’ve got an open circuit (missing a terminating resistor or a break in the line). If it’s significantly lower, you might have a short. This test tells you if the network itself is healthy enough for the ECU to communicate.
Dealing with a Flood of Implausible Codes
When the codes look like a random number generator went wild, I immediately suspect a problem with the 5-volt reference circuit. This circuit supplies power to many sensors, and if it’s unstable, all those sensors will send bad data, making the ECU look like it’s failing.
-
5V Reference Test: I’ll back-probe the ECU’s 5V reference pin (again, wiring diagram is key). The reading must be stable between 4.8V and 5.1V. If it’s low or fluctuating at the ECU, then yes, the internal 5V regulator in the ECU is likely failing. However, if it’s stable at the ECU but missing or low at the sensors, then the problem is in the harness—a short to ground, a damaged wire, or a bad connection.
-
Ground Splices: Don’t forget corroded ground splices. I’ve chased my tail on multiple implausible codes only to find a rusty ground point under the dash or in the engine bay.
When Inputs Are Good, But Outputs Are Missing
This is the scenario where the ECU is getting all the right information (crank, cam, etc.) but isn’t doing anything with it.
-
Output Verification: First, I use a noid light to check for injector pulse and a spark tester to check for spark. If those are absent, I move to bi-directional control with the scan tool. Can I command the fuel pump relay on? Can I command an injector to fire? If the ECU responds to these commands, then the problem is likely external to the ECU (e.g., a bad relay, a blown fuse to the injectors, or a shorted actuator).
-
Scope the Signal: If bi-directional control yields no results, I’ll use an oscilloscope to check the actual output signal at the ECU pin for the component in question (e.g., injector driver, coil driver). If the ECU is sending a proper signal, but the component isn’t activating, then the wiring or the component itself is bad. If there’s no signal, or a distorted signal, coming out of the ECU, then you’ve got a strong case for an internal ECU driver failure.
-
Immobilizer Check: Always confirm the immobilizer system isn’t active. Most scan tools will show an immobilizer status. If it’s active, the ECU is supposed to prevent starting, and it’s doing its job, not failing.
What Actually Fails Inside an ECU?
Once you’ve done all your external checks and confirmed the ECU is indeed the problem, the next question is usually “why?” ECUs are typically sealed units, but understanding the common internal failure modes helps you decide on the best repair path.
Power Supply Degradation
This is probably the most frequent internal failure I see. The ECU takes raw battery voltage and converts it into stable 5V, 3.3V, and other precise levels that the internal microprocessor and other sensitive components need. Over years of thermal cycling—especially in hot engine bays—these voltage regulators and filtering capacitors degrade. Electrolytic capacitors dry out, bulge, or even leak. Regulators simply fail from heat stress. For example, certain older Chrysler and Dodge PCMs were notorious for capacitor failures, leading to intermittent no-starts and communication loss. It’s a design flaw that shows up after a decade or so.
A Quick Note on Software vs. Hardware:
Sometimes, people worry about software corruption. Yes, a voltage spike during a jump-start or a faulty alternator surge can scramble flash memory. But here’s the thing: if your ECU is throwing a single, specific sensor code (like P0134 for an O2 sensor), that means the ECU is actually working correctly and reporting a fault it sees. Don’t confuse good diagnostics from the computer with a bad computer itself.
Physical Damage: Vibration and Water
Vibration is a silent killer. Over time, constant shaking can crack solder joints on the circuit board or even fracture traces. This leads to intermittent connections that are a nightmare to diagnose.
Water intrusion is another big one. If the ECU’s gasket fails, or the connector seals get compromised, moisture gets in. That leads to corrosion—you’ll see green or white crust on the pins and traces. It’s a clear sign of water damage. I’ve pulled units from flooded vehicles where the board looked like it had been soaked in saltwater, completely beyond repair.
Fixing a Bad ECU: Your Options
A Word of Caution on ECU Repairs
Fixing an ECU isn’t like swapping a headlight. It’s precision electronics, and modern immobilizer systems mean “plug and play” is almost never an option. The right approach depends on the failure and your skill level.
Post-Repair: Don’t Skip Validation!
Replacing or reprogramming an ECU isn’t the finish line; it’s the starting gun for validation. You absolutely have to confirm the repair was successful and the entire system is fully functional. I’ve seen too many comebacks because this step was rushed.
My Post-Repair Checklist
-
Verify software checksums. After a flash, always ensure no “programming failed” or “checksum error” codes appear. Your scan tool should confirm a successful write.
-
Monitor Live Data. Take the vehicle for a drive. Check that sensor readings (coolant temp, throttle position, MAF, O2 sensors) respond logically and smoothly to driving conditions. Look for any erratic spikes or flatlining.
-
Bi-directional testing. Use your scan tool to command various components—the fuel pump, purge valve, idle air motor, cooling fan. Confirm they activate and deactivate as expected.
-
Perform Relearn Procedures. Many vehicles require idle speed, throttle body position, or fuel trim relearns after an ECU replacement or reprogramming. Consult the service information for the specific vehicle. Skipping these can lead to drivability issues.
Making the Call: Cost, Risk, and Prevention
Deciding how to fix a bad ECU often comes down to cost, the age of the vehicle, and what makes economic sense for the customer. Here’s a general breakdown of what I usually see:
ECU Reprogramming
This is the cheapest option if it’s just a software glitch. High success if the hardware is solid. The main risk is “bricking” the unit if power drops during the flash, which means you’re then looking at a replacement anyway.
Component Repair
This is a specialized service. It’s labor-intensive, and the success depends entirely on the location and severity of the damage. DIY component repair might only cost $50–$200 in parts, but the skill and equipment needed are significant. For a professional, it’s often a good middle-ground for older, valuable vehicles.
New OEM Replacement
This is usually the most expensive route, but it comes with the highest success rate and a warranty. It includes the necessary programming and pairing. It’s the best option for newer vehicles or those with significant remaining lifespan, where reliability is paramount.
Prevention is Key
The number one enemy of your ECU is voltage instability. A failing alternator can send voltage spikes over 16V, frying sensitive circuits in an instant. Conversely, low voltage from a weak battery stresses the ECU’s internal power supply. Always check battery terminals and ground straps during routine service. If you notice flickering lights, dimming headlights, or unexplained stalling, investigate the charging system immediately. A few bucks on a battery or alternator can save you thousands on an ECU.
