When Parking Sensors Lie — And What to Believe
I’ve seen more parking sensors replaced unnecessarily than I care to admit — not because they failed, but because we jumped to conclusions. The system beeps like a broken smoke alarm, and the first thought is “bad sensor.” But in my shop, that’s never the first diagnosis. It’s the last.
A failed parking sensor doesn’t just stop working — it misbehaves in ways that mimic other failures. And the reverse is true: wiring issues, module glitches, and even bumper alignment can make a perfectly good sensor look dead. So before you pull out the trim tools, you need to know what you’re really dealing with.
Symptoms That Mislead — And How to See Through Them
Let’s cut to the chase: if one zone is silent while the others work, it’s tempting to call it a dead sensor. But I’ve lost count of how many times I’ve found a pinched wire behind the rear trim panel on a Subaru Outback — same issue, every winter. The harness flexes at the hatch opening, insulation wears thin, and boom: open circuit.
Same goes for constant beeping from one corner. Yeah, it could be a failing sensor sending garbage signals. But I’ve also seen it caused by a loose mounting bracket on a 2018 Honda CR-V — the sensor tilted inward, reading the bumper lip as an obstacle. No internal damage, just mechanical misalignment.
And don’t get me started on “all sensors dead.” That’s almost never the sensors. More often than not, it’s a blown fuse (check the PDC fuse under the dash), a disconnected harness behind the license plate, or someone who accidentally turned the system off in the infotainment menu. I’ve had customers show up convinced their whole system fried — turned out they pressed a button.
How I Test — Step by Step
Here’s my process. It’s not flashy, but it works. I don’t guess — I isolate.
Step 1: Rule Out the Obvious
Mud, ice, bumper stickers, thick wax — I’ve seen all of them kill sensor function. Clean the face with isopropyl alcohol and a microfiber cloth. If the warning clears, great. But if it’s still acting up, move on. (And yes, this matters — I once diagnosed a “failed” sensor on a Land Rover that was just covered in undercoating.)
Step 2: Check the Circuit — Not Just the Sensor
Disconnect the suspect sensor. Grab a multimeter, set it to megaohms (MΩ). A healthy ultrasonic sensor should read between 5 and 15 MΩ across the terminals. If you get “OL” (open loop) or near zero, the internal piezoelectric crystal is toast — that’s a confirmed internal failure.
But here’s the trick: do the same test at the PDC module end of the harness. If you get the same reading there, the wiring’s fine. If not, you’ve got a break or short in the line. I’ve saved customers hundreds by finding a $20 wiring repair instead of a $300 sensor swap.
Step 3: Use the Scan Tool — Or Don’t Bother
If you’ve got access to a capable scan tool (like Autel, Snap-on, or dealer-level), pull up live data from the PDC module. Watch the distance reading for the suspect zone. A good sensor should report “out of range” (usually 2550mm or similar) when nothing’s nearby. If it’s jumping around — 0mm, 300mm, 50mm — that’s erratic output. Likely a failing sensor.
But if it’s stuck at 300mm? That’s not the sensor. That’s alignment, a bent mount, or debris blocking the path. I see this on Audis all the time — one sensor slightly canted, reading the wheel well. Adjust it, and the problem vanishes.
Why Sensors Actually Fail — Not Just “They Go Bad”
The piezoelectric crystal inside these sensors is fragile. It vibrates at 40–50 kHz to send and receive ultrasonic pulses. Over time, thermal cycling — hot summers, freezing winters — can fatigue the bonding layer. On cheaper aftermarket units, I’ve seen delamination in under two years.
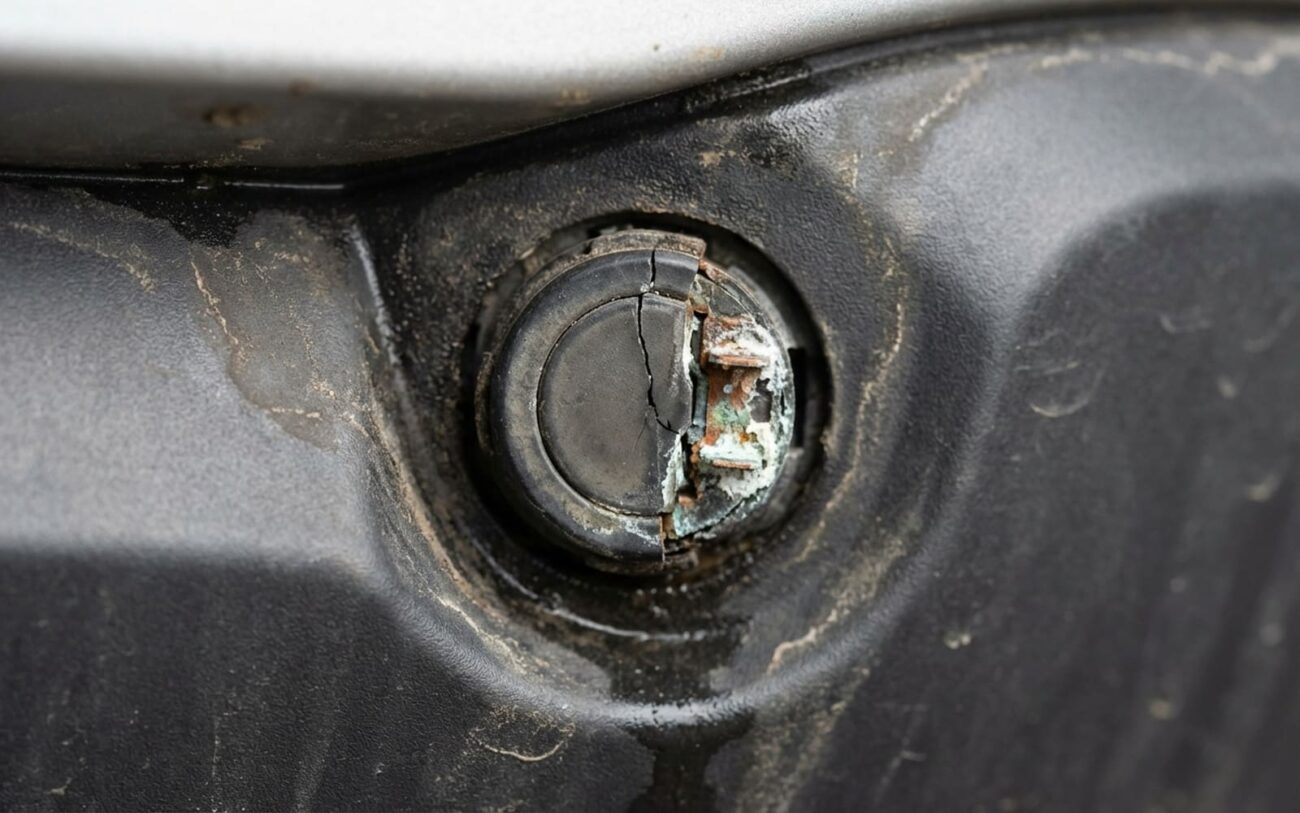
Moisture is worse. If the rubber seal degrades (and they do, especially on vertical-mounted sensors), water gets in. It corrodes the contacts, shorts the circuit, or freezes and cracks the housing. I’ve pulled sensors apart and found rust on the circuit board — no wonder they failed.
And physical damage? Don’t underestimate it. A stone chip at highway speed can rupture the diaphragm. A minor rear-end tap might not dent the bumper, but it can shift the sensor enough to throw off calibration — or crack the housing internally. On some Fords, the rear sensors are mounted right in the bumper’s lower edge. Road debris hits them daily.
Fixing It — Without Making It Worse
Once you’ve confirmed the sensor is bad, how you replace it matters. I’ve seen DIYers destroy bumper clips, cross-thread mounting screws, or skip calibration — then wonder why the warning light’s still on.
External Sensors — DIY Possible DIY-FEASIBLE with proper tools and calibration access
Embedded Sensors — Leave It to Pros PROFESSIONAL-ONLY due to bumper removal and recalibration requirements
Cleaning — But Only If It Makes Sense TEMPORARY / DIAGNOSTIC AID ONLY
Did It Work? Don’t Guess — Test It
You install the new sensor. You shift into reverse. It beeps. Great — but that doesn’t mean it’s working right.
First, do a real-world test: approach a wall or cardboard box slowly. The beeps should start at a consistent distance, increase in frequency, and stop when you back away. No false alarms after sitting idle.
Then, go deeper: use the scan tool to check live data. No object present? The reading should be stable — “infinite” or 2550mm. Move an object toward it: the value should drop smoothly. Any jumps, spikes, or lag? Either calibration failed, the sensor’s defective, or there’s an installation issue (like a poor ground).
I don’t consider a repair complete until I’ve verified both the sound and the data. Too many shops skip this — and the customer comes back in a week.
Is It Worth Fixing?
Let’s be real: if you’re looking at $800–$1,200 to replace multiple sensors and a failed PDC module on a car worth $4,500, that’s a tough sell. I’ve had customers choose to disable the system — and honestly? Sometimes that’s the smart move.
You can usually disable it in the infotainment menu or pull the fuse. Just know what you’re giving up: a system that prevents low-speed scrapes. You’ll need to rely more on mirrors, window visibility, and spatial awareness. Not ideal, but it beats throwing good money after bad.
Keep It Working — My Field Notes
-
Never pressure-wash the sensor face directly. On a 2016–2020 Jeep Wrangler, I’ve seen water forced past the seal in under 10 seconds. Angle the nozzle, keep it moving.
-
Skip the thick ceramic coatings on the sensor. A thin layer of wax is fine, but buildup muffles the signal. Wipe it clean after every detail — it takes 10 seconds.
-
Listen for the startup chime in reverse. No chime? System’s not active — could be fuse, software, or disable. Don’t assume it’s the sensors.
-
If one sensor triggers early, check the bumper alignment. On a 2019 Toyota RAV4, I found a loose mounting tab after a minor scrape — fixed it with a zip tie until the bumper could be realigned.
