That Dead Window? It’s Probably Not the Motor — It’s the Brain in the Door
I’ve pulled more than a few of these Power Window Control Modules (PWCMs) — also called Door Control Units (DCUs) — out of doors over the last 25 years. And I’ll tell you straight: when a window won’t move, most folks jump to “bad motor” or “stuck switch.” But on anything built after 2005, especially GM, Ford, Toyota, and Chrysler, the real problem is often that little black box bolted inside the door.
This module is the brains. It reads the switch signal, checks the CAN or LIN bus, verifies safety conditions (like door ajar status), and tells the motor exactly what to do — up, down, stop, reverse for anti-pinch. When it fails, the window doesn’t just stop — it misbehaves in weird ways. And that’s your clue.
Complete failure? Sure, could be a fuse. But if the driver’s master switch can control other windows just fine, and the local switch in the problem door does nothing — that’s not a wiring issue. That’s the local module gone dark.
And don’t ignore the odd stuff. I’ve seen windows go up when you press down. Or keep running past the top, chewing up the regulator. Or work only when the door is closed — but stutter when you open it. That last one? Classic sign of cracked solder joints inside the module, breaking connection under door movement.
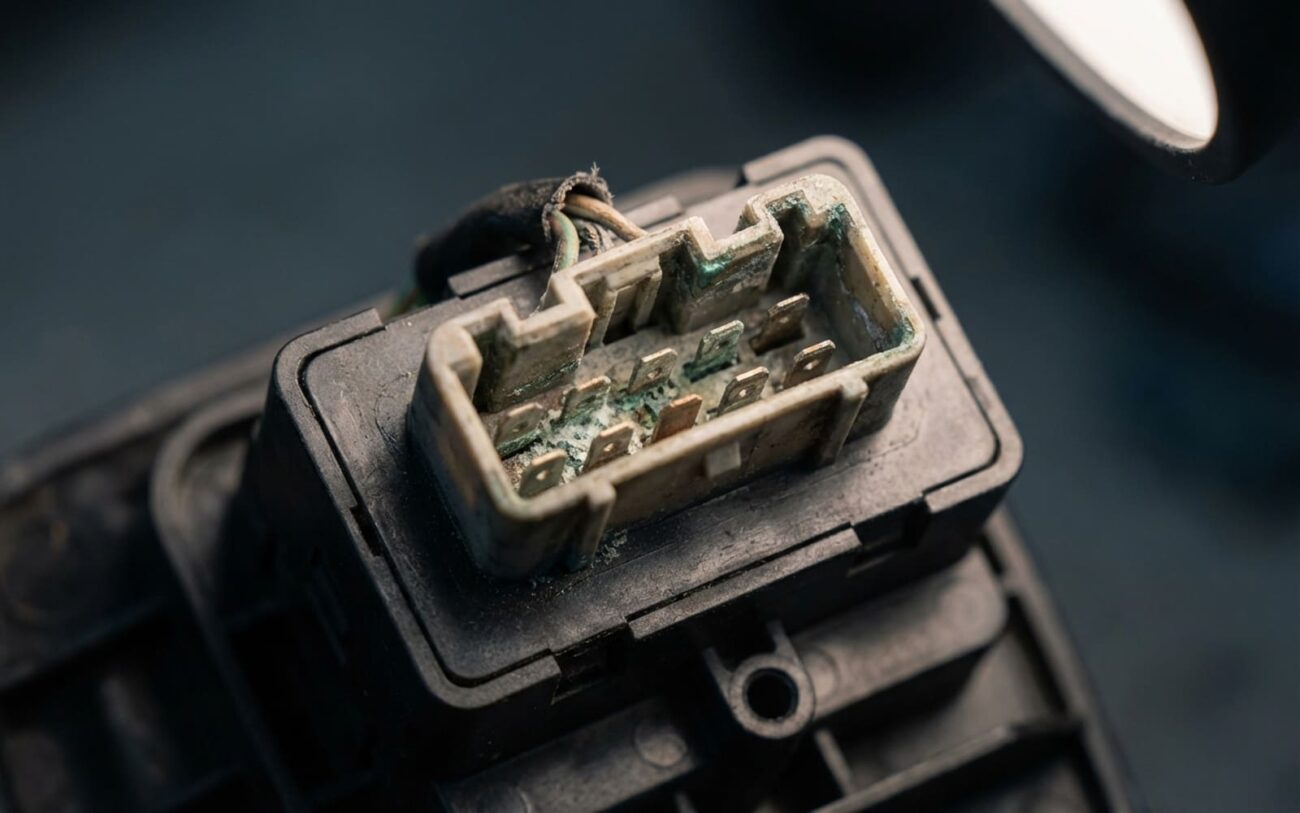
And yes — a bad module can burn. I’ve pulled units with melted connectors, blackened terminals, even bubbling on the circuit board. That’s not “age.” That’s a shorted FET driver cooking itself, often taking out shared fuses for door locks or memory seats with it.
How I Diagnose It — Step by Step
You don’t throw $400 parts at a problem. You test. The goal: confirm the module has power, ground, input, and isn’t being sabotaged by something dumb like a chafed wire.
Start simple.
Check the fuse — yes, even if it looks fine. Use a multimeter. I’ve seen hairline cracks in fuse elements that don’t show to the eye. If it’s blown, find out why. A blown fuse on a window circuit usually means a short — either in the motor, wiring, or the module itself.
Then go to the module connector. Back-probe it. You want three things:
-
Constant 12V (battery power, usually from the fuse box)
-
Switched ignition voltage (so it knows when the key is on)
-
Solid ground — less than 0.2V drop under load
If all three are good, and the switch is sending a signal (test that with a scan tool or by measuring voltage change at the input pin), then the module is likely the fault.
Now, for the tricky ones — intermittent issues.
Jiggle the door harness while commanding the window. If it stutters, but power and ground at the module stay rock solid? That points to internal failure. I’ve seen this on 2010–2014 Silverados where the main connector’s solder joints crack from thermal cycling. The module works when cold, fails when warm. Classic.
And if the auto-up/down or anti-pinch is dead?
That’s usually a Hall-effect sensor circuit issue. Here’s how I test it: unplug the motor. Spin the motor shaft slightly by hand (or with a drill, gently). Measure the sensor wires — you should see a changing signal (typically 5V reference and a pulsed return). If the signal changes, the motor’s good. The module isn’t reading it. So the problem isn’t the motor — it’s the brain.
And if the window moves opposite to command?
Swap the two main motor control wires at the module connector. If the problem reverses — meaning “down” now actually goes down — then the wiring is fine. The module is sending reversed polarity. That’s a shorted driver inside the unit. Game over.
Why These Things Die — It’s Not Magic
These modules fail for real reasons. Not “bad luck.”
Thermal cycling is a big one. Every time you roll the window up or down, the power transistors in the module heat up — sometimes to 150°C or more. Then they cool. Over years, that expansion and contraction cracks solder joints. I’ve seen it on the main power pins, on the motor output FETs, even on the microcontroller. It’s not visible without a magnifier. But it kills connectivity.
Moisture is another killer. Door drain holes clog. Water pools. Humidity wicks into the module through the connector or a cracked housing. Corrosion starts on traces, components fail. And if the vapor barrier is torn — which happens during speaker swaps or accident repairs — moisture gets in fast. I’ve pulled modules that looked fine externally but had green corrosion under the conformal coating.
Voltage spikes? Absolutely. A bad jump-start, failing alternator, or load dump can send surges through the power or CAN lines. These modules run on 5V logic. A 14V spike can fry the regulator or communication chip. And once that happens, no amount of “reset” fixes it.
But here’s what it’s NOT: a failed window motor or regulator. Those are mechanical. They don’t kill the module — but a seized regulator can overload the motor, which then draws excess current and stresses the module. So fix mechanical binding first. Always.
How I Fix It — No Fluff
Solder Reflow Pro Only
Replace the Module Pro Only
DIY Module Swap
The “Dry It Out” Hack
Did It Really Work? Test Like a Pro
Don’t just say “it goes up and down.” That’s not enough.
Run it through 20 full cycles — up, down, up, down. No hesitation, no resetting. Test auto-up and auto-down. If the car has anti-pinch, block the window during closing — it should reverse immediately. Slam the door, open and close it — the window should still work flawlessly.
If you did a solder repair, this is where it’ll fail if the job wasn’t solid. Intermittent function means the crack is still there.
And if you used the “dry it out” method? Monitor it. Especially in rain. If it starts acting up again in humidity, it’s done.
What’s It Gonna Cost You?
Solder Reflow
DIY: $0–$50 if you own tools. Shop: $150–$300. Success rate: 60–80%, but only if cracked solder is the issue. High risk if you miss the real problem.
Module Replacement (DIY)
OEM or reman part. Success rate: 95%+. Risk: improper install, bad calibration, or unprogrammed module on some models.
Module Replacement (Shop)
Parts and labor. Success rate: 98%+. Low risk — pros test, code, and validate.
Rule of thumb: if the repair hits 40% of your car’s private-party value (check KBB), think hard. On a high-mileage commuter, it might not be worth it. But if the rest of the car is solid? Fix it. A failed module can stress the BCM or cause other electrical issues through shared circuits.
Keep It From Happening Again
To Prevent Recurrence
-
Check door drain holes every 6–12 months. Clogged drains = standing water = dead modules. Use a wire to clear them.
-
After any door work, inspect the vapor barrier. Reinstall it with fresh butyl rope — tape won’t last. A torn barrier is a death sentence for electronics.
-
Fix sticky windows early. A binding regulator forces the motor to draw more current, heating up the module. It’s like ignoring a TPMS warning — small issue, big consequences.
