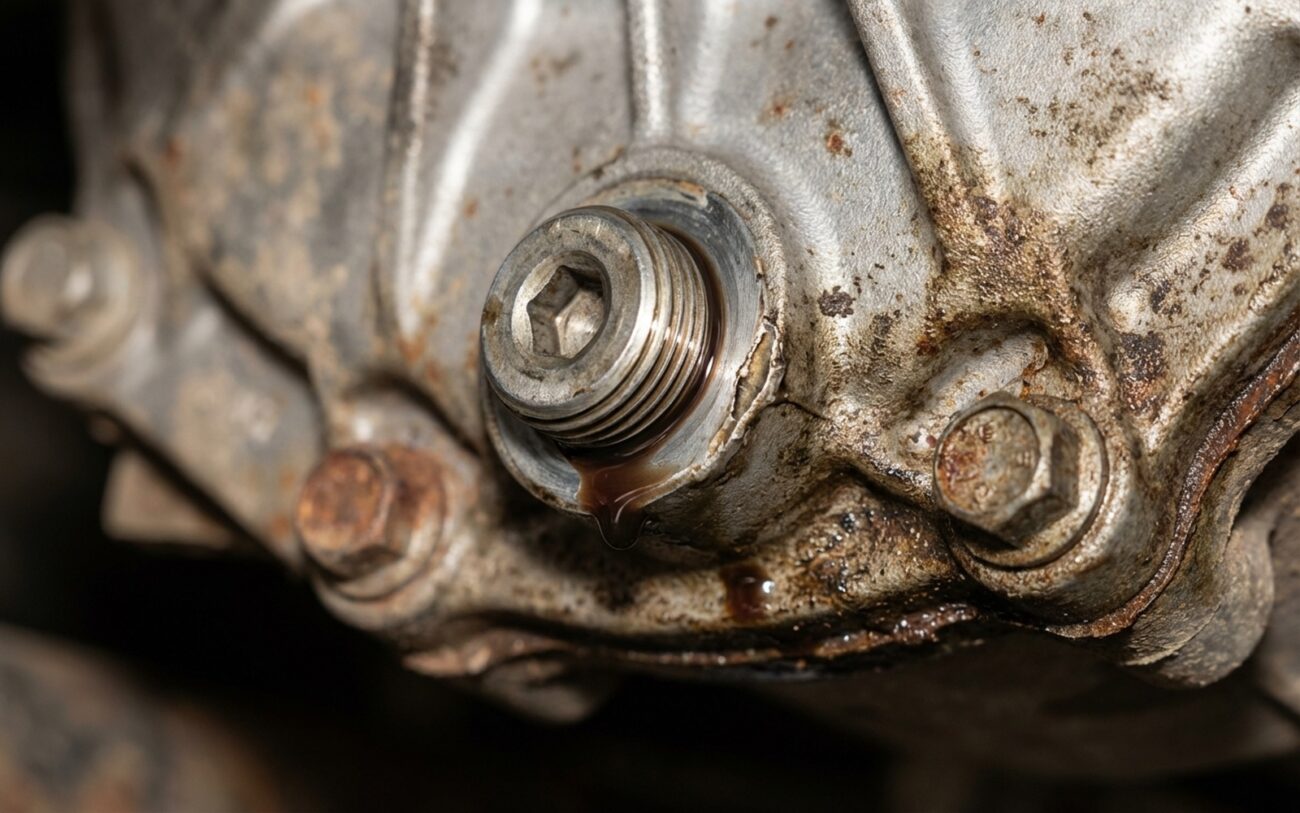
Alright, let’s talk transfer cases. You know, that box under your truck or SUV that makes all-wheel drive or four-wheel drive happen. Here’s the deal: these things are silent killers. Unlike your engine or even an automatic transmission, most transfer cases don’t have a dipstick. That means you can’t just pop the hood and get a quick read on the fluid. And believe me, if that fluid’s low, burned, or full of gunk, you’re on borrowed time. It’s not just a ‘maintenance miss’ – it’s a ticking bomb for thousands of dollars in repairs.
Recognizing the Signs: Noise, 4WD Issues, and Leaks
So, how do these units tell you something’s wrong? Usually, it’s a whine or a hum. You’ll hear it coming from right under your feet, or maybe the center console. It’ll change pitch with your speed, and it often doesn’t care if you’re in 2WD or 4WD – it’s just there. Now, that noise could be a worn bearing or a stretched chain, sure. But in my 25+ years, I can tell you this: always, always check the fluid first. It’s the cheapest, fastest diagnostic step you can take. Skipping it is like trying to fix a leaky faucet by replacing the whole house.
Then there’s the 4WD acting up. Maybe it’s binding or hopping when you make a sharp turn on dry pavement – a classic sign of an AWD system not disengaging properly. Or maybe the dash light just flashes, or the system flat-out refuses to engage. Your first thought might be, “Oh, it’s gotta be the shift motor or some fancy sensor.” And yeah, it could be. But again, a lot of these systems rely on fluid to make those clutch packs or viscous couplings do their job right. If the fluid’s shot, or the wrong type, it’s not gonna work. So, before you start chasing electrical ghosts, check that fluid.
Pinpointing the Problem: Fluid vs. Other Failures
Now, I just told you to check the fluid first. And that’s true. But it’s also true that a lot of other things can make your truck act up in similar ways. You need to be methodical. You can’t just throw parts at it. Here’s how I break down the common symptoms to figure out if it’s really the fluid, or something else entirely.
| Symptom | Likely Fluid-Related Issue | Common External Mimics | How I Confirm the Source |
|---|---|---|---|
| Noise (whining/humming) | Low or severely degraded fluid, causing inadequate lubrication and increased gear/chain wear. | Failed input/output shaft bearings, a stretched transfer case chain, or gear tooth damage. |
First, I do a proper fluid level check using the fill plug. When I drain it, I’m inspecting the fluid’s condition and running a magnet through it for excessive ferrous debris. If the magnet pulls out heavy shavings, you’ve got internal wear. To pinpoint the noise, I use an electronic stethoscope directly on the case itself; that usually tells me if it’s internal to the transfer case or from a nearby component. |
| 4WD engagement failure or binding | Incorrect fluid type or sludge buildup preventing clutch pack or viscous coupling operation. | Faulty shift motor, wiring harness issue, failed 4WD control module, or a wheel speed sensor fault. |
I always start by checking the fluid level and condition. Then, I hook up a professional scan tool to command 4WD modes and monitor the shift motor and actuator feedback. It’s also crucial to confirm the fluid viscosity and type match the OEM specifications – the wrong fluid can absolutely cause engagement problems. |
| Visible leak under vehicle center | Fluid loss due to a leak at the fill/drain plug, a housing crack, or a compromised vent tube. | Transmission output shaft seal, front driveshaft CV joint, or a rear axle fluid leak. |
I clean the entire undercarriage thoroughly, then inspect closely for the source. If it’s not immediately obvious, I’ll add UV dye to the transfer case fluid, drive the vehicle for a bit, and then re-inspect with a UV light. The leak has to originate directly from the transfer case housing or its plugs to confirm it’s the transfer case. |
The Root Causes of Fluid Loss or Degradation
So, you’ve checked the fluid, and it’s low or nasty. Why? Well, like I said, the number one reason these things run dry is simple neglect. No dipstick means ‘out of sight, out of mind’ for most folks. They just don’t think about it until they hear that awful whine. But even when someone does try to check or change the fluid, that’s often where new problems start.
Those fill and drain plugs? They thread right into the aluminum or magnesium case. And those threads are surprisingly delicate. I’ve seen countless plugs stripped out from someone over-torquing them, or using the wrong size hex socket. You know, the kind where you need a special tool to even get it out. All that heating and cooling the transfer case goes through can weaken those threads over time, too. And don’t forget road debris – a good hit can cause a hairline crack around a mounting boss or right near a plug.
Another culprit is the vent tube. Every transfer case has one. If it gets clogged – say, with mud or road grime – pressure builds up inside the case as the fluid heats up. That pressure has to go somewhere, and usually, it pushes fluid right past the seals. On the flip side, if that vent tube gets compromised, or if you’ve been doing some serious water crossings, water can get in. And water in your transfer case fluid? That’s a recipe for corrosion and component failure, fast.
It’s critical to know the difference between a housing issue and a seal issue. If you’ve got fluid leaking from where the driveshafts connect, that’s typically a worn input or output shaft seal – a different fix than a crack in the case itself. And if that fluid you drain is thick, dark, and smells burnt, or it’s got a metallic paste in it, you’re looking at internal component failure – worn gears, a stretched chain, or burnt clutch packs. At that point, you’re beyond a simple fluid top-off or plug repair.
Your Options: Fixing It Right (and When to Walk Away)
Routine Fluid Level Check and Change DIY-FEASIBLE
2. CRITICAL STEP: Always, always remove the fill/check plug first. If you drain the fluid and then can’t get the fill plug out, you’re stuck.
3. Once the fill plug is out, remove the drain plug (if it has one) and let that old fluid flow into your catch pan. If no drain plug, you’ll have to suck it out the fill hole.
4. Pump in the new fluid until it just starts to seep out of the fill hole. That’s your full mark.
5. Reinstall both plugs, and torque them to spec. Don’t guess. It’s usually in the 15-30 ft-lbs range, but check your manual. Overtorquing is how you strip those threads.
For models like the Ford F-150 with BorgWarner 44-06 transfer case, the fill plug doubles as the check point.
DIY Cost: $40–$120 (fluid, pump). Shop Cost: $150–$300. Success Rate: 100%. Secondary Risk: None, if done correctly.
Leaking or Stripped Plug Threads Professional Only
For truly stripped or damaged threads, you’re looking at a thread repair insert – think Heli-Coil or Timesert. This is not a DIY job for the faint of heart. It requires precision drilling, tapping the hole to a larger size, and then installing the insert with the correct torque. The success of this repair hinges on whether there’s enough healthy material around the original hole. If the housing is already too thin or cracked, that insert isn’t going to hold.
DIY Cost: $50 (kit, but not recommended for most). Shop Cost: $250–$500. Success Rate: ~80%. Secondary Risk: Further thread damage requiring case replacement if repair fails.
Cracked Transfer Case Housing Replace Only
DIY Cost: N/A. Shop Cost (Weld Attempt): $500–$1,000+. Success Rate (Weld): <30%. Secondary Risk (Weld): Fluid loss, catastrophic failure, fire risk.
Transfer Case Replacement (Shop): $2,000–$5,000+. Success Rate: 100%. Secondary Risk: Improper installation, fluid mismatch.
The Economic Decision: When to Replace
Here’s the tough truth: you’ve got to weigh the repair cost against the value of your vehicle. My rule of thumb? If the repair bill is going to be more than 50% of what your truck or SUV is actually worth, it’s time to seriously consider your options. I’ve watched too many customers sink four grand into a ten-year-old vehicle when a good quality remanufactured or used transfer case from a reputable supplier would have gotten them back on the road for half the price.
Post-Repair Validation: Don’t Skip This Step
You’ve done the work, or had it done. Great. But you’re not finished until you’ve validated the repair. Don’t just assume it’s good because it’s not actively dripping. You need to confirm it.
My Post-Repair Checklist
-
After a fluid change: Drive the vehicle for a bit, get it up to operating temperature, and let it go through a few heat cycles. Then, bring it back to level ground, let the fluid warm up for 10-15 minutes, and recheck that fill plug. You should see fluid right at the bottom edge of the threads. If it’s low, top it off.
-
After a leak repair: Clean the area around the repair thoroughly. Add some UV dye to the transfer case fluid – it’s cheap insurance. Drive it for at least 50 miles, then get under there with a UV light. You’re looking for no glowing dye around the plug or the repair. Any glow means it’s still seeping.
-
Checking internal health (when draining old fluid): This is a big one. Always inspect the old fluid with a magnet. A light metallic sheen on the magnet? That’s normal wear. But if you’re pulling out chunks, flakes, or a thick, gritty paste, that tells you there’s active internal damage. Even if you just refilled it, that unit is on its way out, and you need to start planning for a rebuild or replacement.
Prevention: My Best Advice
Look, the best repair is the one you never have to do. Preventive maintenance is your cheapest insurance policy here. Transfer case fluid absolutely does not last forever, especially if you’re towing, off-roading, or generally putting your truck to work. Don’t listen to that 100,000-mile ‘normal’ service interval in your owner’s manual. For most folks, their driving falls under ‘severe service,’ and that means changing your transfer case fluid every 30,000 miles. Trust me on this one.
Expert Maintenance Tip
Here’s a simple tip I give all my customers: make a habit of a quick visual check. Every time you’re under the vehicle for an oil change or tire rotation, just take an extra minute. Look at the transfer case, the plugs, the vent tube. See any fresh stains, drips, or even just a little weepage? Address it. A $20 tube of sealant or a new plug gasket now can easily save you thousands down the road. It’s that simple.
And finally, always, always follow the correct procedure for your specific vehicle. On a lot of trucks, like many Ford F-150s with the NVG246 or BorgWarner transfer cases, the only way to check the fluid is through that fill plug, with the vehicle perfectly level and the engine off. There’s no dipstick, no fancy sensor to tell you it’s low. Your owner’s manual is your bible here – it’ll tell you the exact location of that fill plug, the correct fluid type, and how much it holds. It’s a small step, but it prevents huge, expensive problems.
