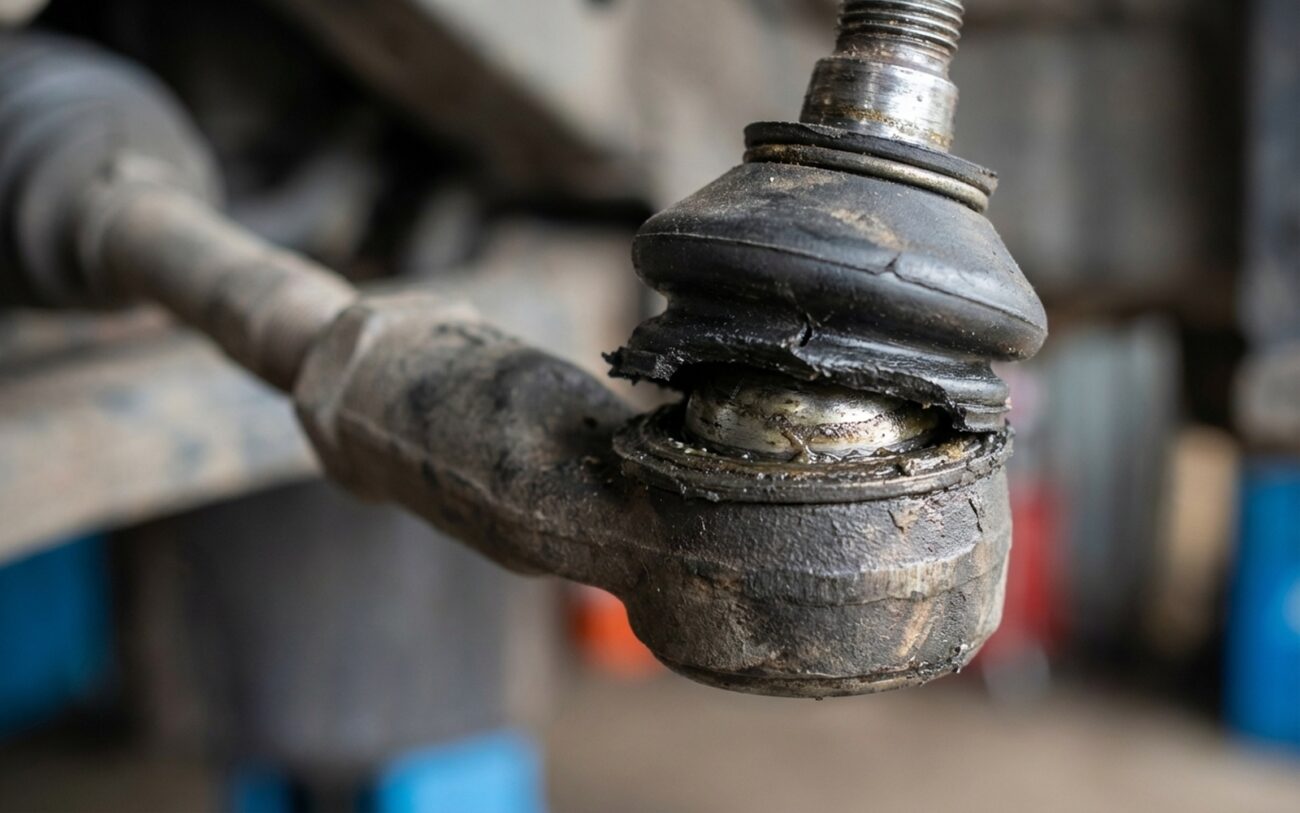
Alright, let’s talk about that clunking sound, or maybe your mechanic just told you your tie rod ends are worn out again – even though you just replaced them. I’ve seen this play out countless times in my 25+ years in the shop. Folks blame cheap parts, or maybe a bad installation, but more often than not, the real culprit is hiding upstream: the steering rack itself.
It’s not the most common failure, I’ll grant you that, but when a steering rack starts to go south, it can chew through inner tie rod ends faster than you can say “alignment.” It’s costly, it’s frustrating, and frankly, it can be dangerous. So, let’s cut through the noise. I’m going to walk you through how I diagnose this problem, what’s truly going wrong inside, and how to fix it once and for all.
What I Look For: Symptoms of a Troubled Steering Rack
When a rack is causing problems, you’ll usually notice one or more of these tell-tale signs. Pay attention, because catching this early can save you a lot of grief.
First and foremost, the big one: premature tie rod wear. If your inner or outer tie rod ends are developing play, their boots are cracking, or they’re just seizing up far sooner than they should – I’m talking under 30,000 miles or two years – that’s a huge red flag. Normal wear happens, sure, but rapid failure means something is putting abnormal stress on that joint. And often, it’s coming straight from the rack.
Next, check for power steering fluid inside the inner tie rod bellows. This is a dead giveaway. If you pull back that rubber boot on the inner tie rod and find it full of greasy, dark fluid, that fluid didn’t just magically appear from the outside. It’s leaking internally from the rack, meaning a seal has failed. Not only is it a mess, but that inner tie rod is now operating in a contaminated environment, which is going to accelerate its wear dramatically.
Finally, listen to your steering wheel. Do you feel a notchy, sticky, or inconsistent steering feel? Even after you’ve put new tie rods on and had an alignment? You might feel a slight “catch” when you’re driving straight, or when you’re making slow turns – like the steering wheel resists just a bit at a certain point. That’s often a sign of internal rack damage, like worn gear teeth or a bent rack bar.
My Diagnostic Approach: Pinpointing the Rack
Before you condemn the entire steering rack – because that’s a big job and an expensive part – we need to be absolutely sure. A lot of front-end issues can mimic a bad rack. Here’s how I go about isolating the root cause with targeted tests.
Test 1: Checking Inner Tie Rod Resistance (The Drag Test)
If you’re seeing premature inner tie rod wear, this is where I start. First, get the vehicle safely in the air and support it. Disconnect the outer tie rod from the steering knuckle. Now, disconnect the inner tie rod from the steering rack itself – you’ll usually need a special inner tie rod tool for this. Once it’s disconnected, try to rotate the stud of the inner tie rod by hand.
A healthy inner tie rod joint should have some resistance, a smooth, consistent drag. We’re talking somewhere in the neighborhood of 20 to 80 inch-pounds of drag. If it spins freely with no resistance, or if it binds up and feels notchy, that inner tie rod socket on the rack is shot. It means there’s excessive friction or misalignment right where the tie rod connects to the rack, and that’s what’s killing your tie rods.
Test 2: Confirming Internal Fluid Leaks
If you’ve found fluid inside the inner tie rod boot, this test confirms it’s coming from the rack. Carefully pull back the inner tie rod boot (or remove it if necessary). With the engine running (and the power steering system pressurized), use a borescope – one of those small inspection cameras – to look inside the rack housing, right where the inner tie rod shaft goes in. If you see fresh power steering fluid actively seeping from the housing, that confirms an internal piston seal or inner tie rod shaft seal is failing. That fluid is contaminating the joint and causing premature wear.
Test 3: Isolating Notchy Steering Feel
When a customer complains about notchy or sticky steering, it could be a few things: the steering column U-joint, a faulty electric power steering (EPS) motor, or even the intermediate shaft binding. To rule those out and confirm the rack is the problem, I disconnect the intermediate shaft from the steering rack input shaft. This completely isolates the rack from the rest of the steering column. Now, manually rotate the rack input shaft by hand. If that notchy or sticky feeling remains, you’ve confirmed the fault is internal to the rack itself – likely worn rack gear teeth, a damaged rack piston, or a bent rack bar.
Important Distinction:
It’s crucial to understand what isn’t a rack issue. Normal outer tie rod wear from age, worn ball joints, or a leaking power steering hose are common problems, but they don’t mean your rack is faulty. A bad outer tie rod doesn’t automatically point to the rack – but a failing inner tie rod, especially with fluid inside the boot, often does.
Why Racks Fail and Take Tie Rods With Them
When the steering rack itself is the source of your tie rod woes, it usually comes down to one of these core issues:
-
Manufacturing defects: Sometimes, you just get a bad part. Improperly hardened socket threads or misaligned bore castings within the rack can cause uneven load on the inner tie rod right from the start.
-
Internal contamination: If your power steering pump is failing, it can shed tiny metal debris into the fluid. This acts like grinding paste, wearing down internal seals and the tie rod interface within the rack.
-
A bent rack bar: Hitting a curb hard, or a really nasty pothole, can actually bend the internal rack bar. Even a slight bend puts constant, uneven lateral stress on the inner tie rod, causing it to fail in weeks or months.
-
Corrosion or fluid degradation: Using the wrong type of power steering fluid can swell seals or allow internal rust to form. This increases friction and wear inside the rack, which then transfers that stress to the tie rod ends.
Repair Options: What Actually Works (and What Doesn’t)
Professional Territory
Look, on many vehicles, replacing the steering rack is a significant undertaking. It often requires lowering the subframe, dealing with stubborn hydraulic lines, and using specialized tools. A misstep here – like over-tightening a tie rod, misaligning the rack during installation, or not bleeding the system correctly – can lead to premature wear all over again, or worse, damage to other components like the clock spring. This isn’t a job for the faint of heart or the inexperienced DIYer.
Complete Steering Rack Replacement
Replacement for a Bent Rack Bar
System Flush (Diagnostic Only)
How I Verify the Repair Was Successful
-
Leak check: After the new rack is in, I always cycle the steering lock-to-lock a few times at operating temperature. Then, I inspect all connections and the inner tie rod boots meticulously for any fluid seepage.
-
Steering feel test: A road test is non-negotiable. The steering wheel should move smoothly, with consistent resistance throughout its range of motion. No clunks, no dead spots, no notchiness.
-
Alignment: This is mandatory, no exceptions. When you replace a steering rack, your toe settings will be way off. Skipping a proper front-end alignment will lead to rapid and uneven tire wear, and you’ll be back to square one with steering issues. Don’t skimp on this step.
Cost and Practical Considerations
| Repair Type | DIY Cost (Parts) | Shop Cost (Total) | Success Rate | Risks of Improper Repair |
|---|---|---|---|---|
| Complete Rack Replacement | $400 – $1,200 | $1,000 – $2,500 | >95% | Clock spring damage from improper centering; loose mounting bolts leading to catastrophic failure; premature seal failure from using the wrong fluid type. |
How to Prevent Recurrence
Prevention, in my experience, starts and ends with fluid discipline. Always use the power steering fluid specified in your owner’s manual. Universal fluids often contain additives that can degrade seals over time, inviting corrosion and premature wear. Don’t cheap out here.
-
Make it a habit to check those inner and outer tie rod boots for cracks or fluid residue every time you get an oil change.
-
And address uneven tire wear early. It’s often one of the first indicators of steering or suspension play, and catching it early can prevent bigger problems down the road.
