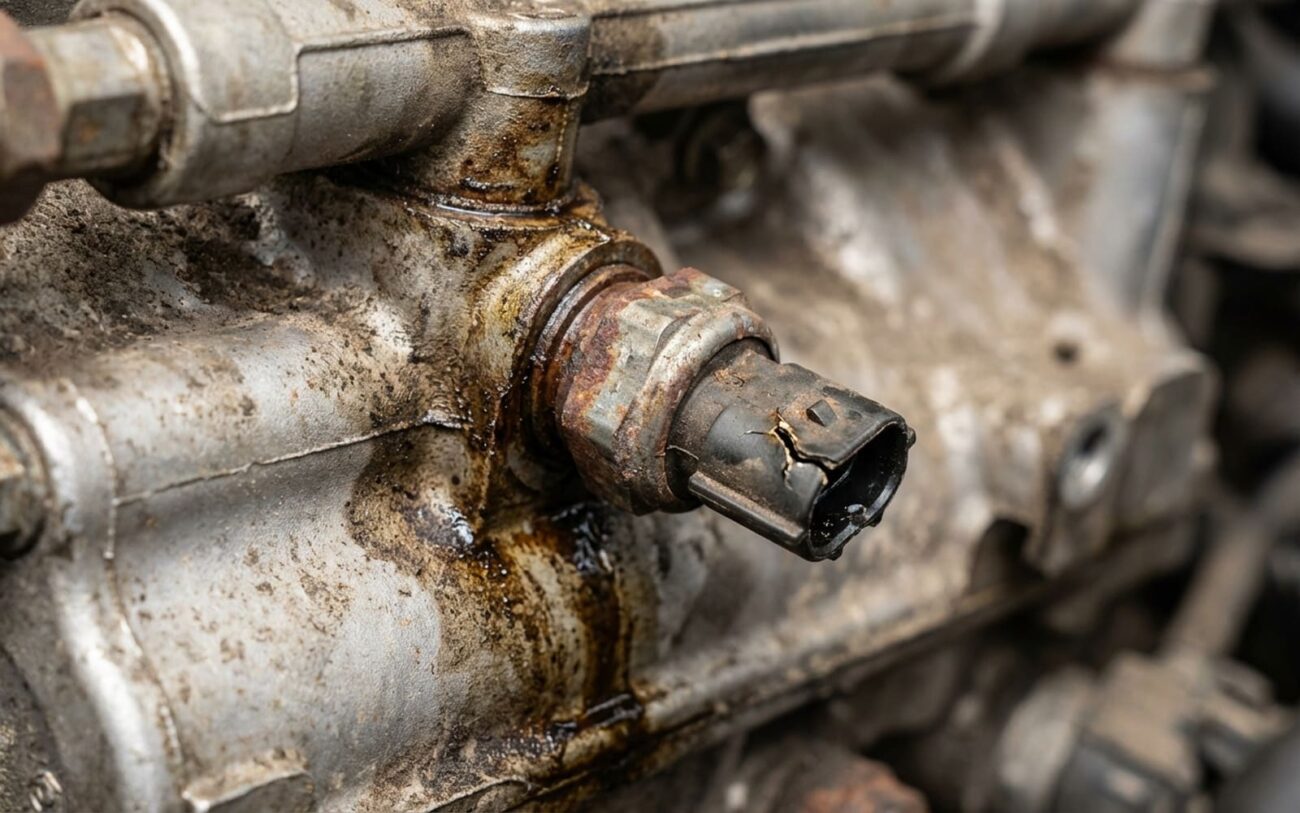
Fuel Rail Pressure Sensor Codes: What I See in the Shop
Alright, so you’ve got a check engine light on, and the scanner’s pointing to the fuel rail pressure sensor (FRPS). I’ve been turning wrenches for over 25 years, and let me tell you, this isn’t some minor sensor. It’s a critical piece of your modern fuel system, especially with today’s direct injection engines running crazy high pressures. The FRPS is the PCM’s eyes into what’s happening in the fuel rail. If that data is off, even a little bit, the engine can’t get the right amount of fuel. You’ll see problems with performance, fuel economy, and emissions. Worse, a bad signal can put you in limp mode or, over time, cause some serious internal engine damage. I’ve seen it happen. So, let’s walk through this like we’re in the bay, step by step, to get it right.
What You’ll See and What the Scanner Tells You
A failing fuel rail pressure sensor doesn’t usually announce itself with a bang or a puff of smoke. It’s more subtle, showing up as drivability issues and those dreaded diagnostic trouble codes (DTCs). The most common ones I run into are P0190 (a general circuit malfunction), P0191 (performance or range issues), P0192 (low input), and P0193 (high input). What these codes are really telling you is that the PCM is seeing a signal that just doesn’t make sense for the engine’s operating conditions.
On the road, the car often feels gutless, especially when you try to accelerate. It might idle okay, but stomp on the gas and it hesitates, stumbles, or just doesn’t respond like it should. I’ve seen plenty of vehicles go into limp mode, limiting RPMs to protect the engine. Some will crank for a long time before starting, or even stall right after you get it fired up.
This is where your OBD2 scanner becomes your best friend. Pull up the Fuel Rail Pressure (FRP) PID in live data. What you’re looking for is consistency and responsiveness. If it’s stuck at 0 psi, or pegged at some ridiculous number like 2,500 psi on a port-injected engine (which typically runs much lower), or if it’s jumping all over the place without any throttle input, that sensor is probably lying to the PCM. Remember, the PCM uses this data to calculate how long to open the injectors. Bad data means either too much or too little fuel. A prolonged lean condition? That’s a recipe for detonation, which can absolutely trash your pistons and connecting rods, and it’ll cook your catalytic converter too. So, don’t ignore these symptoms.
The Real Diagnostic Work: Is It Really the Sensor?
This is where a lot of guys, even experienced ones, go wrong. They see a sensor code, they swap the sensor, and then the car comes back. Just because the code points to the FRPS doesn’t mean the sensor itself is the problem. I’ve seen wiring issues, corroded connectors, even a failing PCM mimic a bad sensor. Or, more commonly, it’s an actual fuel delivery problem that the sensor is accurately reporting.
The key to good diagnostics here is cross-verification. You absolutely, positively need to compare the sensor’s electronic signal (what your scan tool shows) with the actual mechanical fuel pressure. Don’t skip this step. Guessing will cost you time, money, and comebacks.
| Symptom/Code | Likely Sensor Failure | Common Mimics | My Go-To Test to Confirm |
|---|---|---|---|
| DTC P0191/P0192 (Performance/Range) | Internal piezoresistive element failure; sensor can’t read pressure accurately. | Faulty fuel pressure regulator, weak low-pressure fuel pump, clogged fuel filter, failing high-pressure fuel pump. |
Use a bi-directional scan tool to command the fuel pump on (or crank the engine). Monitor the live FRP sensor data while simultaneously measuring pressure with a mechanical gauge. If the scan tool reading and the mechanical gauge differ by more than ±75 psi, you’ve found your bad sensor. |
| DTC P0190 (Circuit Malfunction) | Open or short circuit within the sensor itself. | Damaged wiring harness, corroded or bent connector pins, poor ground connection, or a failing PCM. |
With Key On Engine Off (KOEO), back-probe the sensor connector. Use a Digital Multimeter (DMM) to verify you have a solid 5V reference voltage and good ground continuity. Then, measure the signal voltage; it should be around 0.5V at rest (atmospheric pressure). Any significant deviation points to a circuit issue. |
| Live data shows erratic, non-responsive pressure readings. | Contaminated diaphragm or an intermittent internal connection fault. | Air in the fuel system, a failing high-pressure fuel pump, or excessive fuel pulsation from a faulty damper. |
This is where an oscilloscope shines. Probe the sensor signal wire. A healthy signal should look like a smooth, analog ramp as pressure changes. If you see a jagged, stepped, or completely flatlined waveform when pressure should be changing, you’ve got a sensor or wiring problem. |
Why These Sensors Bite the Dust
Once you’ve confirmed the sensor is truly bad, you might wonder why. These things are sealed units, so it’s usually an internal failure. The heart of most FRPS units is a piezoresistive silicon chip. It deforms ever so slightly under pressure, which changes its electrical resistance, and that’s how it sends a signal to the PCM. But nothing lasts forever.
Over time, constant thermal cycling – heating up and cooling down – can crack the tiny solder joints or degrade internal connections. The metal diaphragm inside, especially in direct injection systems where pressures can easily exceed 2,000 psi, takes a beating. It can fatigue, lose its elasticity, and then it just won’t respond accurately anymore. I’ve seen this on a lot of the higher-pressure systems.
Another common failure mode is seal degradation. If an O-ring or the internal epoxy seal gives up, fuel vapor or even moisture can seep into the electronics. That leads to corrosion, and once corrosion sets in, it’s game over for the sensor. I’ve seen this frequently on certain Ecotec and EcoBoost engines, where a faint fuel smell around the rail or intermittent readings eventually trace back to internal leakage within the sensor housing itself.
And yeah, manufacturing defects happen. Some batches from certain suppliers just have higher failure rates. While I can’t name specific TSBs without knowing your exact make and model, there are definitely known service bulletins out there for various manufacturers addressing premature sensor drift due to internal component flaws. It’s just part of the game.
Your Repair Options: Getting It Fixed Right
Sensor Replacement DIY-FEASIBLE
First, you must relieve fuel pressure. Use the Schrader valve on the rail, or follow your vehicle’s specific procedure. Disconnect the battery. Clean the area around the sensor thoroughly to prevent crud from falling into the fuel rail. Unplug the electrical connector and inspect it for any corrosion or bent pins. Then, use that flare nut wrench to carefully remove the old sensor. Install the new sensor with its new seal (it should come with one) and torque it to spec—usually somewhere between 15–25 ft-lbs. Don’t overtighten; you can crack the aluminum rail. Don’t undertighten; you’ll have a leak.
Fuel Rail Thread or Body Damage Professional Only
Let me be crystal clear: there is no workaround or bypass for the fuel rail pressure sensor. It’s too critical. Driving with a failed sensor, or one installed in a damaged rail that leaks or gives bad readings, risks prolonged lean operation. And like I said before, that will lead to piston damage. It’s not worth the risk.
Confirming the Fix: Don’t Skip This Step
Don’t ever assume that just because you put in a new sensor, the job is done. Validation is absolutely critical. After you’ve installed everything and reconnected the battery, use your scan tool. Check the Key On Engine Off (KOEO) fuel rail pressure reading. It should be within a few psi of atmospheric pressure (basically 0 psi) or match the expected bleed-down value for your specific vehicle. Then, start the engine. It should fire up quickly and settle into a smooth idle.
Now, watch that live FRP data. Pressure should build quickly to the manufacturer’s specified range and then stabilize. For port injection, you’re usually looking at 40–60 psi. For direct injection, it’s a whole different ballgame, often 500–2,500+ psi, depending on the engine and conditions. You need to see it hit those targets and hold steady.
Next, take the vehicle for a full drive cycle. Accelerate, decelerate, get it up to highway speeds. Confirm that the check engine light stays off and that no pending codes return. If you had to repair the rail threads or replace the entire rail, you need to perform a static leak-down test. Tee a mechanical gauge into the system, pressurize it (key on, pump running), then shut off the key. Watch that gauge for 10–15 minutes. Any drop of more than 5 psi indicates a leak—could be the sensor, the rail, or even an injector. A fuel leak under pressure is a fire hazard, plain and simple. Do not ignore it.
What This is Going to Cost You (Real Talk)
Repair costs always vary, depending on your vehicle’s make and model, and what the local labor rates are. But here’s a realistic breakdown based on what I see:
| Repair Type | DIY Cost (Parts Only) | Shop Cost (Parts & Labor) | Expected Success Rate | Secondary Risk if Not Done Right |
|---|---|---|---|---|
| Sensor Replacement | $80–$250 | $300–$500 (includes diagnosis) | > 95% (if diagnosed correctly) | Fuel leak or fire hazard if not torqued properly. Potential engine damage from incorrect fuel delivery if the new sensor is faulty or the underlying issue wasn’t fixed. |
| Fuel Rail Replacement | $300–$800 | $800–$1,500 (this is labor-intensive) | ~ 100% (if installed correctly) | Fuel leak from improper injector installation or sealing. Air in the system causing hard starts or misfires. |
As a general rule I tell my customers, if the total repair bill starts creeping up past 40% of your vehicle’s current market value, especially on an older, high-mileage car, it’s time to really think about the long-term. A failing FRPS can sometimes be the first domino to fall, signaling broader wear in the fuel system—a weakening high-pressure fuel pump, or injectors that are starting to clog up. Look at the overall health of your engine and consider if other major components are nearing the end of their life cycle.
Keeping It From Happening Again
You can’t prevent every failure, but you can definitely reduce the risk. First off, use top-tier gasoline whenever possible. These fuels have better detergents and generally lower levels of ethanol. Ethanol can be corrosive over time and attracts moisture, both of which are bad news for sensor seals and fuel system components. And for crying out loud, stick to your fuel filter replacement schedule! A clogged filter makes your fuel pump work overtime, increasing pulsations and stress on the entire rail and sensor.
If you’ve got a scan tool (and I recommend every car owner get one), make it a habit to check the fuel rail pressure PID during your routine oil changes or maintenance. Get familiar with what your car’s normal idle and idle-off pressure values look like. Catching early signs of sensor drift—like gradual signal noise or a slow response—can save you a breakdown and a bigger headache down the road.
Finally, during those under-hood inspections, just take a quick visual look around the sensor and the fuel rail. Look for any fuel stains, dampness, or a strong fuel odor. Catching a slow leak early can prevent a roadside emergency and, more importantly, reduce the risk of a fire. Be smart, be safe.
