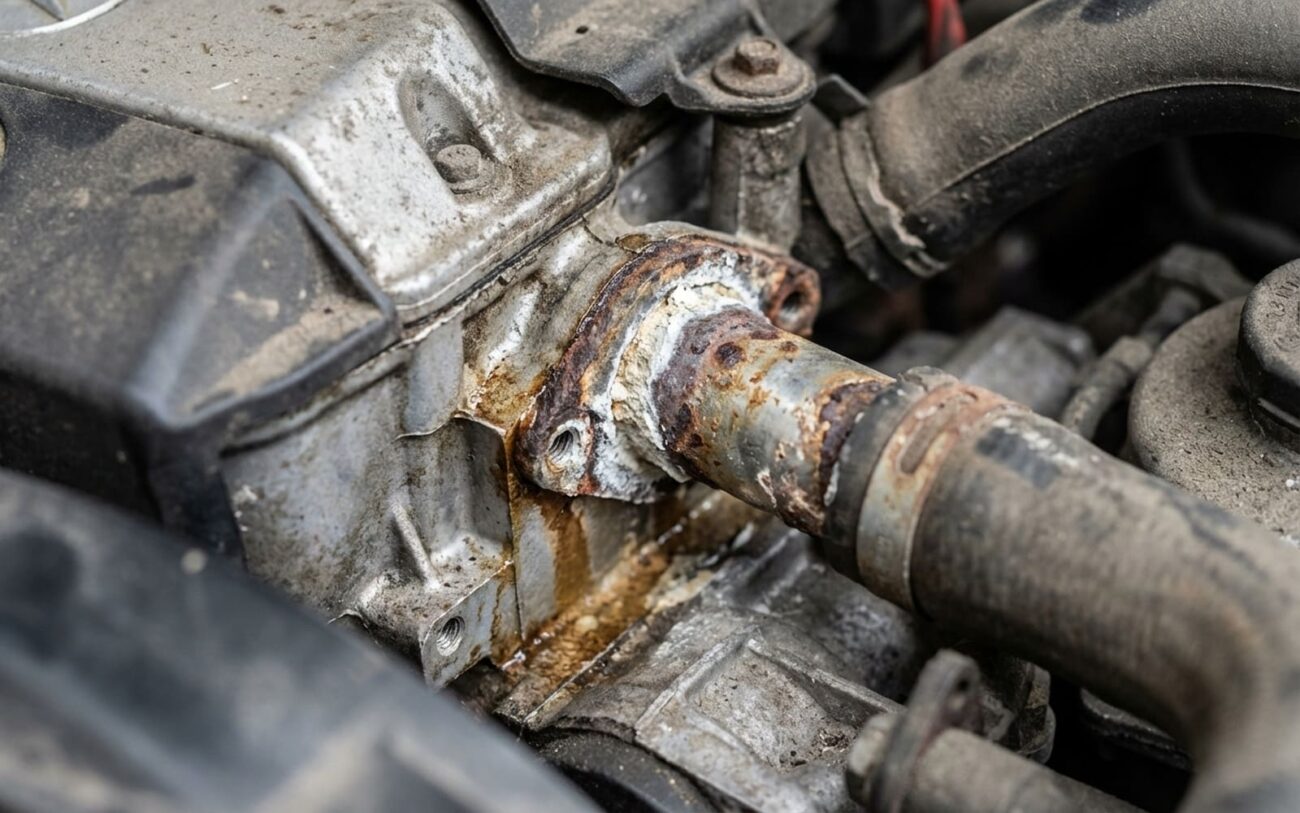
Alright, let’s talk about those sneaky coolant leaks on your older Mercedes E-Class – specifically the W210 and W211 models, the ones running the M112 and M113 V6 and V8 engines. I’ve seen more than my fair share of these over the years, and there’s one particular culprit that gets misdiagnosed constantly: the aluminum coolant crossover pipes.
These aren’t your typical rubber hoses. We’re talking about rigid aluminum lines that route coolant between the engine and the heater core, often snaking through or near the firewall. When they start to go, the symptoms can be subtle at first, then escalate faster than you’d think.
What You’ll See & Hear: The Symptoms
The earliest, and most common, sign I see is unexplained coolant loss. You top off the expansion tank, and within a week or two, it’s low again. The kicker? No visible puddle under the car. This is what throws most people off, because it looks exactly like an internal leak, like a blown head gasket. I see this confusion all the time in the shop.
But unlike a head gasket issue, these pipe leaks often introduce other clues. The big one is a sweet, syrup-like antifreeze odor inside the cabin. You’ll notice it especially when the heater is first turned on, or shortly after you shut the engine down. That smell is coolant vapor escaping near the firewall, right where those pipes connect to the heater core.
In more advanced cases, you might even hear a faint hissing or gurgling noise coming from behind the dashboard after you turn the engine off. That’s pressurized coolant escaping into hot engine areas and turning straight to steam. If the pipe ruptures completely, you’ll get a sudden burst of steam – usually from the rear of the engine bay or, worse, right inside the passenger footwell – followed by a rapid rise in engine temperature. When that happens, you need to stop driving immediately. On these aluminum-intensive engines, running with low or no coolant for even a few minutes can cause cylinder head warpage or cracking. What starts as a repairable pipe issue can quickly spiral into a full engine rebuild, and believe me, you don’t want that bill.
How I Diagnose It: Separating the Real Culprit
Look, not every coolant loss points to these aluminum pipes. There are plenty of other things that can fail – water pump, thermostat housing, radiator, or yes, a head gasket – and they can all mimic a leak. The key is systematic testing, not just throwing parts at it. Here’s the approach I use:
First things first, always rule out the simplest stuff. A faulty radiator cap can’t hold pressure, which means any pressure test you do won’t be valid. If it can’t hold pressure, your cooling system won’t work right. So, check or replace that cap before you dive deeper. I’ve seen too many people chase ghosts because of a cheap cap.
Next, I’ll perform a cooling system pressure test. I’ll pressurize the system to 1.5 bar (about 22 psi) and let it sit for at least 20-30 minutes. If the pressure drops significantly, we’ve definitely got a leak, internal or external.
Now, how do we tell if it’s the pipes or a head gasket? This is where the confusion usually happens. If you’ve got persistent coolant loss with no visible external leak, and your pressure test drops, I’ll follow up with a combustion gas test. You know, the block tester kit that changes color? If that fluid changes color (usually to yellow or green), it means exhaust gases are getting into your coolant. That, my friend, confirms a head gasket issue. If there are no combustion gases, but you’re still losing pressure, those aluminum pipes are high on my suspect list.
What about that coolant smell in the cabin or steam from the footwell? That’s your big clue for the pipes. For that, I’ll remove the passenger-side kick panel and sound insulation. Then, with the system pressurized, I’ll visually inspect the aluminum pipe connections and Oetiker clamps right there at the firewall. Sometimes I’ll use a borescope to check any concealed sections. What I’m looking for is active seepage or, more commonly, white corrosion powder around those clamps. If the pipes are wet and corroded but the heater core itself is dry, then it’s the pipe, not the core.
One quick tip: if you see your coolant reservoir under the hood boiling, that usually points to combustion gas intrusion – a classic sign of a head gasket failure. A simple pipe leak won’t cause boiling unless the system is already severely depleted and overheating.
Why These Pipes Fail: The Real Story
So, why do these aluminum coolant pipes fail so predictably on these specific Mercedes models? It’s not just poor design; it’s a perfect storm of metallurgy, environment, and sometimes, maintenance neglect. The primary enemy is corrosion, but it’s not just one type. It’s a combination:
-
Galvanic corrosion: The aluminum pipes are clamped with steel Oetiker bands and they connect to brass or copper heater cores. When your coolant degrades, it becomes conductive, essentially turning this junction into a tiny battery. Aluminum, being the most anodic metal in that mix, corrodes rapidly. This reaction accelerates if non-OEM or mixed coolant types are used – especially if someone topped it off with plain water or an incompatible ethylene glycol formula. I see this all the time.
-
Erosion-corrosion: Over time, old coolant breaks down and can form sludge. As that crud circulates, it acts like an abrasive, scouring the inner walls of the aluminum pipes. This thins the metal from the inside out, often without any visible external signs until a pinhole finally forms.
-
Stress corrosion cracking: These pipes are rigid and fixed in place. Every heat cycle – engine warm-up and cool-down – causes them to expand and contract. That constant flexing, combined with internal corrosion, creates micro-cracks that grow over time, especially in high-stress bends or right near those clamps.
Mercedes-Benz actually documented this issue. There are known service bulletins for certain model years, particularly in the mid-2000s, addressing coolant leaks from these aluminum flanges and pipes on the M112 and M113 engines. The recommended fix? Replace the entire pipe assembly with an updated version, often featuring improved materials or coatings. So, this isn’t a failure of the cooling system as a whole; it’s a known weakness in a specific component. A failed water pump, a cracked radiator, or a blown head gasket are all separate failures with different root causes and repair paths.
The Fix: What It Takes
How you fix this depends entirely on the location and severity of the leak. I’ll be honest: most of these repairs are not for the average weekend mechanic. The cooling system requires precise bleeding procedures, and one missed step can leave air pockets that cause overheating or poor heater performance. This is definitely professional territory.
Seriously, This Is a Shop Job
Cooling system repairs, especially on these Mercedes, demand precision. One mistake can lead to air pockets, overheating, or a heater that just won’t work right. If you’re not experienced, you’re better off letting a pro handle it.
If you’re dealing with a leak at an accessible Oetiker clamp in the engine bay – say, near the thermostat housing or water pump – the fix is relatively straightforward. You’ll need to cut off the old clamp, clean the pipe ends thoroughly, and install a new section using an OEM repair kit. The tools? You’ll absolutely need Oetiker clamp pliers (specifically the 7.5″ ear-style tool), a vacuum coolant filler (like the Mercedes-Benz W271 or equivalent), and the correct coolant: MB 325.0 spec, mixed 50/50 with distilled water. That clamp isn’t torqued; it’s crimped until the ears are flush. And listen, whatever you do, do NOT overtighten it; you’ll crush the soft aluminum pipe.
The worst-case scenario? Corrosion where the pipes pass through the firewall to the heater core. This is a big job, requiring partial or even full dashboard removal. You’ll need the complete coolant pipe assembly (make sure it’s chassis- and engine-specific), specialized dashboard removal tools, new HVAC firewall grommets, and proper sealant. The Mercedes Workshop Information System (WIS) procedure must be followed to avoid damaging airbags, wiring harnesses, or HVAC controls. This is absolutely not a job for a weekend mechanic.
If the pipe is perforated along its length due to internal wall thinning from corrosion, it’s non-repairable – you have to replace it. Welding or epoxy fixes just won’t hold under repeated heat cycles and 1.5 bar of system pressure. The entire assembly must be replaced.
After the Repair: Don’t Skip This Validation
Don’t just refill and drive off. A proper repair demands validation. For any clamp or pipe section replacement, I always perform a pressure test: hold 1.5 bar for 30 minutes with zero drop and absolutely no seepage at the repair site. Then, you need to drive the car through at least three full thermal cycles – cold start to normal operating temperature and back to cold. After that, there should be no antifreeze smell inside the cabin. If you smell it, you still have a problem.
If you replaced the firewall-side assembly, add one more check: heater performance. Set the blower to high and the temperature to max. Use an infrared thermometer to measure the air temperature at the center vent and compare it to the ambient intake air. There should be at least a 30°C (about 54°F) difference. Lower output suggests flow restriction – possibly from debris or, more commonly, an air lock in the heater core. You’ll need to bleed it again.
Tools you’ll need for these checks: a cooling system pressure tester and an infrared thermometer. These simple steps prevent comebacks and confirm the system is truly sealed and circulating properly. Trust me, it’s worth the extra time.
Prevention: Keeping It From Happening Again
If your coolant pipes are still intact – or you’ve just replaced them – prevention is absolutely critical. The single most effective thing you can do is use the correct coolant and change it on schedule. That means only Mercedes-Benz MB 325.0 specification coolant or a verified equivalent that explicitly meets that standard. Do not mix coolant types. Ethylene glycol formulations vary, and mixing them can deplete inhibitors and accelerate corrosion, bringing you right back to square one.
I recommend replacing the coolant every 5 years or 50,000 miles, whichever comes first. This keeps the corrosion inhibitors active and protects all those aluminum components. For early detection, make it part of your routine. Every oil change, pop the hood and inspect the visible sections of the aluminum coolant pipes – especially near the Oetiker clamps. Look for white or gray powdery deposits, which are telltale signs of galvanic corrosion starting up.
Also, check the coolant level in the expansion tank monthly when the engine is cold. A slow, unexplained drop is your earliest warning. Catch it early, and you might avoid dashboard removal and a five-figure engine repair down the road. Prevention isn’t just maintenance; it’s vehicle longevity.
The Bottom Line: Cost and Economic Decisions
Let’s talk real numbers, because this is where the rubber meets the road. The cost of repair varies dramatically based on access and labor complexity.
| Repair Type | DIY Cost | Shop Cost | Success Rate | Secondary Risk if Failed |
|---|---|---|---|---|
| Single accessible clamp or pipe section replacement | $150–$300 (repair kit, coolant, tool rental) | $400–$700 | 95% if the remaining pipe is sound | Overheating, head warpage, engine damage |
| Full firewall pipe assembly replacement (dashboard removal) | $500–$800 (parts and coolant) | $1,800–$3,000 (6–8 hours labor) | 98% when performed per WIS procedures | HVAC noise, airbag warning lights, or improper reassembly if dashboard isn’t handled correctly |
Here’s the reality check I give my customers: if the repair estimate exceeds 50% of the vehicle’s current clean trade-in value (you can check NADA or KBB for that), you really have to weigh the investment carefully. These are aging vehicles. Even after fixing the coolant pipes, you’re likely to face other age-related issues down the road – suspension components, electronics, or transmission concerns. At some point, it becomes less about a technical repair and more about making economic sense. Sometimes, it’s just time to move on.
