OBD2 Port Dead? Here’s My Diagnostic Playbook (25 Years of Fixing It)
Alright, let’s talk about one of the most frustrating things in the shop: you’ve got a check engine light glaring at you, you plug in your trusty scanner, and… nothing. “No Link,” “Communication Failed,” “Timeout.” It’s like the car’s giving you the silent treatment.
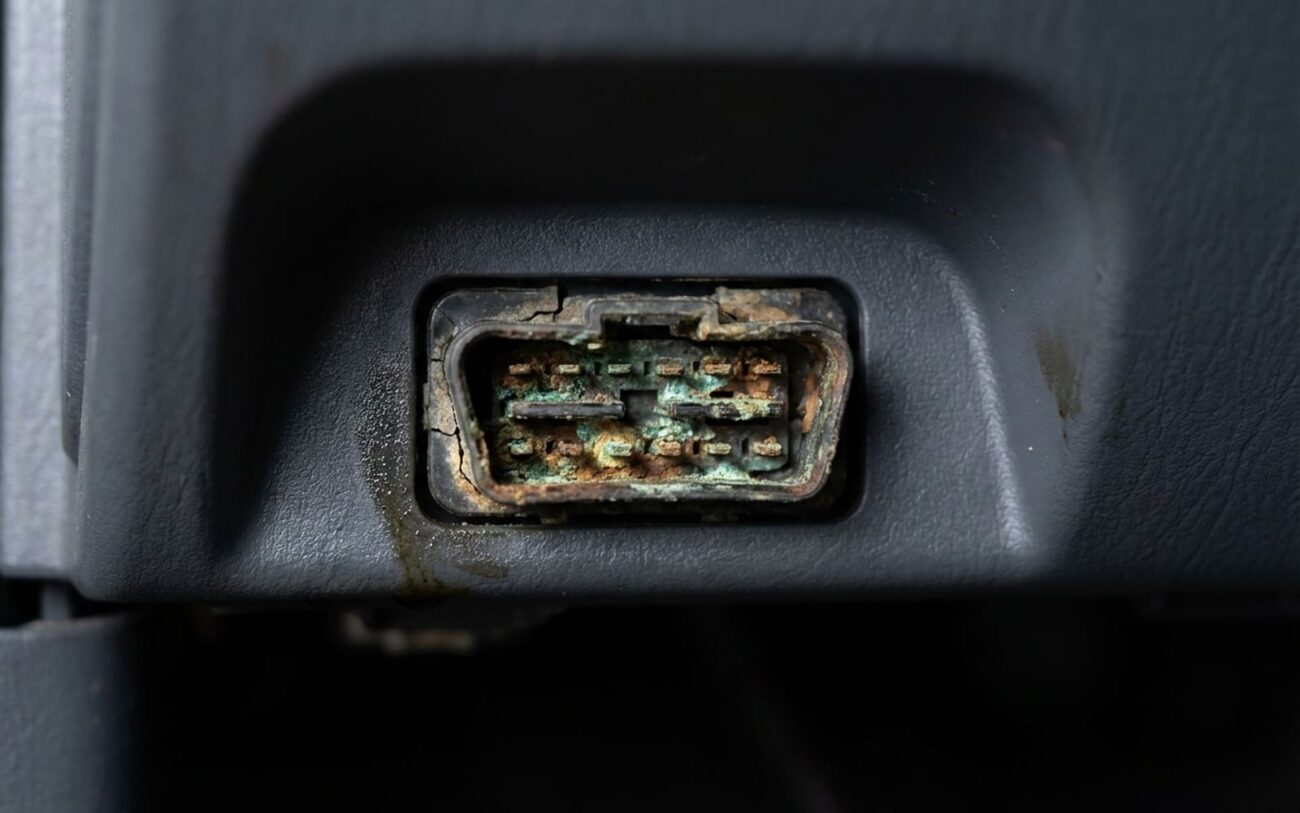
Now, if your dash lights up normally when you turn the key, that tells me the car’s got power and the main computer (ECM) is awake. But if the scanner can’t talk to any module – ECM, TCM, ABS, BCM – then we’ve got a communication breakdown. And based on what I’ve seen over the last couple of decades, the most common culprit isn’t some fancy module failure, it’s usually something much simpler: corrosion in the OBD2 port itself.
Signal: TIMEOUT
I’ve also seen plenty of intermittent failures. The scanner connects today, but after a rainy drive or a humid night, it’s dead again. That’s almost always moisture getting into places it shouldn’t. And if you pull off the little cover (if it has one) and see greenish-blue crud or pins that look blackened and eaten away? Well, you’ve probably found your problem. But don’t just jump to conclusions; other issues can mimic this exactly. The key is a methodical approach.
Why These Ports Go Bad: The Usual Suspects
When the Data Link Connector (DLC) itself is the problem, it almost always boils down to one of two things: environmental abuse or physical damage.
The OBD2 port is usually tucked away under the dash, often near the driver’s knee. That’s a prime spot for it to get exposed to moisture, road salt, and humidity – especially if you live in a snowy or coastal area, or if you’re like some of my customers and use the floorboards as a secondary cup holder. This combination of dissimilar metals (the pins), moisture, and salt creates what we call a galvanic cell. Basically, it’s a tiny battery that slowly but surely eats away at the contacts, leaving behind copper salts or black oxidation that kills your signal.
The other big one is physical damage. I’ve seen countless ports where someone’s forced in a cheap scan tool, a poorly made aftermarket dongle (like for insurance tracking), or just plain wasn’t careful. That can bend or misalign pins, or scratch off the protective plating. Once that plating is gone, oxidation starts almost immediately. And believe it or not, I’ve even seen cases where improperly wired aftermarket devices back-fed voltage into the DLC, which really speeds up that galvanic corrosion process.
My Diagnostic Process: Don’t Guess, Test
Before I even think about cleaning or replacing that DLC, I need to rule out other problems. A dead OBD2 port and a blown fuse can look identical to your scan tool. You need a digital multimeter (DMM) and a logical approach. Here’s how I break it down:
| Symptom | What I Check First | Common Mimics | My Definitive Test |
|---|---|---|---|
| No communication with scan tool | Visual inspection for severe corrosion or bent pins. | Blown OBD2 fuse, broken wire, failed gateway module, dead ECM. |
With the key ON, check Pin 16 (battery power) for +12V with a DMM. Then, turn the key OFF, disconnect the battery, and measure resistance between CAN High (Pin 6) and CAN Low (Pin 14). It should be around 60 Ohms. |
| Intermittent link, worse when wet | Look for moisture, white/green deposits, or loose pin tension. | Water in under-dash modules, failing module on the CAN bus, loose connection at the gateway. |
Perform the Pin 16/CAN resistance tests. Then, with the scanner connected and live data streaming (if you can get it), gently wiggle the DLC and its harness. Any dropouts point to a loose connection or damaged wire. |
A quick note on CAN bus resistance:
Most modern vehicles use a CAN bus for communication. This network typically has two 120-Ohm terminating resistors, one at each end of the bus. When you measure across CAN High (Pin 6) and CAN Low (Pin 14) at the DLC (with the battery disconnected!), you should see approximately 60 Ohms. If you see 120 Ohms, one resistor is open. If you see 0 Ohms or something very low, you’ve got a short. If it’s way high, you have an open circuit somewhere.
Repair Options: My Go-To Fixes
Cleaning Individual Pins DIY Feasible
Full Connector Replacement: My Preferred Method for Bad Damage
If the plastic housing is cracked, multiple pins are badly pitted, or the wiring harness leading to the connector is damaged, I’m replacing the whole thing. This isn’t a job for a beginner. You’ll want an OEM pigtail connector – don’t cheap out here. I always use sealed crimp connectors or, even better, solder the wires and then use adhesive-lined heat-shrink tubing. This creates a waterproof, durable connection. Twist-and-tape splices? Forget about it. They’ll fail under the dash, guaranteed, and you’ll be back to square one.
The “Field Fix” (Use with Caution) Temporary
Verifying the Repair: Don’t Guess, Test Again
After any repair, you absolutely have to validate it. For a simple pin cleaning, the first test is straightforward: your scan tool should connect immediately and communicate with all the major modules (ECM, TCM, ABS, BCM). If it struggles, drops out, or only talks to some modules, your repair isn’t complete.
My Post-Repair Checklist:
-
With the battery disconnected, re-check the resistance between CAN High and CAN Low at the DLC. It should still be around 60 Ohms.
-
If you had a specific corroded pin, check resistance between that pin and its destination at the gateway module (or ECM, etc.). It should be less than 1 Ohm.
-
Perform a “Wiggle Test” on the entire harness leading to the DLC while streaming live data. Watch for any communication dropouts. This catches loose splices or hairline breaks.
-
Make sure your scanner can talk to the BCM (Body Control Module). Sometimes a frozen BCM can mimic network issues, especially on older GMs or Fords.
Cost & Value: Is It Worth It?
Absolutely, it’s worth it. You can’t properly maintain or diagnose a modern vehicle without a working OBD2 port. Here’s a rough breakdown of what you might expect:
Pin Cleaning (DIY)
Cost of electrical contact cleaner, small brushes, and dielectric grease.
Pin Cleaning (Shop)
Includes shop diagnostics, labor for detailed cleaning, and materials.
Connector Replacement
This covers professional diagnostics, the OEM pigtail connector, and high-quality, environmentally sealed splicing. It’s the proper, long-term fix.
Success Rate
If the problem is truly isolated to the DLC and its immediate harness, these repairs have a very high success rate.
Prevention: Keep That Port Talking
-
Every 6-12 months, especially if you’re in a salty or humid climate, pull the DLC cover and apply a thin layer of dielectric grease to the pins. It’s cheap insurance.
-
Avoid leaving insurance dongles or other aftermarket devices plugged in long-term. They can trap moisture and put stress on the pins.
-
If you ever drive through deep water (puddles, floods), pull the DLC cover and let the area air out completely. A little fan can help.
-
Annually, just plug in a simple code reader. If it connects, great. If it struggles, you’ve caught minor oxidation early.
